
How to Make Lunch ahead of time
Pack your kids school lunch the night before.
My number one tip for back to school lunch box ideas is to make lunch ahead of time - and I’ve got tons of make ahead lunch ideas for you. You can pack lunch the night before, or even pack lunch days ahead of time. I promise this will save you so much time. Make ahead lunches for kids saves so much time.
It's one of the single best things I do for myself. Really, for myself. If I take an hour (at the most!) on Sunday to pack lunches for Monday, Tuesday, and Wednesday, then that's free time I've bought myself for each of those very busy those days of the week.
Here I am going to tell you how to make lunch for kids ahead of time - all of my best tips for packing a lunch that will stay fresh for days.
It takes a little extra time up front and a little extra planning, but I have never, ever regretted doing it. I really encourage everyone to give it a try.
Every time I post about lunches that I've made a day, or two, or even three in advance, I get loads of questions about them.
Questions about how do I keep the food fresh that long, what do I pack, and how do I pack to ensure that the lunches are still good three days later.
I figured it was a topic that deserved a blog post all its own.

My assembly line of lunch packing on a Sunday afternoon.
How to pack school lunch ahead of time:
1: Start with the freshest food possible
Time your grocery shopping with your lunch prep and packing day, so that you are starting out with food that you know is already going to be good for well past the couple of days ahead that you are packing.
You can find my school lunch grocery list here.
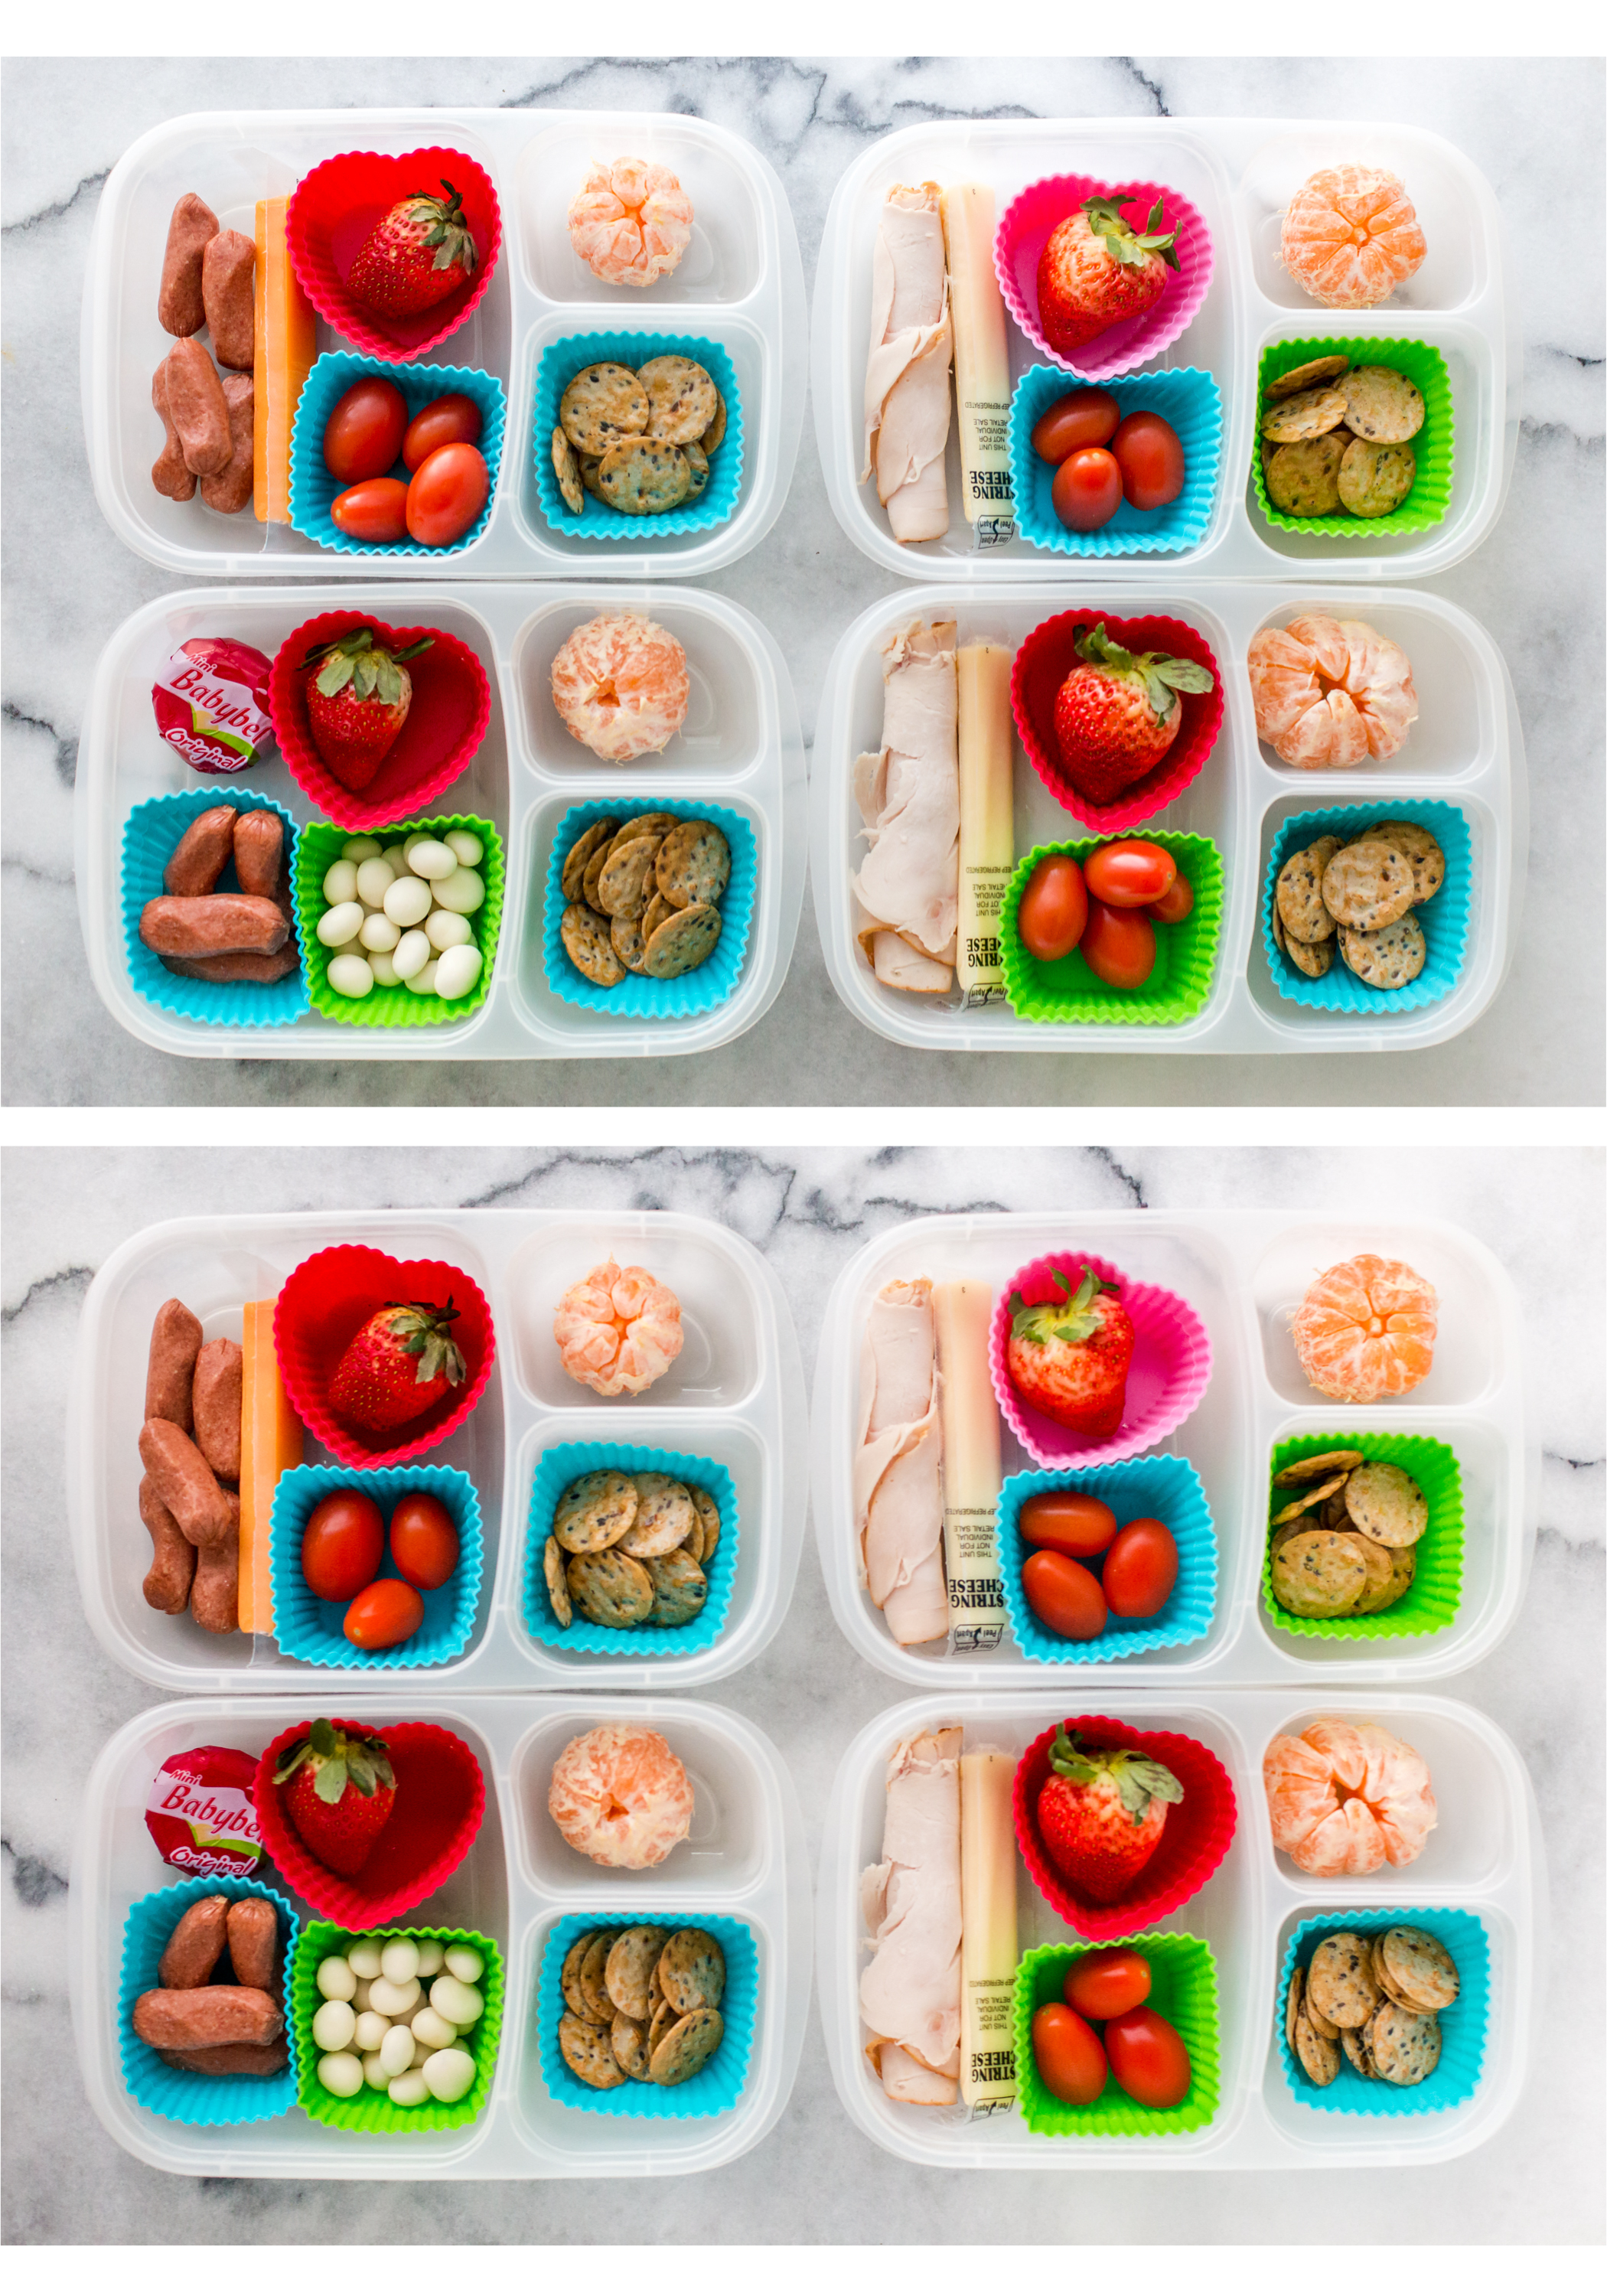
This is a lunch that was packed three days ahead of time. The top picture was taken the day it was packed. The bottom picture was taken three days later! Can you tell the difference?
2: Keep foods from touching each other
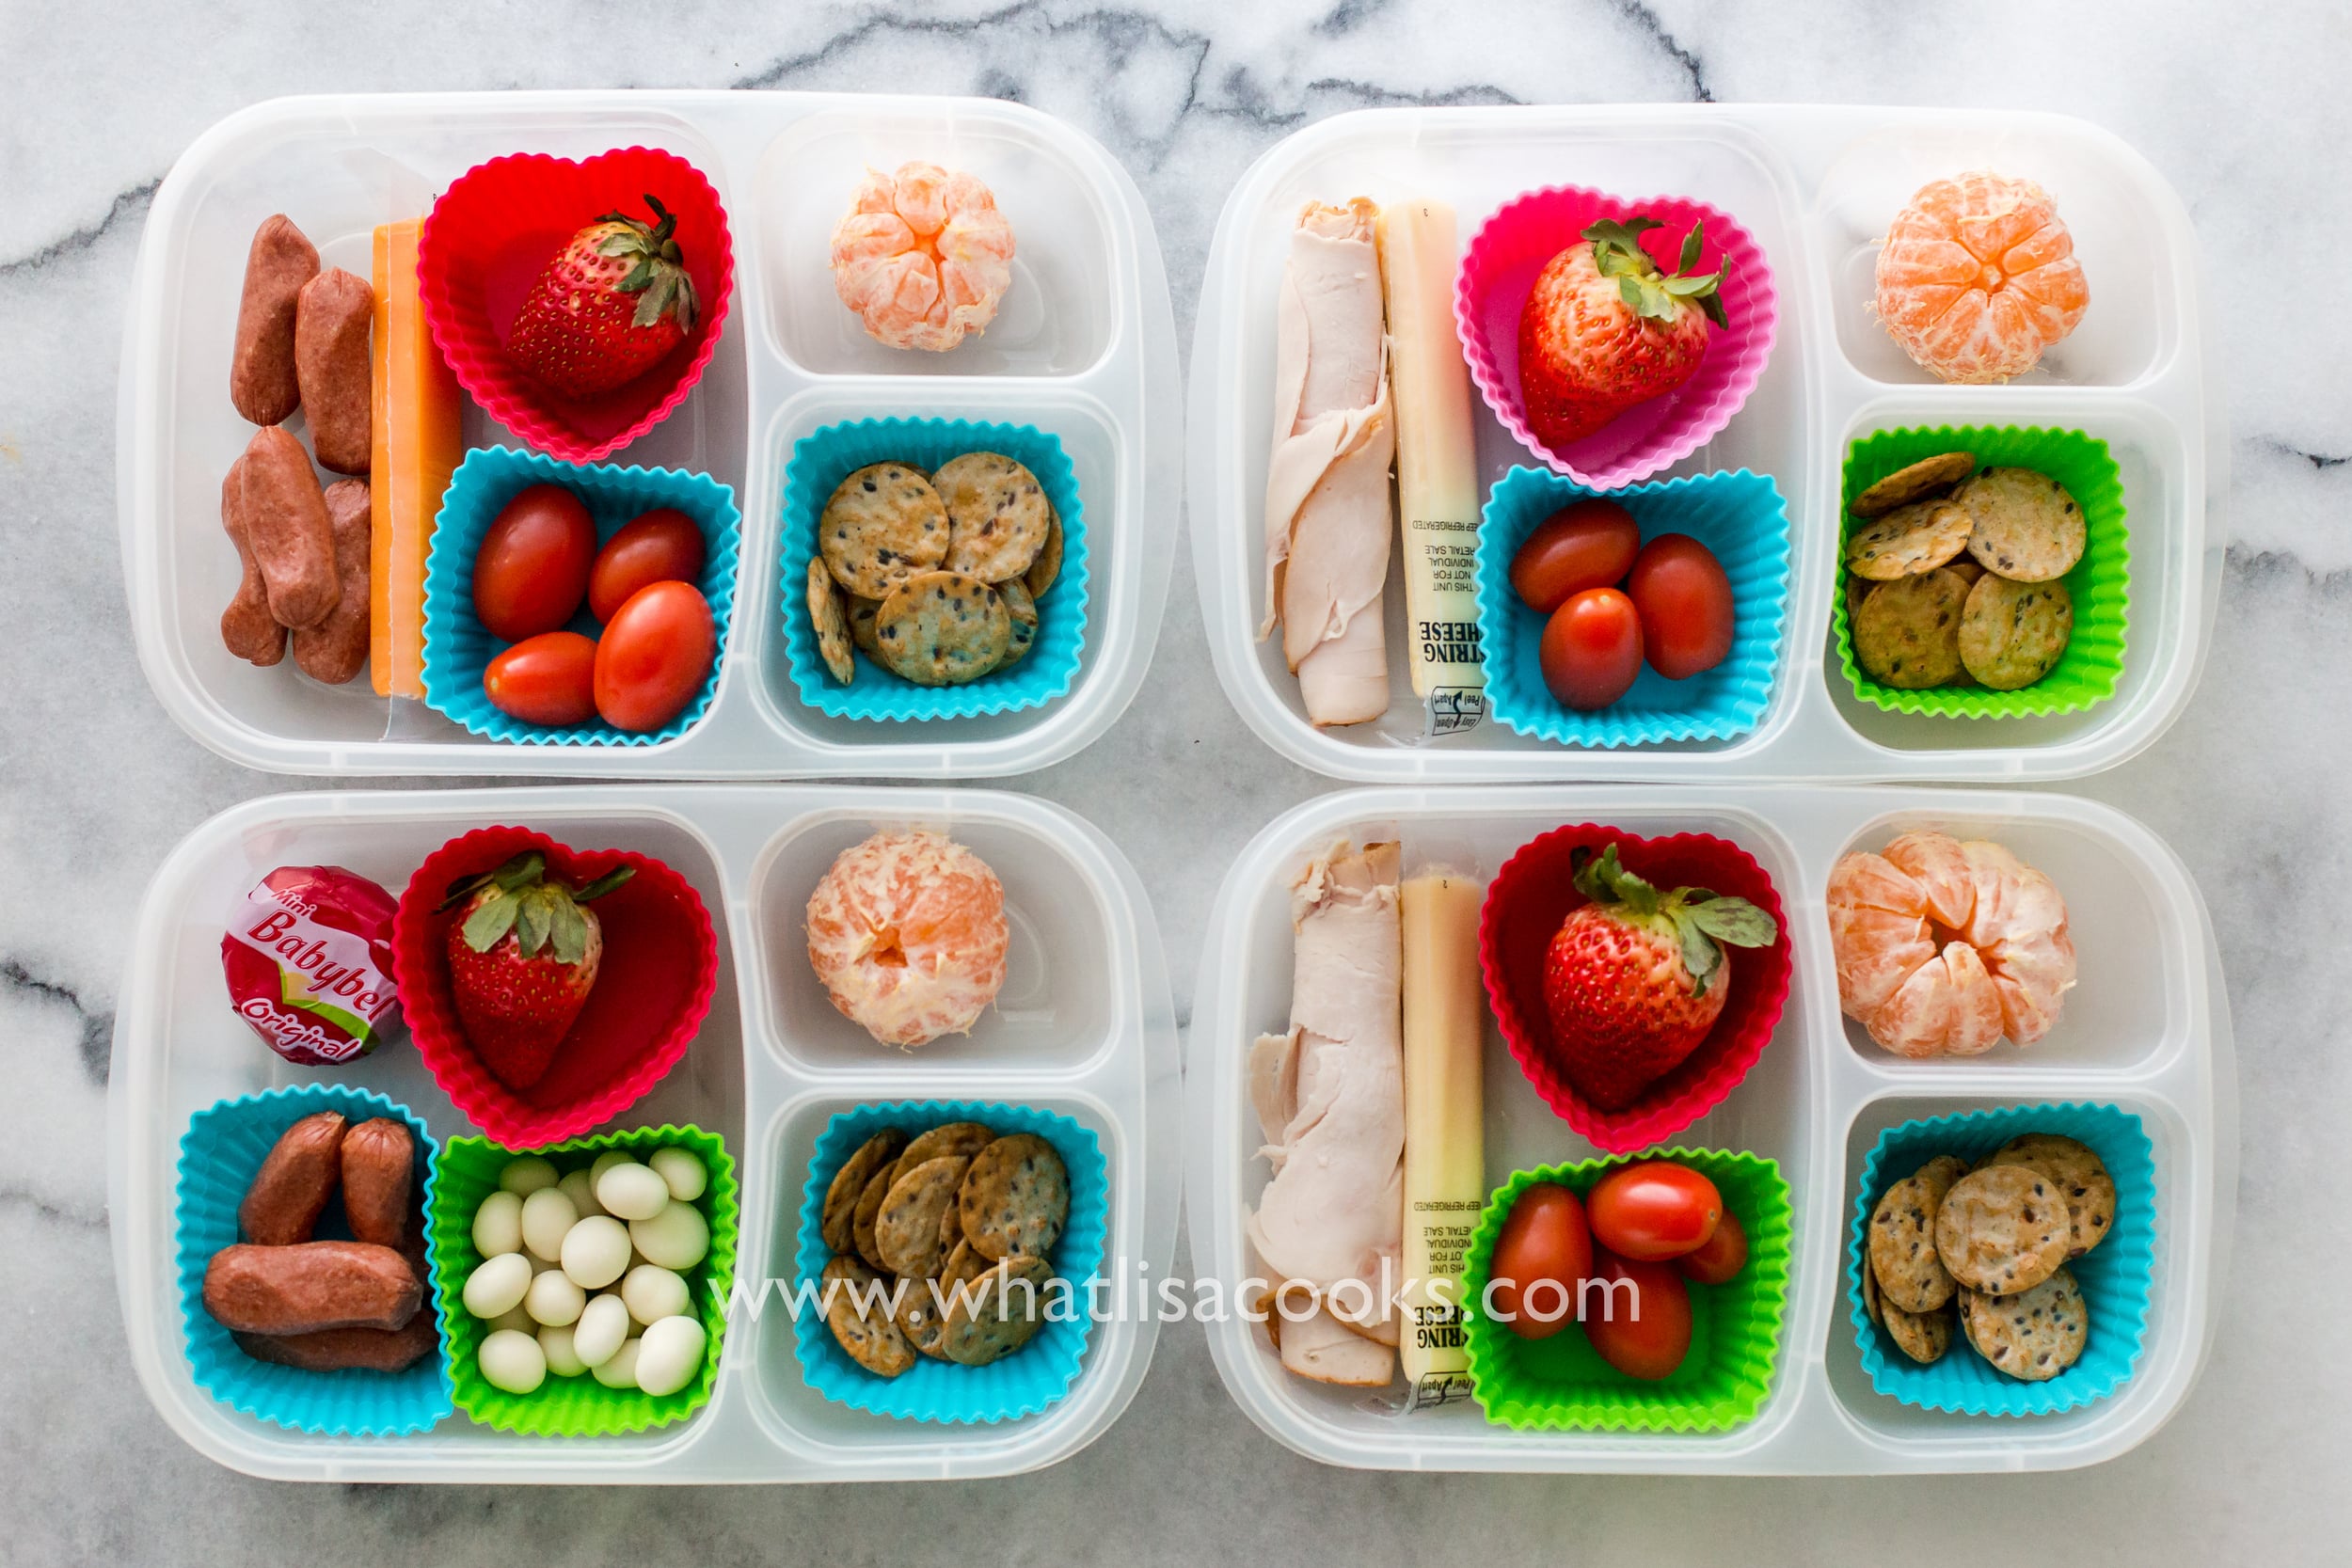
I love using a bento style lunch box with separate compartments, they make it very easy to keep foods from touching.
In addition to that, I like to insert silicone muffin cups to act as extra dividers, or use other small containers inside the lunch box. Sometimes I even use just pieces of parchment paper to provide a little separation.
If you can keep the different foods from touching each other, then they will all stay fresh for a lot longer.
3: Don't pack wet food
A lot of the questions I get are about how do I keep the foods in the lunch from getting “soggy”. My answer to that is to just not pack anything that would bother you if it got "soggy".
Sometimes you just have to use common sense. Avoid the wet stuff.
Don’t pack sliced tomatoes in advance, or anything else that has a tendency to leak moisture over time. Stick to the more dry stuff.
Want to pack lunches that look like mine? Shop my amazon store to get all of my favorite lunch packing products.
4: Avoid packing ‘combo’ foods
Try to avoid packing foods that are layers of things with different textures and moisture level.
Sandwiches with layers of vegetables are just not going to hold up well. Salads with vegetables of different moisture levels mixed together, like cut tomatoes touching lettuce, can be tricky. Or salads with dressing already mixed in.
If you want to pack a salad, try keeping the different veggies as separated as possible, and the dressing in a separate container. I've had pretty good luck packing salads a day in advance with just the dressing on the side, but if you want to pack for 2 or 3 days ahead then I suggest you keep all your veggies separate and mix up your salad right before you are ready to eat.
If you want to pack a sandwich, I've got some tips below just for sandwiches.
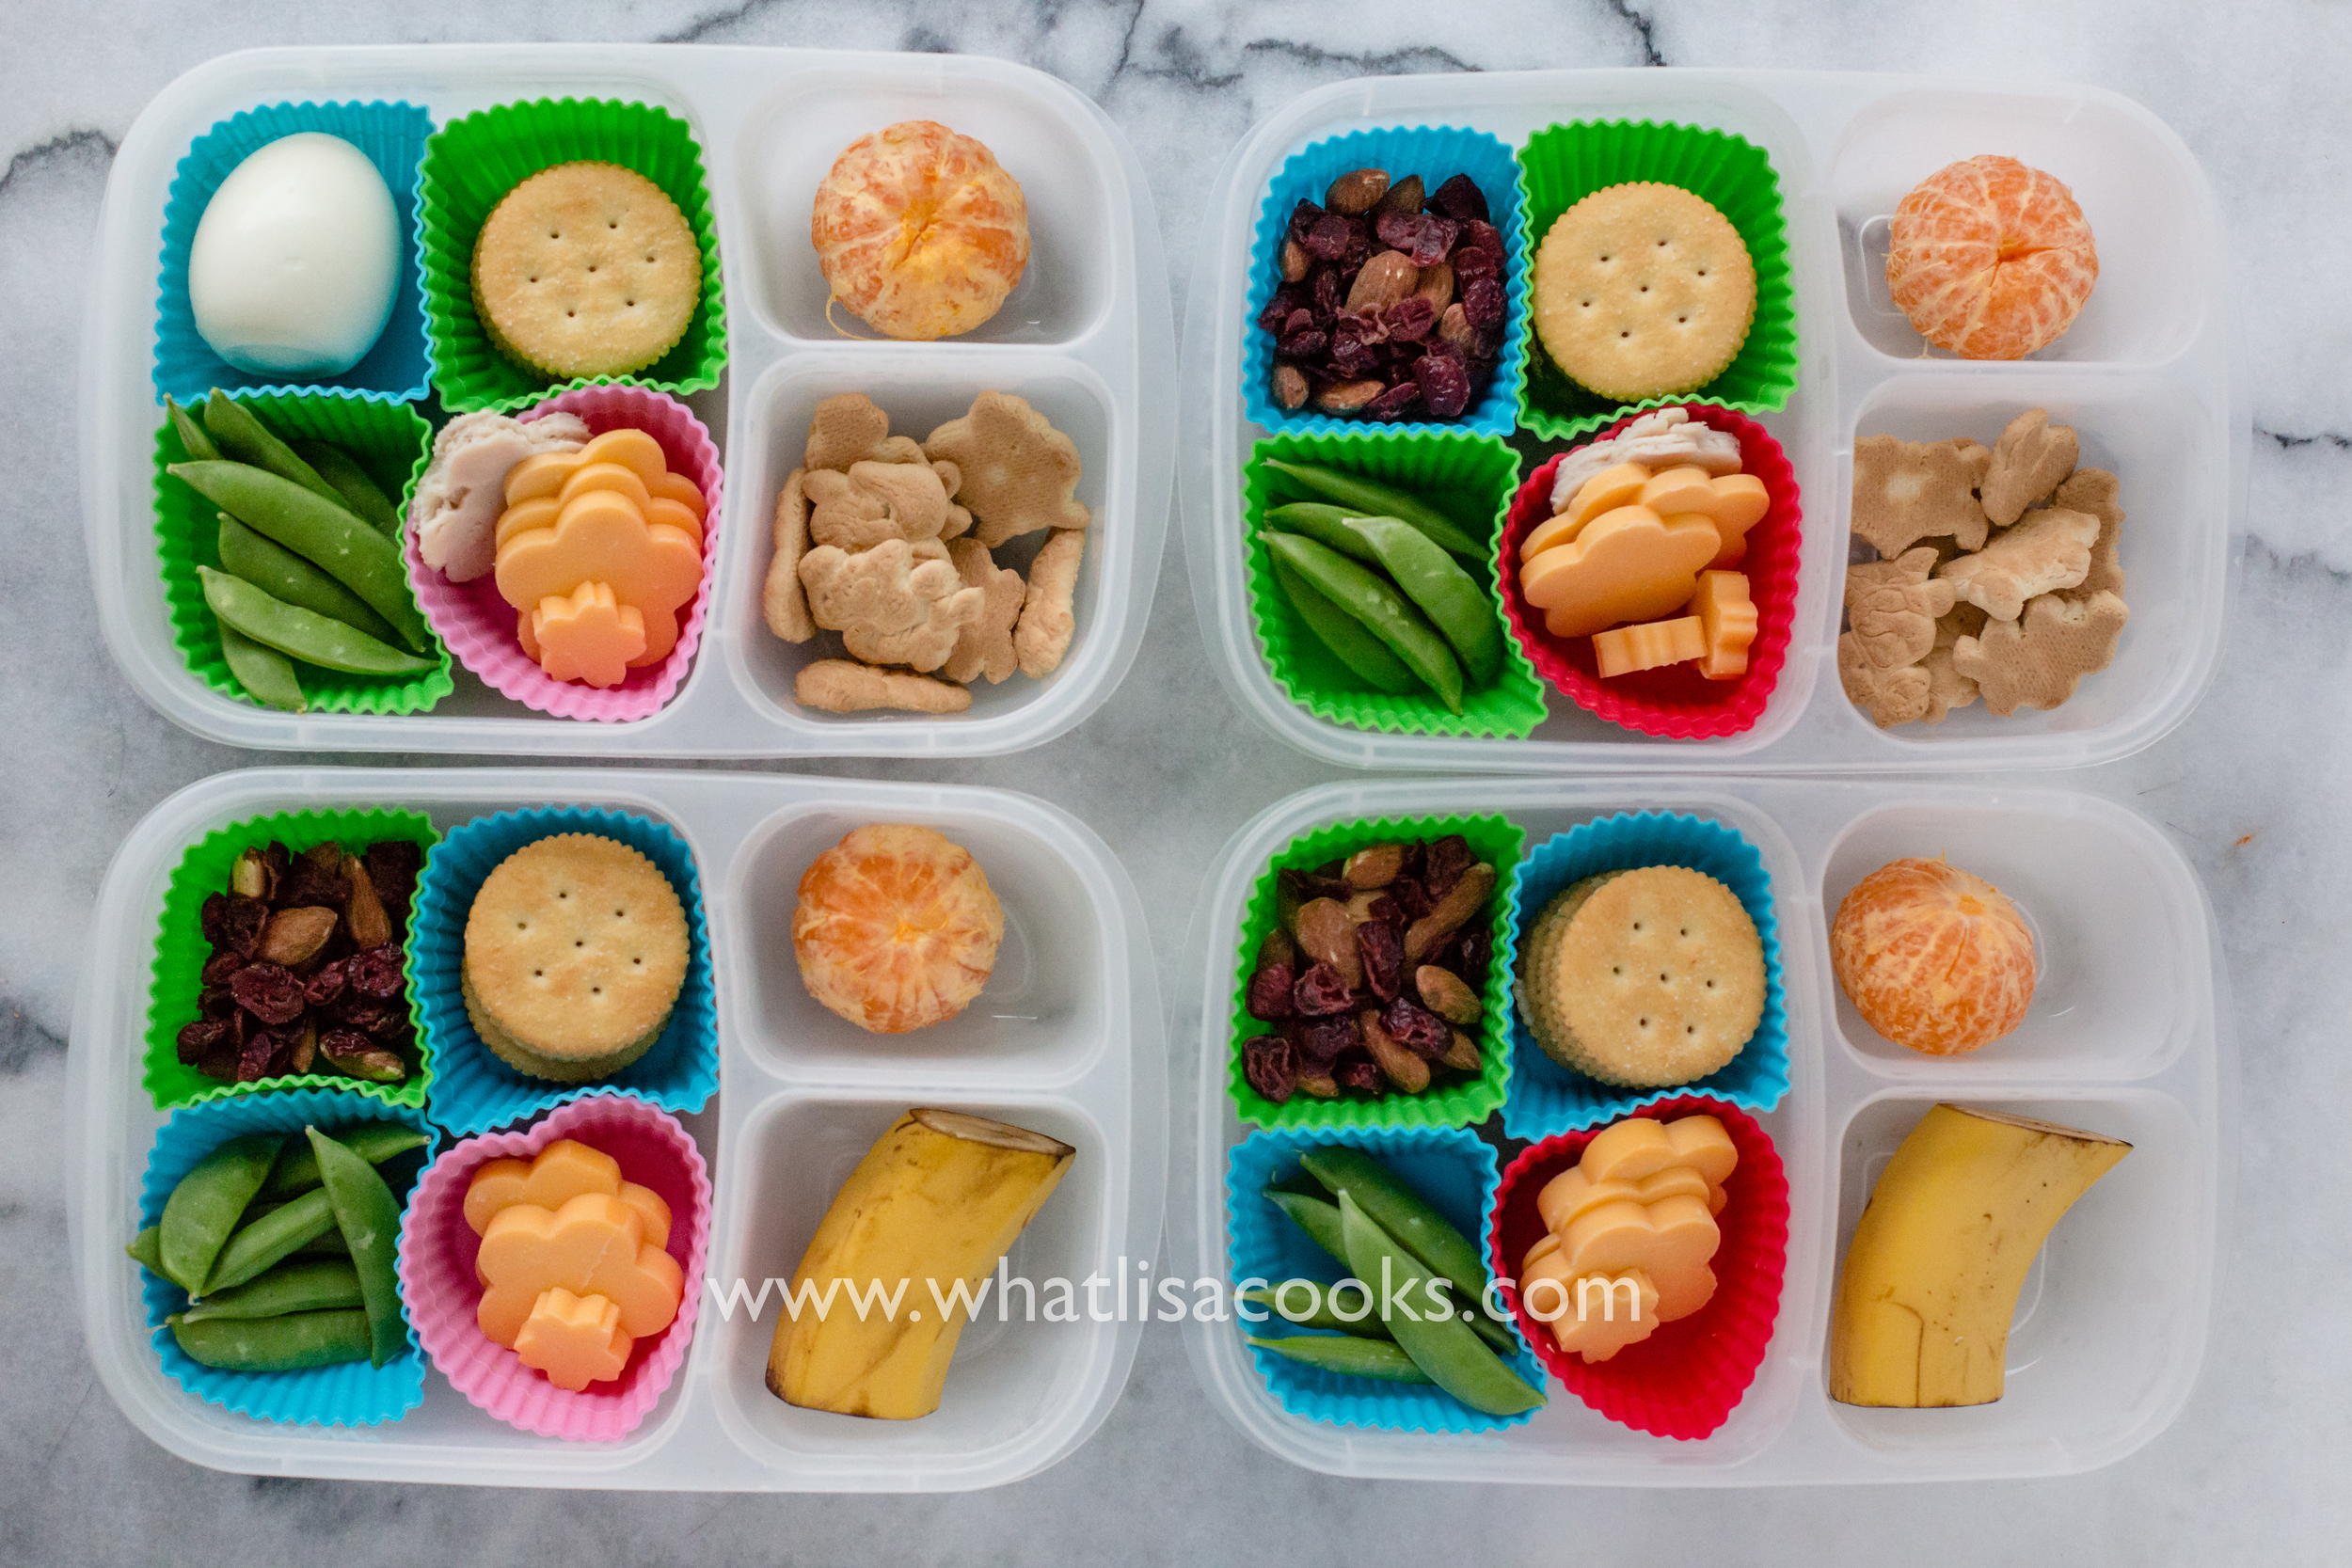
Crackers, cheese, turkey, dried fruit, sugar snap peas, orange, banana, and one has a boiled egg.
5: Avoid most cut fruit
If you follow my pages, you know how I feel about cut apples.
I have no problem packing those days in advance, because browning has never been a big problem for me. But other than apples, I avoid packing cut fruit very much in advance.
A night before is ok, but no longer than that. Instead go with whole berries, whole grapes, whole plums or apricots, whole peeled mandarin oranges.
Most of the more juicy fruits start to release their liquid as soon as they are cut, so after a day or two the fruit will be a little more dry, and you’ll have some juice making a mess in your lunchbox. But fruits with their outer skin intact will retain their moisture better and stay fresh longer.
Bananas are ok for a day or two if all you’ve done is cut off one end - that end might get a little dry/brown but the rest of the banana will be just fine.
Oranges or mandarins are ok if you peel them carefully, ensuring not to break any of the protective membrane on the sections.
6: Choose cut vegetables carefully
Some veggies will keep just fine when cut, and others don't.
Lettuce, carrots, celery, and broccoli all store well when cut ahead - think about the kinds of veggies that don't release a ton of water after they sit for a while. These are all actually great choices for doing a once-a-week prep - get them all cut and stored in containers in your fridge so they are easy to grab and throw in a lunch or salad. I like these green storage containers for produce, they do help keep it fresh.
Not all veggies will tolerate being cut and stored ahead of time. Most slicing tomatoes top this list. Cut or sliced tomatoes are just not the same overnight in the fridge. If you want tomatoes in your lunch, choose small cherry or grape tomatoes instead - the size that can just be put in the lunch whole or just cut in half. Cucumbers are hit and miss, I've had pretty good luck with keeping sliced cucumbers for a few days, but not always. But it’s pretty easy to find the mini snacking cucumbers now and those are great for lunch.
I think you just need to do a little trial and error, it seems to depend on the variety and how juicy they are. Avocados will turn brown on the exposed flesh after being cut, but if that little bit of brown doesn't bother you, then go for it. The flavor isn't affected. Think about other veggies you can include that can be left whole - sugar snap peas, fresh green beans, mini sweet peppers.
7: Cut with a sharp knife
This seems like a small tip, but it does make a big difference.
If you are going to pack cut fruits or vegetables, try cutting them with a very sharp knife. Very sharp knives slice through foods with much less pressure - and that means less bruising and less damage to the fruit and vegetables. If they are cut with minimal bruising, they will lose less juice, there will be less browning, and they will last longer.
You don't have to spend a fortune on a whole set of sharp knifes. Get one good knife, the best you can afford. Or at least get a good knife sharpener - my favorite knife sharpener is not at all expensive. You won't believe what a difference it will make.

12 lunches packed and ready, enough for us for 3 days.
8: Pack in containers that are airtight enough to keep refrigerator moisture and smells out
I pack most of my lunches in EasyLunchboxes.
They are not totally leak proof, but a lot of people think that just because they don’t seal well enough to keep liquid in somehow also means that they don’t close tightly enough to keep food fresh, and that’s simply not the case. (see the picture comparison above of the same lunch three days apart.
I can put crackers or tortilla chips in an EasyLunchbox and stick it in the fridge and they will still be crunchy 3 days later!
I also love the way they all stack so neatly together, which makes it much easier to have several lunches in the fridge at a time.
9: Pack foods that you know will keep in your fridge
Honestly, if you’re packing a lunch that is all foods that would already be stored in your fridge for the same amount of time anyway, then as long as you follow my other tips above, it should all be just fine.
If it's already in your fridge, and all you’re doing is repackaging and storing it in a lunch box instead of whatever other container it was already in, then there's little to worry about.
10: Don't be afraid of the crunchy stuff
People seem to think that crackers and chips are going to get soft as soon as you put them in the fridge, and that's simply not true.
I'm actually not even sure how we all got that idea.
As long as they're in a closed container, they will stay just as crunchy. Temperature has nothing to do with it. Humidity is more of what causes these things to go soft, and for most of us the refrigerator is probably less humid than the rest of the house.
Honestly, in the winter time my garage (where my pantry is) is as cold as my fridge, if not colder. If I can store crackers there, then why not in the fridge?
Go right ahead and pack crackers, chips, or even dry cereals. If you're really nervous about it, you can put the crackers in a little snack bag or a separate container, but I don't think that is strictly necessary.
11: If you're struggling with ideas, think "Lunchable".
You know those lunchables that you can buy pre-packaged at the store?
Think about how they are packaged and what's in them: crackers, sliced meat, sliced cheese, maybe a cookie. And what's unique about how they are packed? They are in a container with a separate little section for each item.
There's a reason why they work (and it's not just preservatives, because there are lots of organic brands now) - it’s basically all of the tips I’ve listed above.
Next time you're at the store take a look at the lunchables and note what kinds of things they contain, then go home and make your own version of that - but healthier, and less expensive!
You can make the standard cheese, meat, and crackers. Or try the one that's a make-your-own pizza - with a piece of bread or english muffin, a container of sauce, shredded cheese, and some sliced pepperoni. Or a make your own nachos, with chips, cheese, and salsa.
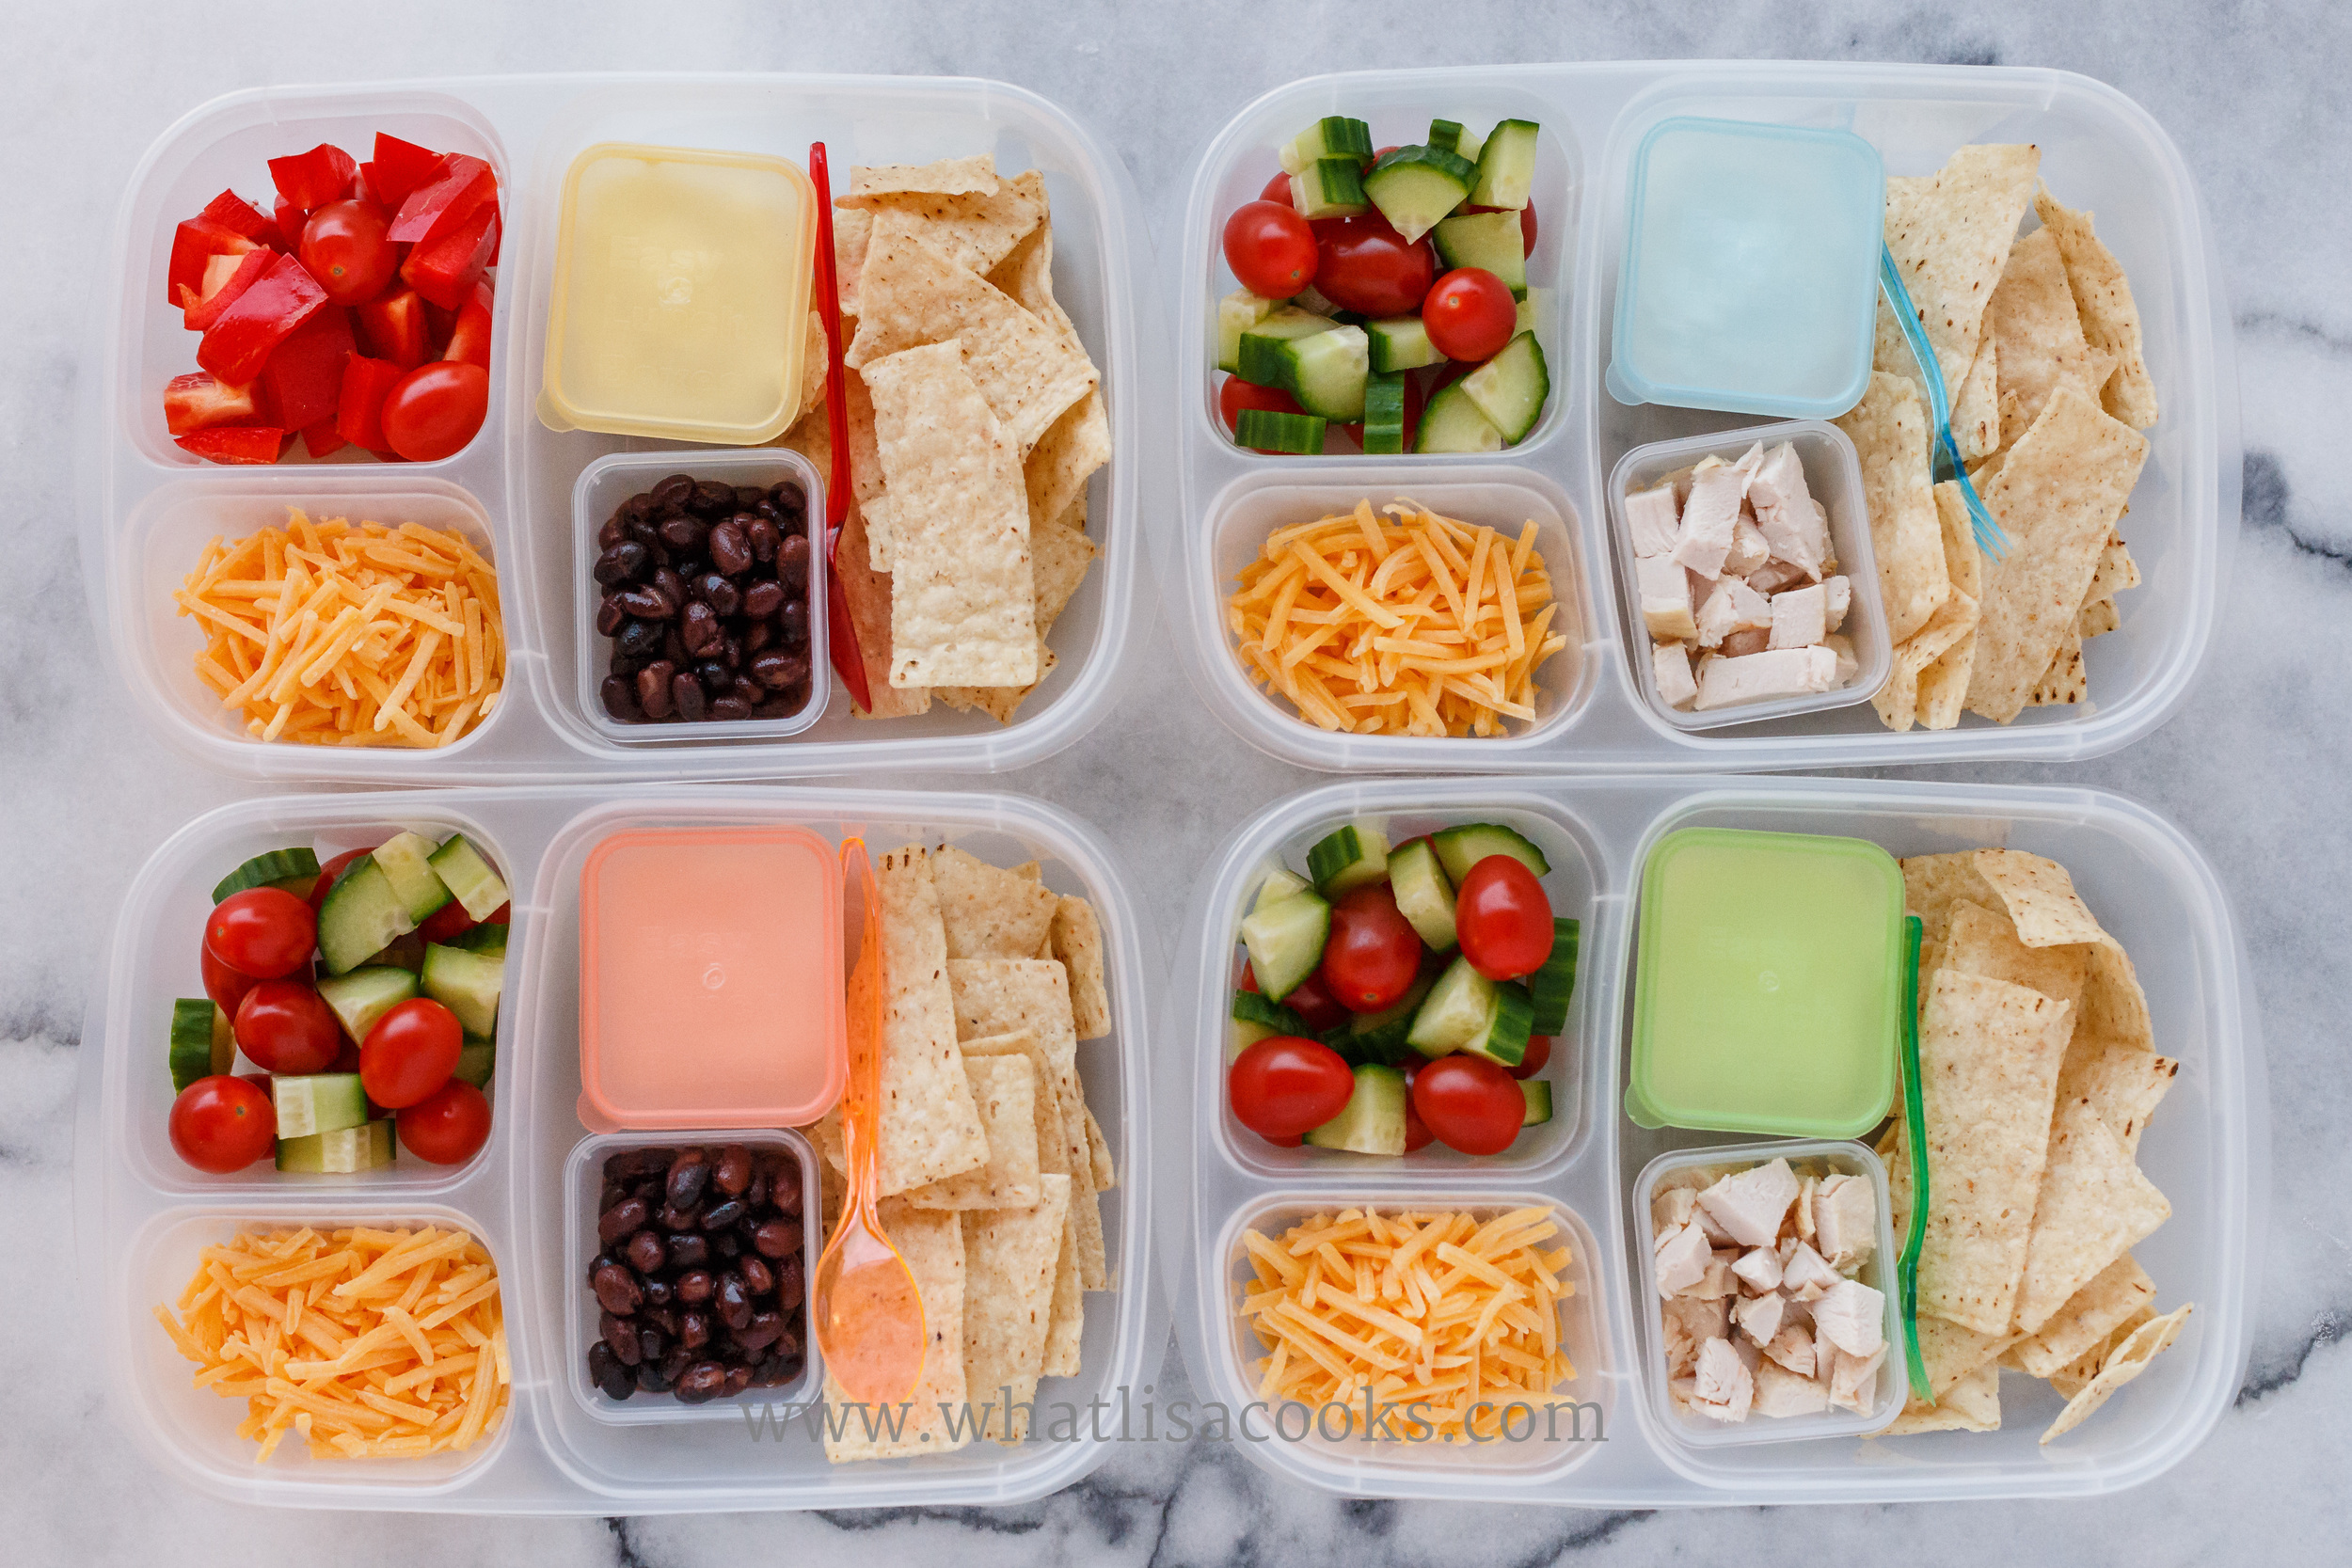
Make your own nacho kit with chips, beans or chicken, sour cream, and shredded cheese.
12: Make ahead, and pack from the freezer
Some of my favorite lunches to pack are the ones when I can just pull something already made out of the freezer and pop it in the lunchbox.
This makes lunch packing even faster. Most foods that freeze and defrost well are also going to hold up to lunchbox storage well.
I make things like pizza rolls, english muffin pizzas, pancakes, muffins, waffles, corn dog muffins, etc. all well in advance and freeze. Then when it's time to pack a lunch I just pull something out of the freezer and put it in the lunchbox while frozen. They slowly thaw in the fridge and are great for a several days.

Pizza rolls, tomatoes, grapes and oranges.
How to pack sandwiches ahead of time.
I already suggested that you maybe skip the sandwiches. But if what you really want is a sandwich, here are my tips for packing lunch with sandwiches ahead of time:
Avoid wet ingredients
Leave out the lettuce or tomato or cucumber, or other similar veggies that are going to release a lot of moisture. If you really want veggies for your sandwich, keep them separate and add them to the sandwich right before eating.
Seal your bread with something
I usually have no problem with mayonnaise making bread soggy. I know some people say they do. I wonder if they’re using light or reduced fat mayo, that may contain more water. Regular mayo is mostly oil, so there shouldn’t much moisture or water in there to make bread soggy.
If that still doesn’t work for you, try a thin layer of butter on the bread to seal it, then your other spreads or toppings. Or some people have good luck with leaving out the spread and packing it separately, and then adding it at the last minute. There are great little containers available that hold just the right amount of mayo for a sandwich.
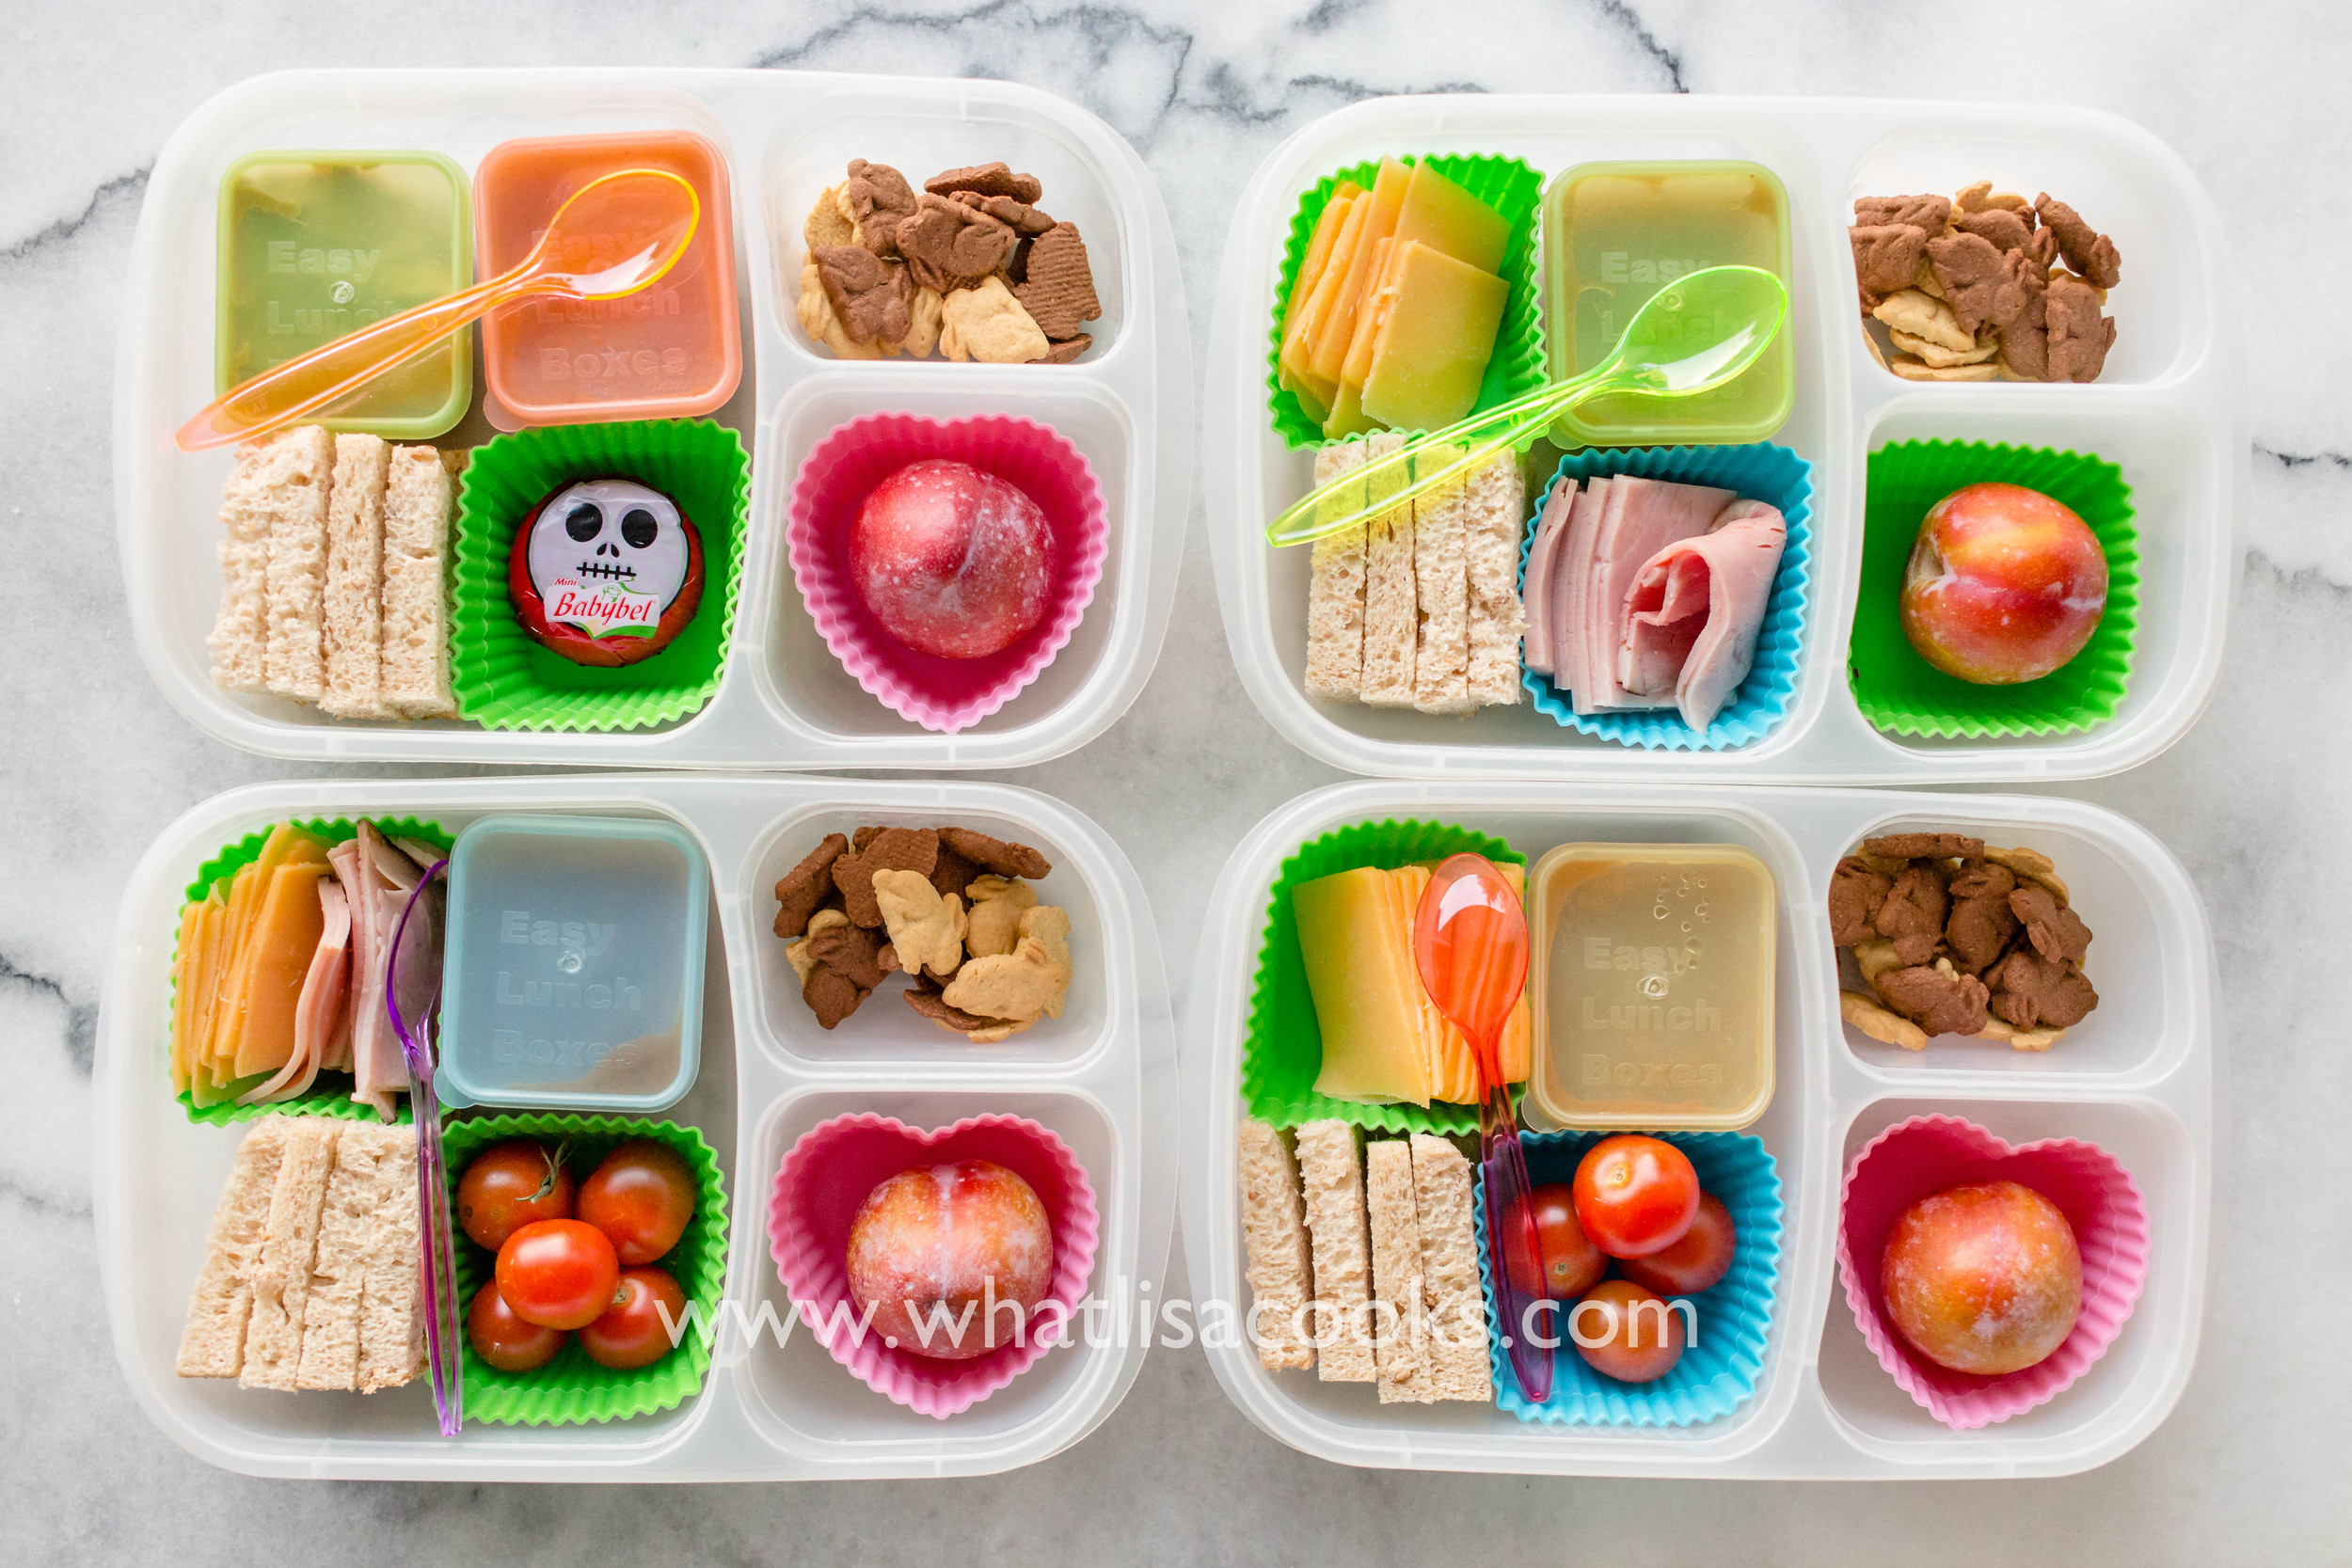
Make your own sandwich kit, with bread, cheese, ham, and one has peanut butter. Applesauce, tomatoes, cookies, and a plum on the side.
Meat in the middle.
Some people feel that sliced lunchmeat makes their bread soggy. So try putting the meat in the middle of the sandwich, rather than right next to the bread. Put slices of cheese on either side touching the bread. Or you can dry the meat a little with a paper towel before you put it on the bread.
Use the freshest sliced lunchmeat possible.
I find that pre-packaged sandwich meat often has a lot of water added to it, and it’s almost drippy when take it out of the package. But if you get freshly sliced meats from the deli they don’t have as much water added and they work much better for making sandwiches ahead.
Use a more dense, dry bread.
That wonderful soft, white sandwich bread that we all love is just too delicate to hold up to packing in advance. It just absorbs moisture too easily. Instead try a more dense bread - a multigrain, or at least a whole wheat bread (but not one that's too soft), or a good firm and chewy sourdough.
Try packing a “make your own” sandwich box.
This is actually one of my kids favorite lunches. It’s an easy way to make sandwiches more fun. Pack pieces of bread, sliced meats and cheese, sliced veggies, mayo, all in separate containers or separate sections of the lunch box so none of the components are touching each other. Then they get to assemble their own sandwich at lunch time. Bento lunch boxes with silicone dividers are perfect for this kind of lunch.
How to make peanut butter and jelly sandwiches ahead of time.
Try putting a layer of peanut butter on both pieces of bread, and then the jam in the middle.
Use jam instead of jelly. A lot of folks don’t know the difference and assume they are different names for the same thing. They are not. Jelly is made from just the juice, so by nature it is much wetter.
Jam on the other hand is made from the whole fruit, usually with the pulp and skin, so it’s thicker and there is less moisture to soak into your bread. I always use only jam, never jelly.
Toast or grill sandwiches.
The extra toasting on the outside gets you started off with bread that is a little more dry, and the melting of the cheese helps keep it all together without getting soggy. You can make grilled cheese or grilled ham and cheese ahead of time.
Adjust your expectations
There are lots of things that are going to be just the same as the day you packed them, but some aren't.
And as long as you're ok with the change in texture, then it's still ok to eat.
I make quesadillas days in advance all the time. No, they're not still crispy on the outside like they were when they were just cooked on a hot pan, but I still think they taste great. I pack burritos ahead of time often - and yes, the tortilla does get a little soft, but we deal with it.
Toasted or grilled sandwiches aren't going to be quite as crisp, and that's ok.
Just give it a try
A lot of this is trial and error. You're going to make a few mistakes, and that's ok!
Experiment with different things, and see how you like what they look & taste like after a few days.
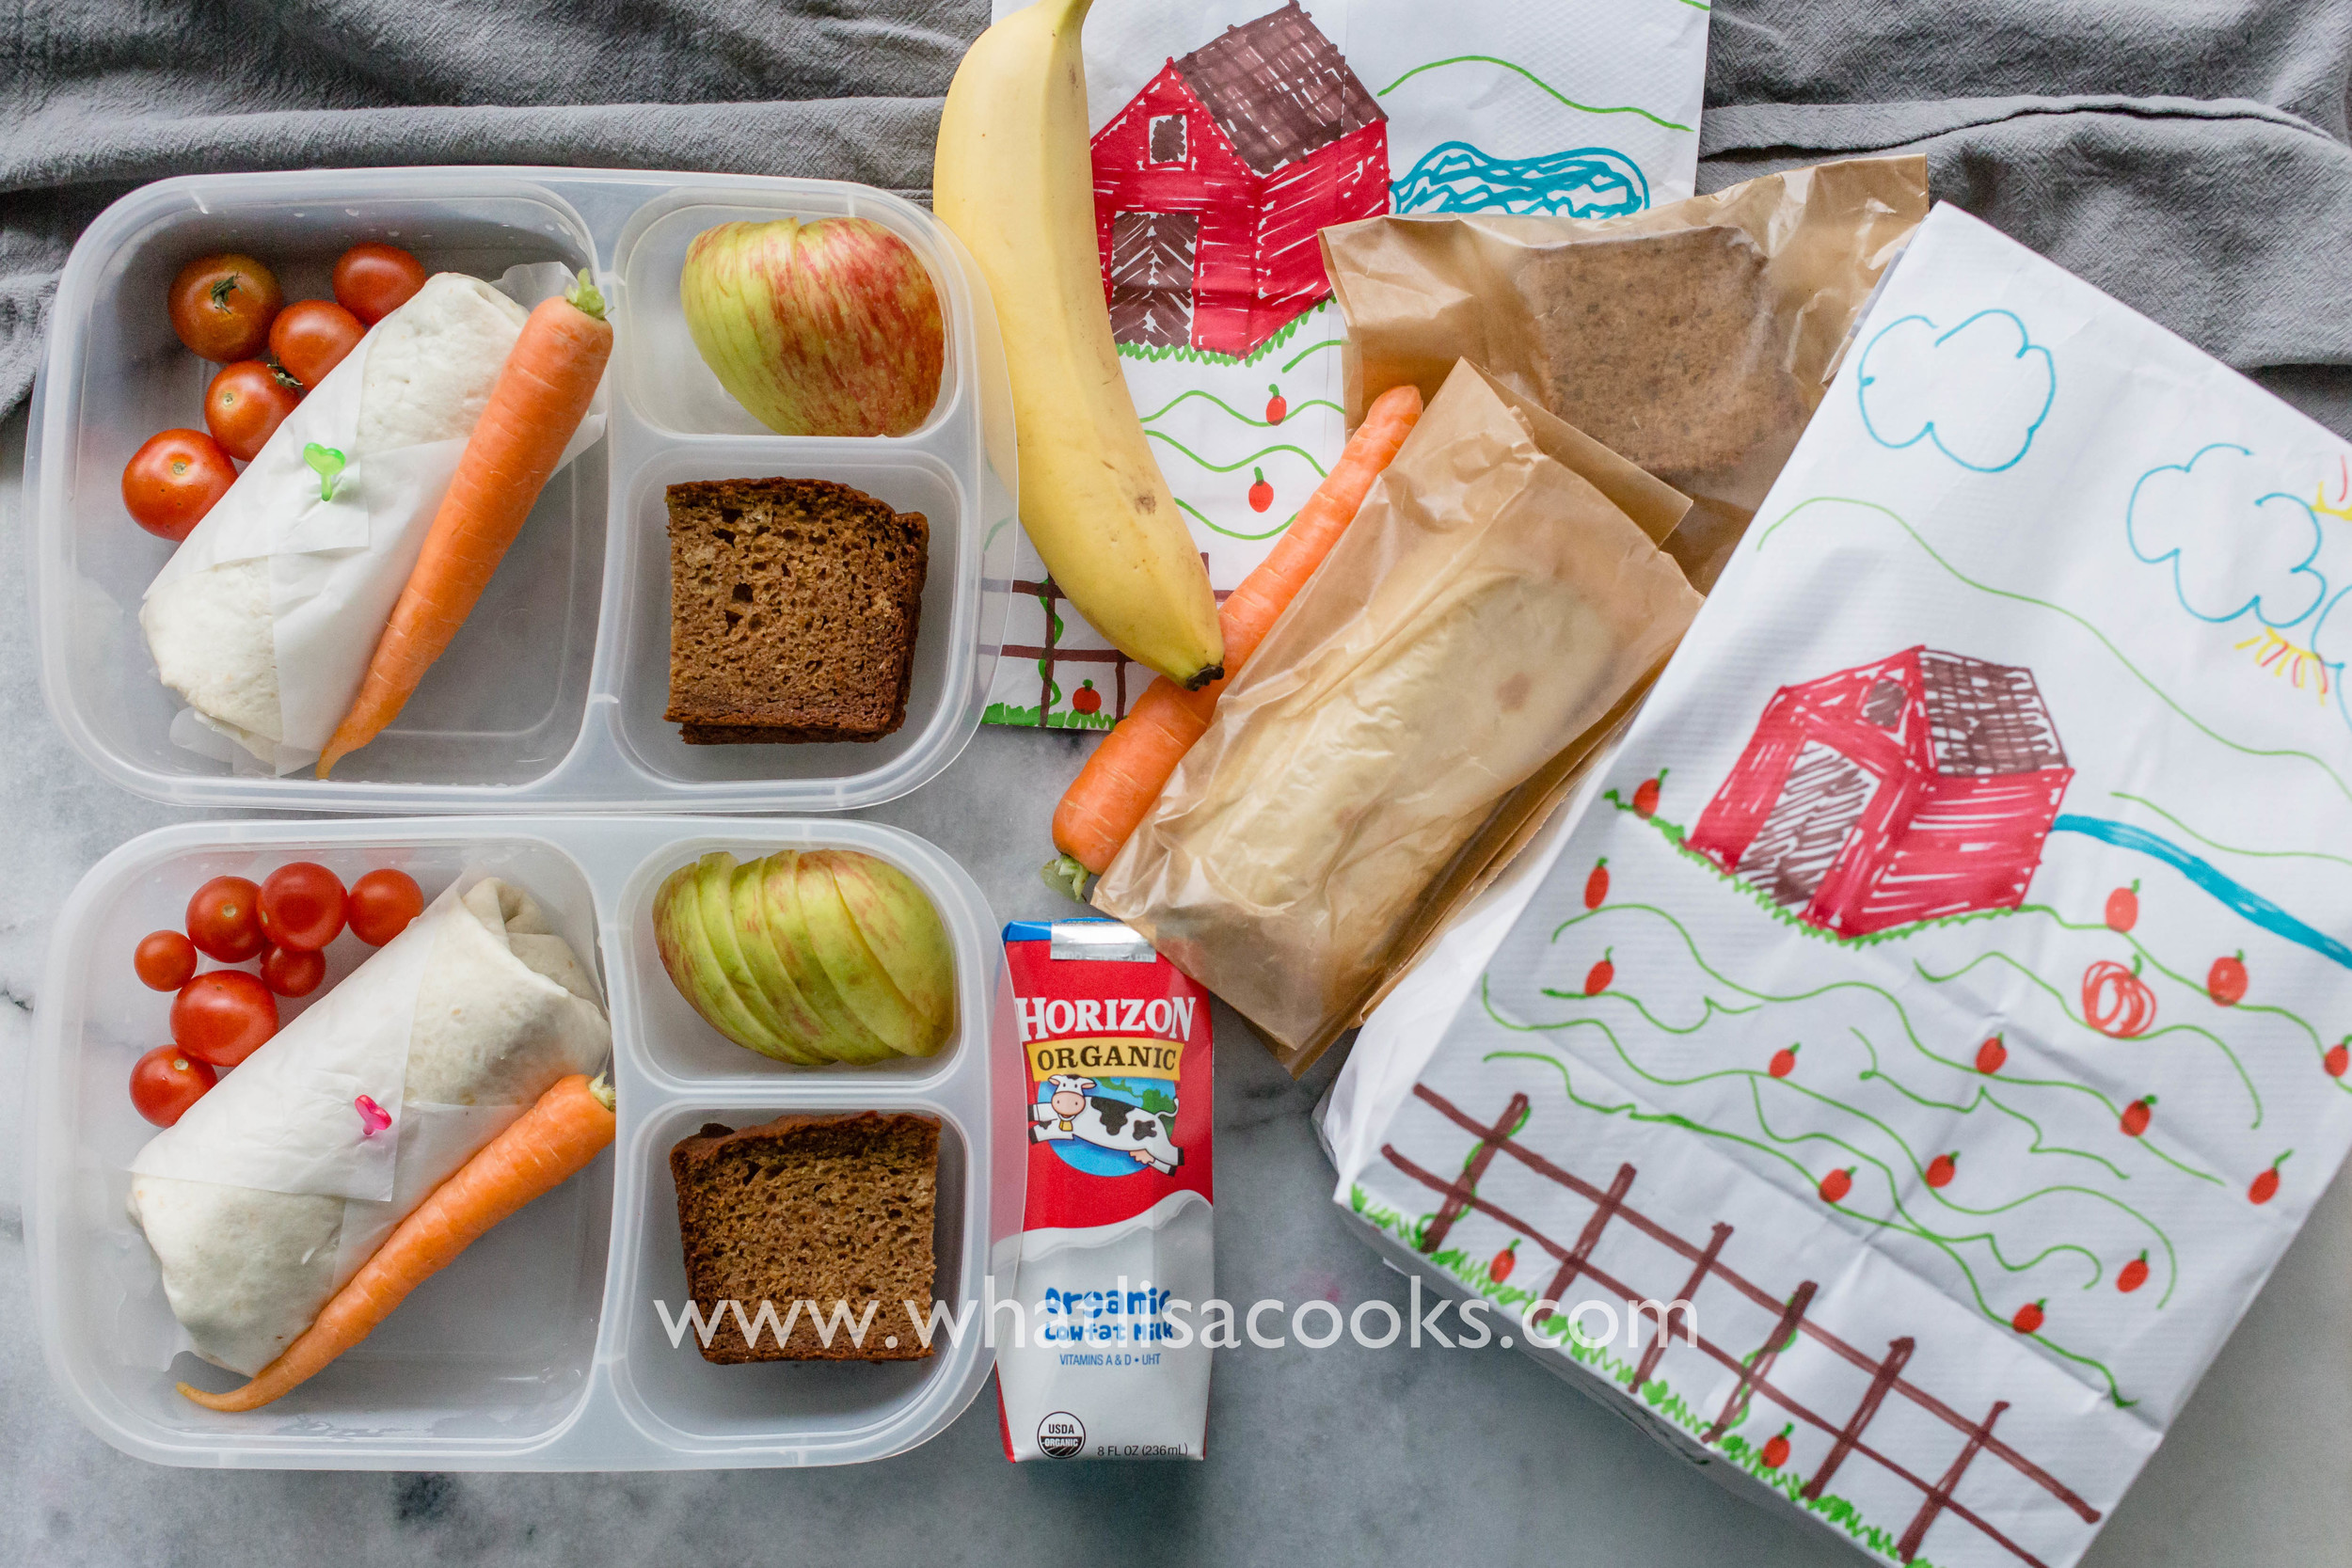
Burritos - two have just a piece of parchment around them, and two are in a wax paper bag - either option keeps other foods from touching them. Whole tomatoes, whole carrot, banana bread. Two had sliced apples and two had a whole banana.
What's the worst that can happen?
If you pack a lunch a few days ahead of time and check it the morning you want to use it and think that the berries or the crackers don't look quite fresh enough - just quickly swap them out, and remember to try a different kind the next time. You're still ahead of the game because you still have a lunch that's already mostly packed.
If you think the fruit is just past where you kid will eat it, but it’s not spoiled - don’t throw it out! Toss that fruit in a zipper bag in your freezer and use it for a smoothie. Freeze the crackers too, smash them up next time you need bread crumbs for something.
My bottom line advice is really to just pause and think through things before you pack whatever you would normally pack.
Not every lunch is going to work just a well when packed days in advance.
But you can pack lunch in advance, with my tips above and little bit of thought and planning, you can easily get at least 3 or 4 days of lunches packed at once.
It’s amazing how much time it saves during the week, so it’s really worth taking the extra time to think it through.
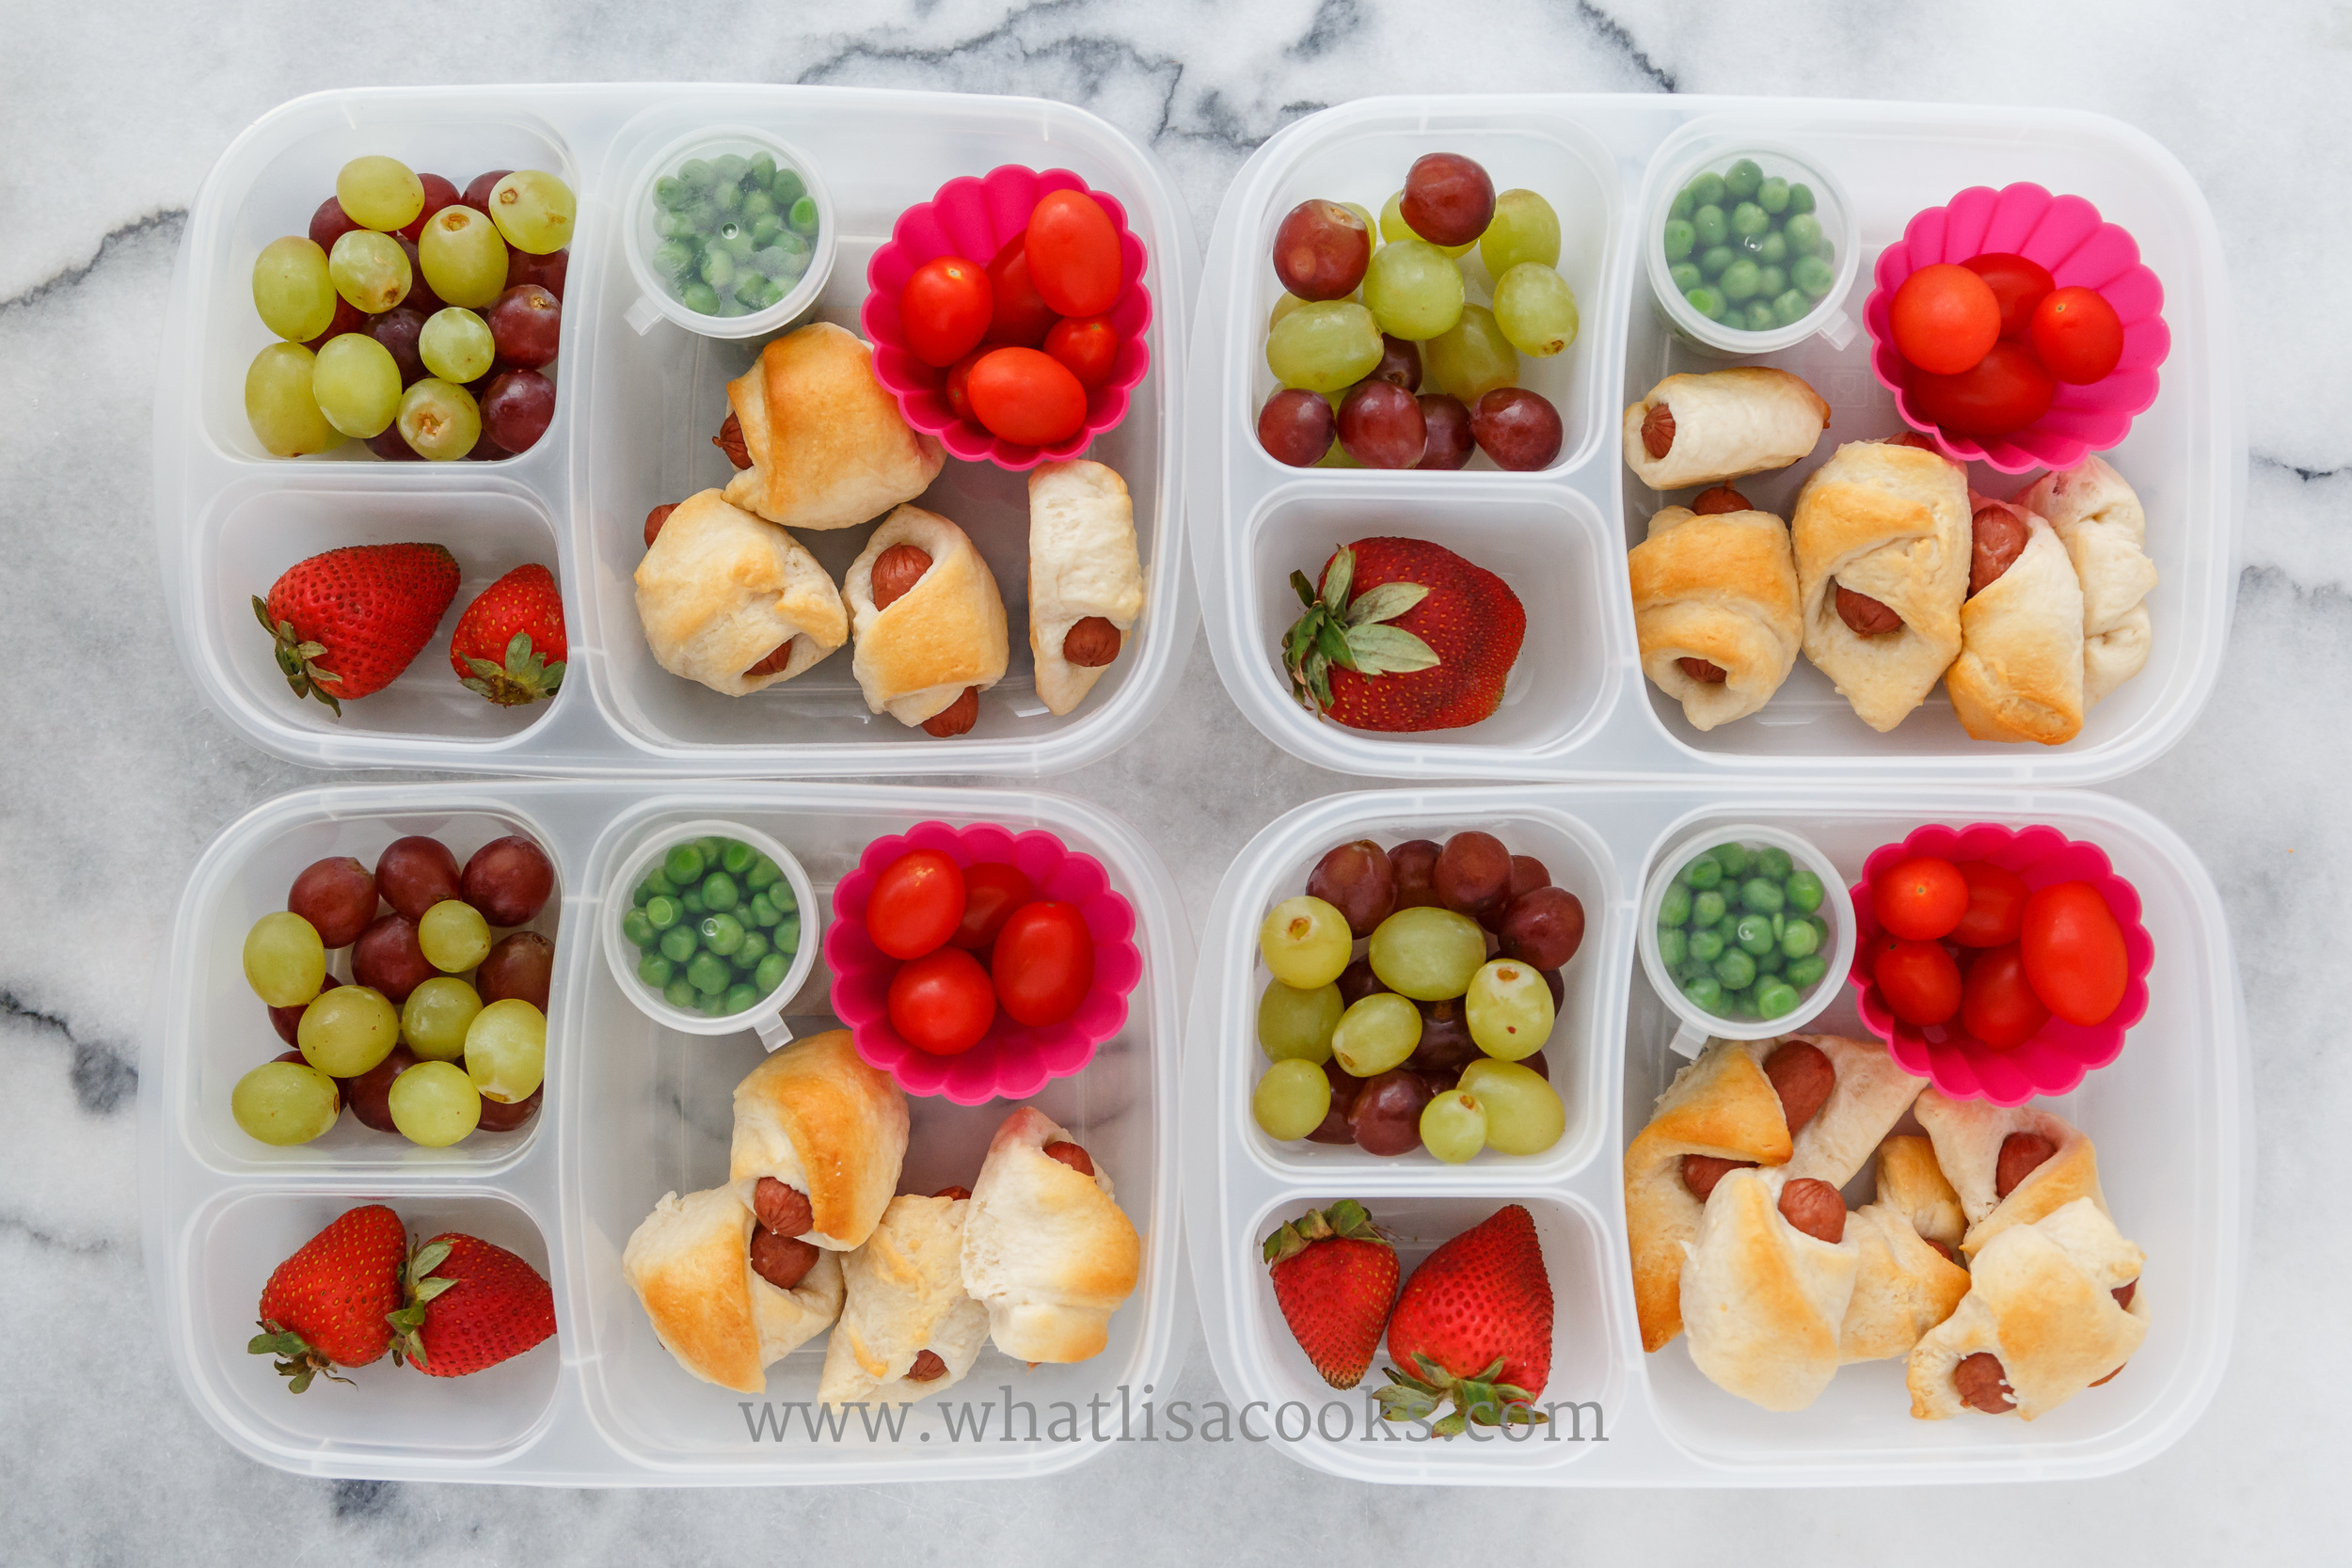
Pigs in a blanket, tomatoes, peas, grapes and strawberries.
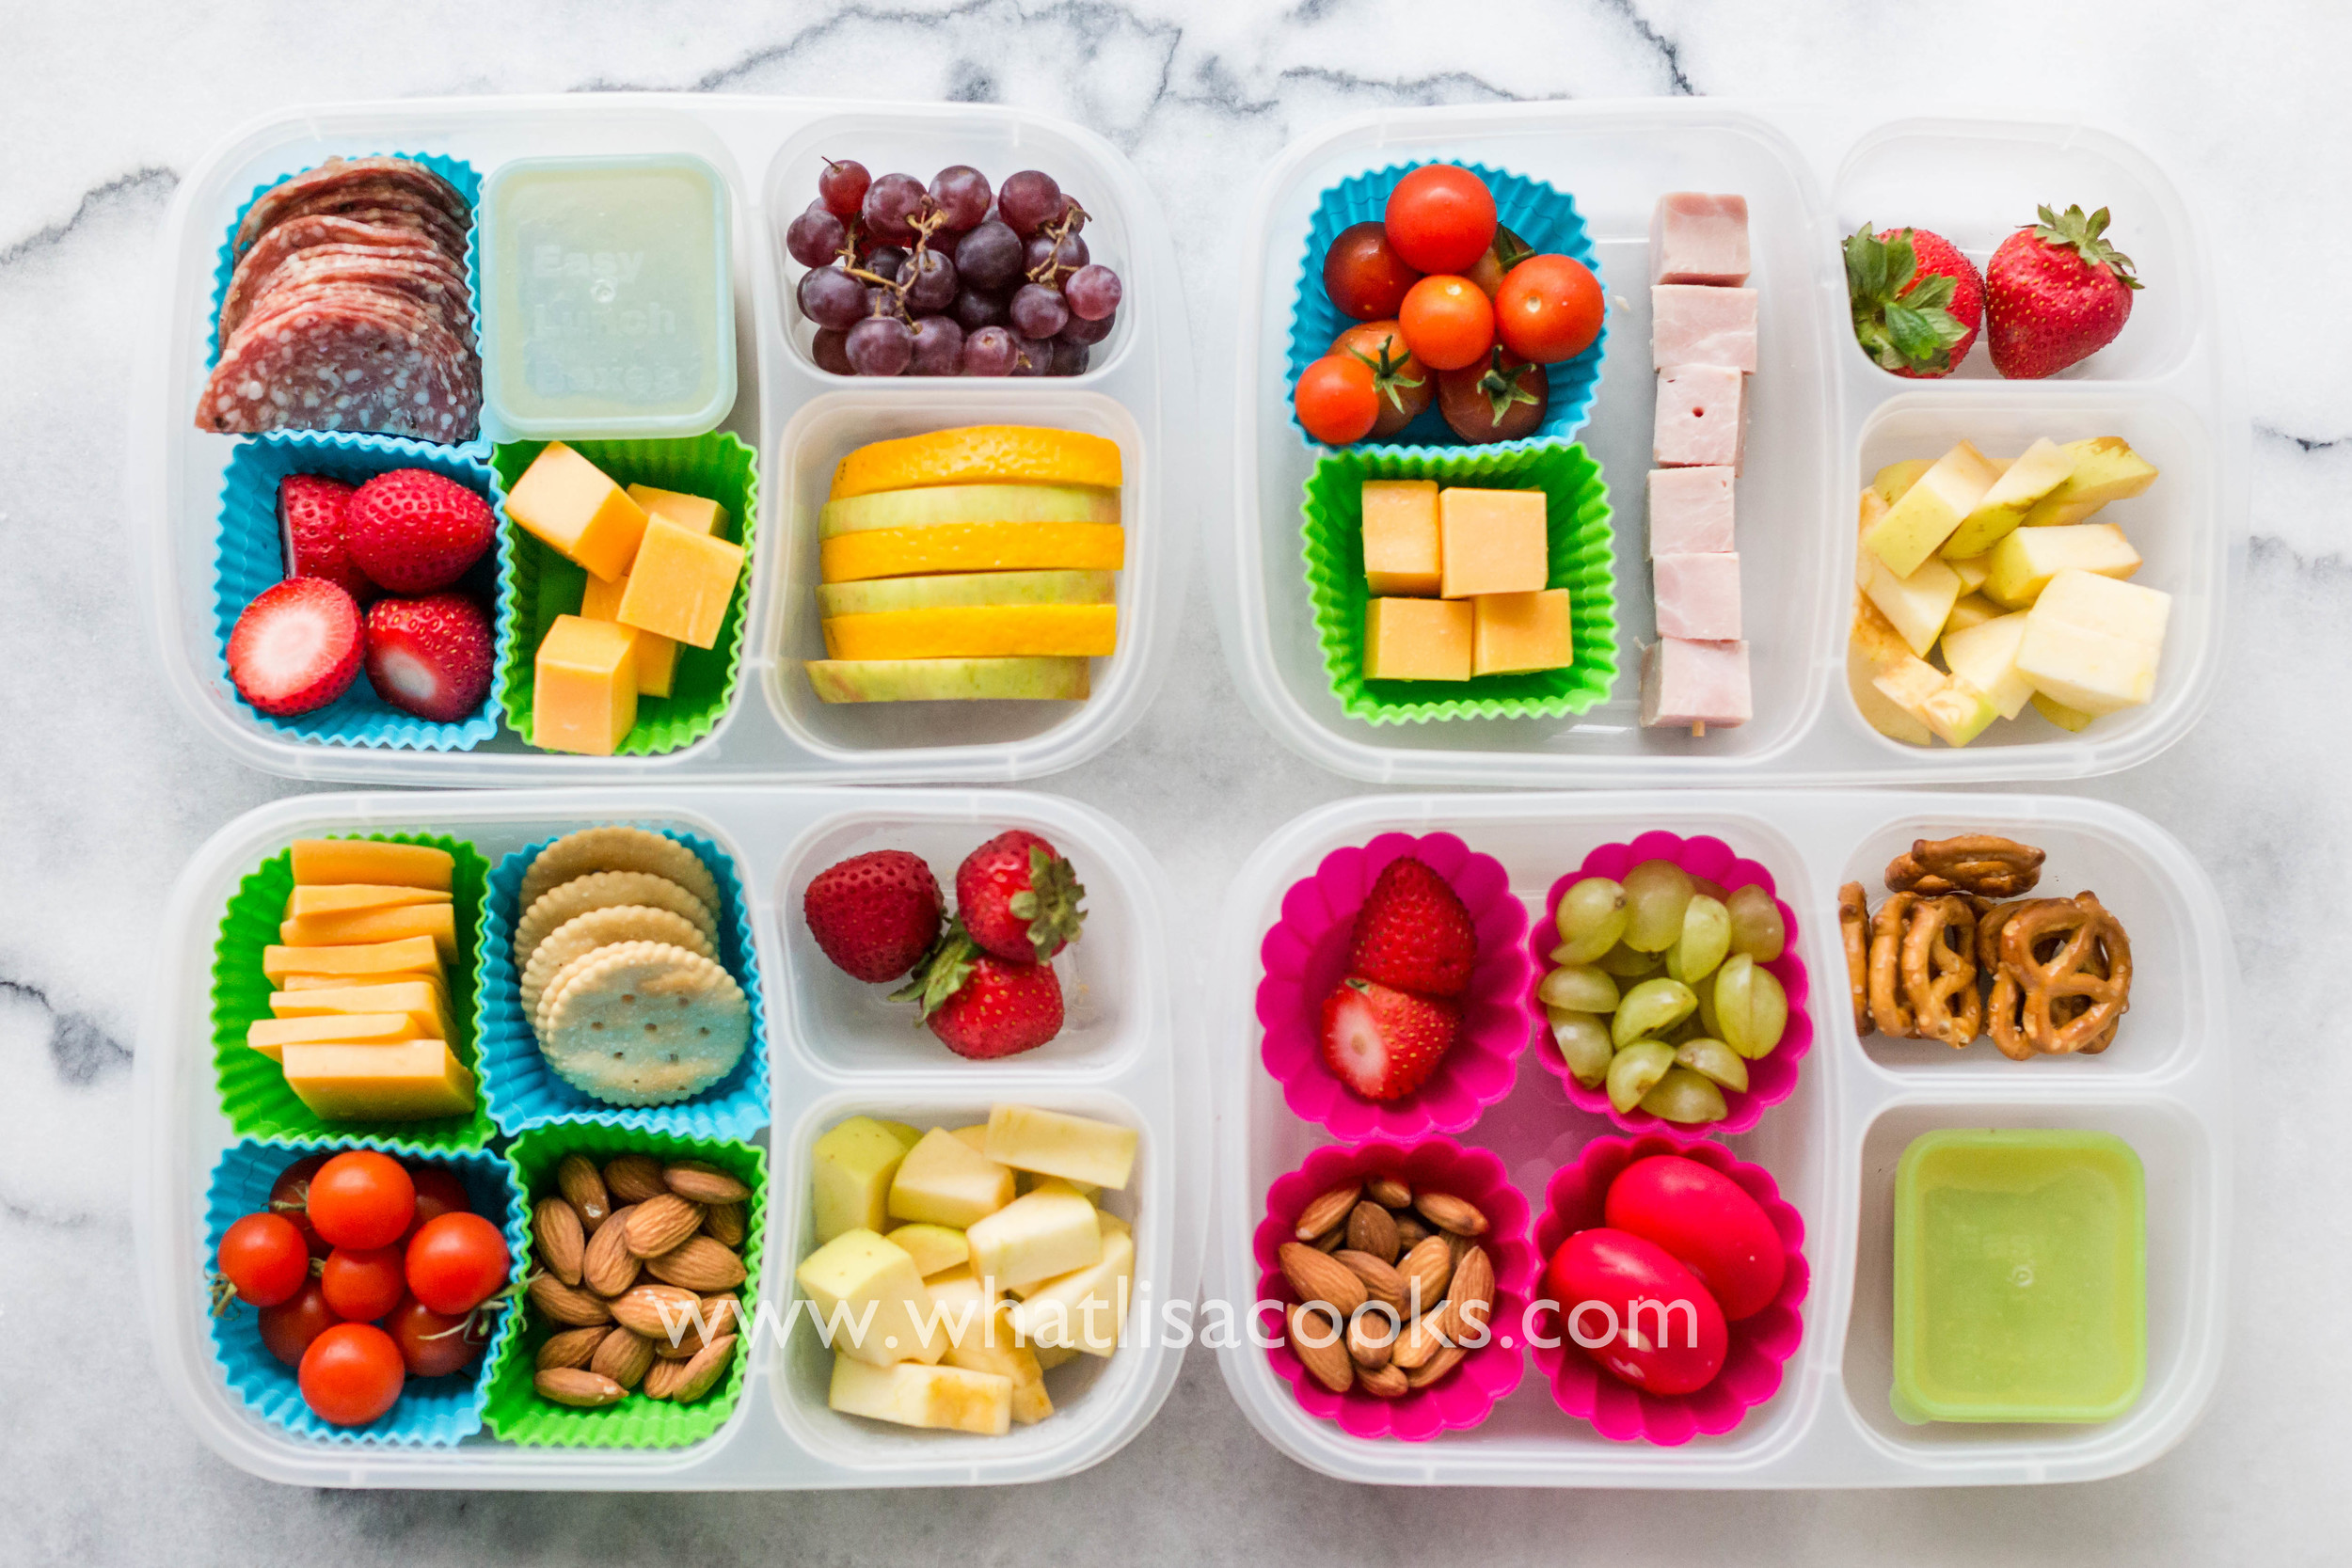
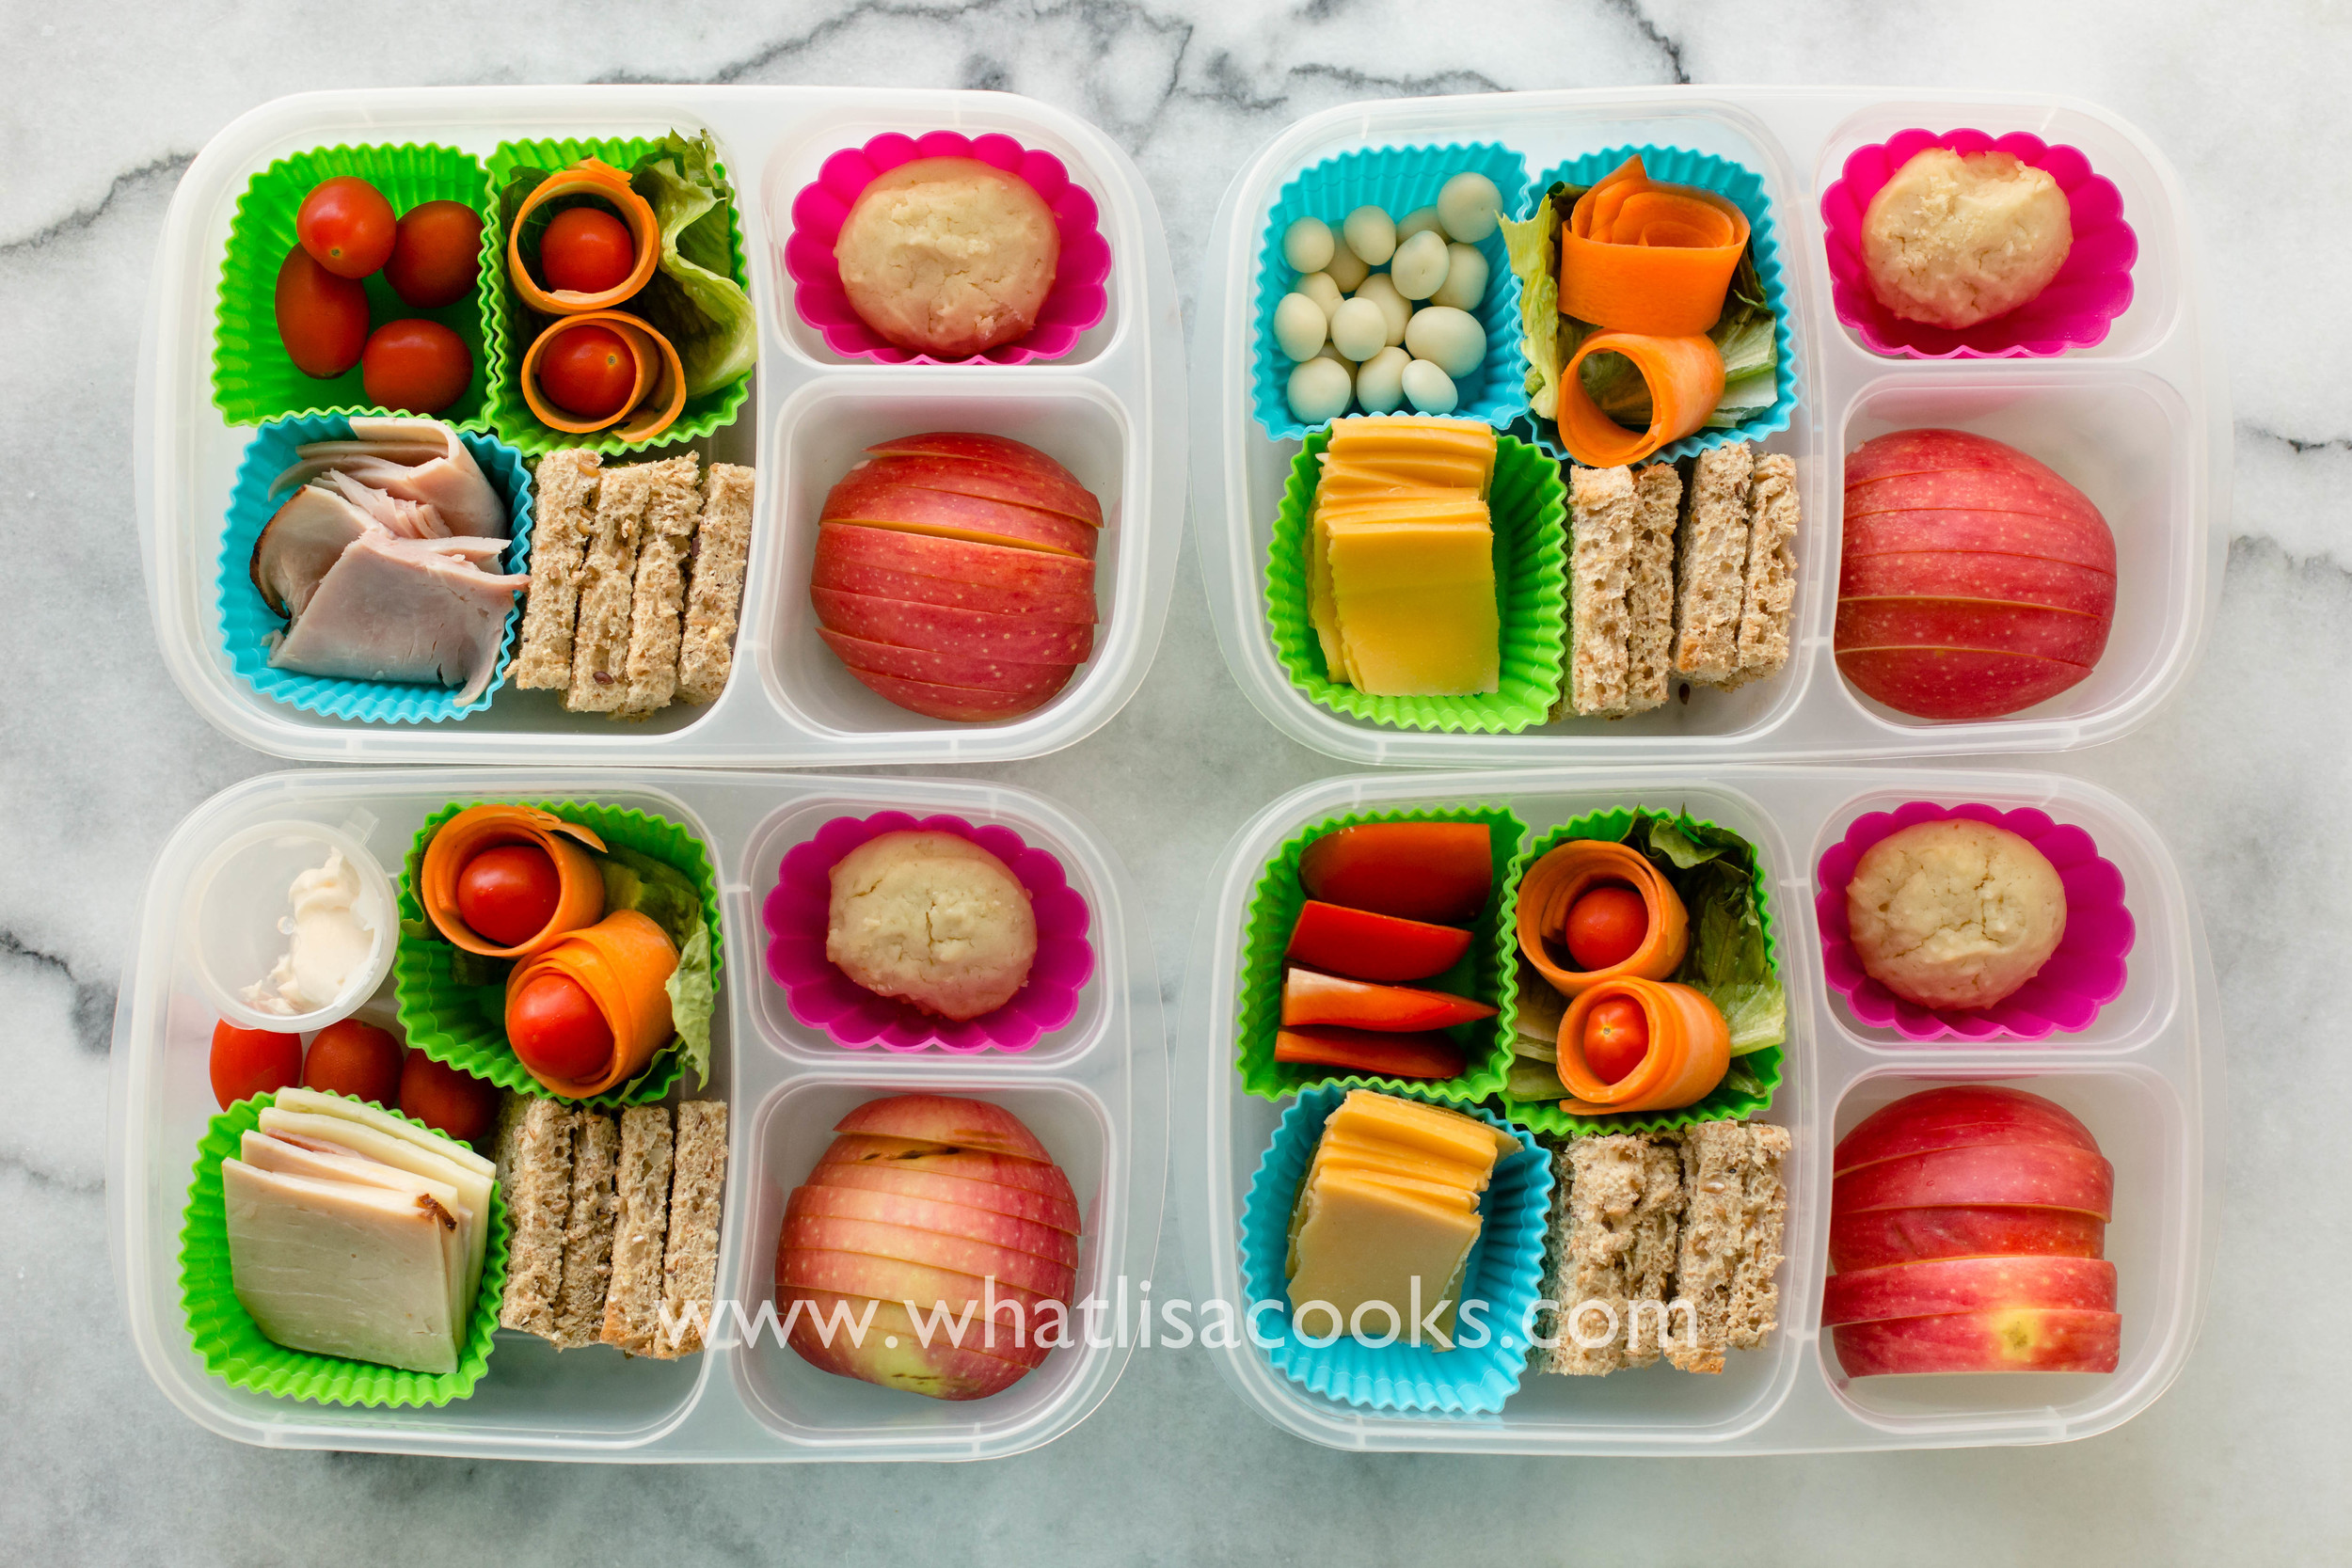
Crackers, cheese, meat, tomatoes, nuts, strawberries, apples.

