Homemade Yogurt: Update
/I've been making homemade yogurt for over a year now, so I thought it was time I updated this post with a little more on how I'm doing it now. I've refined my method a bit, which makes it even easier for me. My original post from March 2013 is below, but here are some notes on how I've updated my process, and what's working well for me.
I'm generally not one for buying kitchen gadgets that only serve a single purpose. I have a small kitchen and storage is tight, so I need to know I'm going to get a lot of use out of something before I can buy it. But after making yogurt for a while and spending a little more time than I wanted fiddling with temperatures and constantly checking thermometers, I decided to get myself a yogurt maker. Now I think "yogurt maker" is a bit of a stretch, it doesn't "make" the yogurt for you, it basically just keeps it at a just right temperature for just the right amount of time. This is the one I got, it's basic and does just what it needs to do. I love the little glass jars that it comes with, they are just a perfect serving size. For our size family, if we are all eating yogurt, making just the amount that fits in these jars will only last us one or two meals.
But I've discovered a few tricks - the jars that it comes with aren't necessary, you really can use any container that will fit on the warming base. We have lots of jars around here as we use up our homemade jam, and jam fit in here just perfectly too. They are a little taller so the lid doesn't sit on perfectly, but I've discovered that the lid doesn't really matter. I just rest the lid on the top of the jars and layer a few dish towels over the top. You can even make your own 'fruit on the bottom' yogurt in jars - just put your fruit, jam, honey, whatever in the bottom of the jar, pour the prepared milk over, and culture as usual. The kids love to be able to dig down to the bottom of their jar to get the to honey and fruit. And doing it this way makes it nice for sending in lunches as well, with everything already included.
It may be obvious - but if you're making yogurt in single serving jars, then you're not straining it. So this is thinner style yogurt in the single serving jars. But the trick of adding some dry milk powder does make a difference if you want it thick. I like the Organic Valley brand of powdered milk for this. I also use this yogurt maker with a bigger bowl of yogurt - I just experimented with bowls from my kitchen until I found one that fits. This makes the process very quick and easy - no measuring or pouring into jars. Just heat the milk to 185 in the microwave in your bowl, let it cool to 115, whisk in your starter, put it on the warmer, cover and set your timer. (note in the post below I said 175, but I've found that I get thicker yogurt if I go to 185) When finished, you can use it as-is, or you can strain it. I usually strain and end up with a quart of nice thick yogurt after starting with about 5 cups of milk and a half cup of starter.
The consistency varies with each batch. I've also learned that I get a thicker yogurt if I used store bought yogurt as my starter, versus if I'm using my own yogurt. So I generally will use my yogurt for a couple of cycles, and then mix in a store bought starter every 3rd or 4th batch to get it thicker again. Also a longer culturing time will give you thicker yogurt, but it also makes it more tangy, as the yogurt cultures eat up more and more of the milk sugar, so you just have to play with it and see what you like. Lately I have actually been doing a 24 hour culture, to maximize the good probiotics for us and reduce the sugar even more. For this method, I set the timer once in the morning for 12 hours, and then re-start it for another 12 hours before I go to bed, and have finished yogurt the next morning. We're mixing it with honey or jam or blending it in a fruit smoothie, so the sourness doesn't bother us. One thing I have found when you are doing a longer culture, is the the bottom of the jars or bowl can get a little over cultured or 'cooked', but layering a couple of dish towels between my container and the heater seems to solve this with no problem.
I think that's it for updates - happy to answer any questions if I can. I'm not an expert but have been doing it for long enough now that I feel like I've worked it out pretty well. So go and make yourself some fresh, organic, homemade, whole milk yogurt!
(Important note: don't use "ultra pasteurized" or "UHT" milk. That has been too overhead and left nothing living in the milk. Regular pasteurized milk works just fine, I usually buy Organic Valley Whole Milk, and it works great.)
Fresh, home made yogurt - that's right. It really doesn't compare to store bought - creamier and sweeter. I've been making yogurt weekly for several months now as well. It's another thing that just makes me feel really good to make. And once you realize how easy it is, you might wonder why we aren't all doing this. And it's cheap - compare the cost of organic yogurt to the cost of the equal amount of organic milk. Organic yogurt is around 13 or 14 cents per ounce - and you'll pay up to 43 cents per ounce for Greek yogurt (and not necessarily organic). Organic milk is about 4 cents per ounce. My family goes through a lot of yogurt, so it does make a difference for us if I make it.
But mostly I'm doing it because it's just really good!
If you do an internet search on how to make yogurt, you'll find plenty of recipes and techniques. So what I'm giving you here is just how I've found works best for me. I use about a half gallon of milk, in a glass bowl I heat this in the microwave for about 20 minutes - you want to get it to at least 175 degrees. Then I set it out on the counter and let it cool to 115 degrees or less. Then stir in about a cup of plain yogurt (for your first batch you'll want a good quality store bought one, and then after that you just use your own yogurt as your starter). Then you cover it, keep it warm at around 100 degrees, and leave it alone for at least 7 hours - and then you have yogurt. It is really amazing.
As for keeping it warm - I have found two methods that work well for me - heating pad or on top of the warm oven. For the heating pad method, I put a few layers of towels around the bowl, then sit it on the heating pad, and then wrap another dish towel or two around that. I turn on the heating pad on low and just keep an eye on the temp - adjusting the pad on and off as needed. I use a digital probe thermometer, so I can just have it on all the time. Lately more often I have been keeping it warm on my stove. I've found that if I turn the oven on at about 175-200, and set my bowl of yogurt on top of the stove, it keeps it at a perfect 100 degrees all day.
As for time - everything I read said about 7 hours is ideal. Longer might get you thicker yogurt, but also more tangy. I tried overnight once and it was a little too tangy for my taste.
A few notes about thickness and consistency - the basic technique above gets you regular yogurt, a little runny. There are two things to do to make it thicker - I usually do at least one of these, if not both. First, you can mix in some dry milk powder with your milk at the beginning of the process, half a cup or so, blend the lumps out well. This seems to absorb some of the extra liquid and I think it makes the yogurt a little more creamy. And second is to strain it - you line a colander or sieve with a few layers of cheesecloth (or I think paper towels will work), dump the yogurt in, and let the excess liquid drain off for an hour or two.
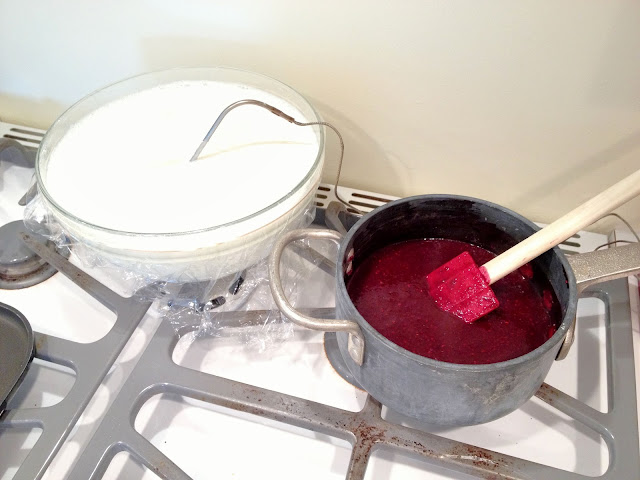
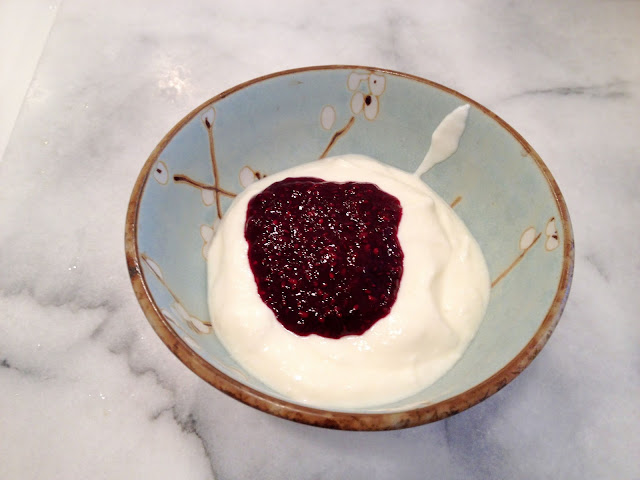
I usually start this whole process in the morning after breakfast, pay just a little attention to it throughout the day as I'm getting other stuff done, and by bed time I have finished yogurt to put in my fridge for breakfast the next morning. We are loving it served with a little homemade jam and a drizzle of honey. It's great in smoothies, or with granola, or however you like yogurt.