
Notes from the kitchen table: no. 08
A couple weeks of family meal plans and lots of new recipe links!
Welcome to another week of Notes From the Kitchen Table!
I’m skipping a few of my usual weekly features in this edition of the newsletter. I’ve got a lot of recipes and meal plans to share this week and I think that will take up enough space!
Things have been busy here. I feel like I say that every week, but I guess it’s always true. We are into October which means costume season and some of my kids are getting very creative with their costume requests. I love a good challenge though, and I love to sew, so while it’s a lot of work and somewhat exhausting, I do have fun making costumes for them. I shared a pic this week on Threads of a costume I’m working on for one of my kids. I’m pretty pleased with how it’s coming along.
I understand that it’s autumn in some parts of the northern hemisphere? We’re not seeing any evidence of that yet here. We’ve been having sunny 90+ degree days here in the Sierra foothills in California and I’m still loving every minute of it. I’m sure I won’t love the electric bill from needing to still be running the air conditioner in October, but I’m happy to still be having nice pool weather.
My garden is loving the warm weather too! We got off to a late start, and I think the super hot July stunted things a bit, but my tomato plants are seriously popping off now so we’re having all things tomatoes in our meals lately. Read on for a link to my freshest ever roasted tomato sauce.

OK, what’s in this week’s issue:
This week I’ve got two weeks of meal plans and links to several new recipes. I’m trying to get better about actually writing out recipes for the things I cook and I’m happy to be able to share those with you.
Remember my recipes aren’t quite like what you find on a lot of other food sites - my recipes are documenting how I actually cook for my family. The photos aren’t staged, I’m not cooking food just to take photos of it. I’m taking pics of our actual meals and I’m telling you exactly how I made them.
Make sure you don’t miss a weekly update - click here to subscribe to my substack and you’ll get these updates in your inbox. The archive of all my weekly updates and past meal plans will always be available on the blog as well.
Let’s dig in!
Featured Blog Posts:
New recipe posts!
In the last newsletter I shared a link to my Moroccan inspired spice mix, and this week I have a new super easy slow cooker dinner recipe that uses that same spice blend. You’ll definitely want to try this Slow Cooker Moroccan Spiced Chicken with Chickpeas and Potatoes - it’s so flavorful and I think is a new favorite.
I’ve also written up recipes for a couple of the main components of one of our favorite meals: Seared Ahi Tuna Bowls. The main parts of this meal are the seared ahi tuna and the crispy salt and pepper tofu, and the rest of of the bowl can be whatever you like. I love making the tuna this way because it feels fancy and high end restaurant quality, but it really is so easy and fast to make. And the tofu recipe is one of my family’s favorite. Whenever anyone asks for suggestions of how to cook tofu, this is always my go-to. I shared some more details about this meal including loose instructions for how I make the cucumber salad and the soy ginger dressing in last week’s meal plan post.
I’ve talked before about how we like to keep a supply of muffins in the freezer for easy grab-and-go breakfasts and this week I wrote up a new recipe version of the banana bread / banana chocolate chip muffins I’ve been making that my kids love. Also if you missed the egg bites recipe I shared last time you’ll want to check that out too - it’s another of our weekday breakfast favorites.
And finally, as I mentioned above, I’ve been making all kind of things with our fresh tomatoes from the garden, including an amazing roasted tomato sauce. Roasting the tomatoes is a simple way to bring out so much sweetness and flavor and I tell you all about how I do it in this blog post.
Let me know if you try any of these!
Meal Planning Updates:
Menus from the last two weeks are posted now, you can click here for last week’s and click here for the week before. Both of them have some pictures, links to IG posts with some details, and a few recipe links.
As for this week, here’s what’s currently on the menu.
Check back next week for the details.
Chicken and dumplings. I actually already made this - you can see it here on IG.
Chili lime chicken tacos - I have some chicken that I marinated a few weeks ago and didn’t get around to using so I stuck it in the freezer.
Teriyaki tofu and broccoli with steamed rice. You can see my teriyaki recipe here.
Pizza, not sure yet if it will be homemade.
The husband is away for the weekend so I’ll probably indulge myself in several big salads and let the kids have some favorite comfort foods like nuggets and pasta, we also have a couple of frozen lasagnas taking up space that I might use. Momma’s taking the weekend off!
Ideas for dinners later in the month:
I like to keep a running list of dinner ideas as I think of things or as someone in the family makes requests, then when I’m making a meal plan it’s even easier because I’ve got some ideas ready to just fill in. Here are some things that are on my list and will probably make an appearance sometime soon.
I still haven’t used the whole chickens I bought at Costco, so I plan on doing some kind of whole chicken recipe. Either Jamie Oliver’s chicken in milk, or maybe Samran Nosrat’s Buttermilk Chicken. I shared a post recently with favorite whole chicken recipes and I’ve been craving several of them ever since. This might be related to the weather - roasting whole chickens feels like a cool weather activity and we’re not there yet.
I also still haven’t tried this chicken saag recipe from Nom Nom Paleo that I saw recently and I’ve been dying to try it.
I recently saw recipe for a coconut curry meatballs dish that sounds amazing. My family are sort of obsessed with meatballs lately so I’m always looking for new meatball ideas to try.
We also still have a big pork shoulder in our freezer so we will plan on smoking that sometime soon. Smoked meats also sound best to me when the weather is cooler, so I’m kinda waiting from some of that autumn cool weather to actually show up before I declare it smoking season.
A kid has been requesting that I make that gumbo again soon, or what I called more like gumbo adjacent but definitely not authentic.
And I got thinking this morning about how I will eat literally almost anything if you put a fried egg on top of it, which then got me thinking about things with fried eggs on top, which got me craving Loco Moco, so I’ve added that to my list as well. This is how my mind works. ;-)
Social Media Highlights:
I’ve been so busy with costume making that I haven’t done a lot of exciting social media interacting lately. But be sure to check out my instagram for all the latest from the kitchen.


Also if you missed my last update - I’m back to posting on my Facebook page too! A lot of the content is the same as what I post on Instagram, but there may be some differences, and it’s another option for keeping up with the latest if you aren’t into Instagram.
That’s it for this week. I hope you’ve enjoyed my updates!
Have a Question?
Ask me anything. Do you need lunch packing advice or meal planning suggestions? Or do you have other food or family management related questions? My goal is to be your resource for tips and advice - from a mom who has been there, and done that.
Reply to this email, post a comment, or hit me up on social media, and your question could be featured in next week’s newsletter.
Don’t forget to follow along on Instagram, Facebook, and Threads for daily tips and inspiration.
➡️ Follow Me on Instagram | ➡️ Follow Me on Facebook | ➡️ Follow Me on Threads
Wishing you an easy week ahead!
– Lisa
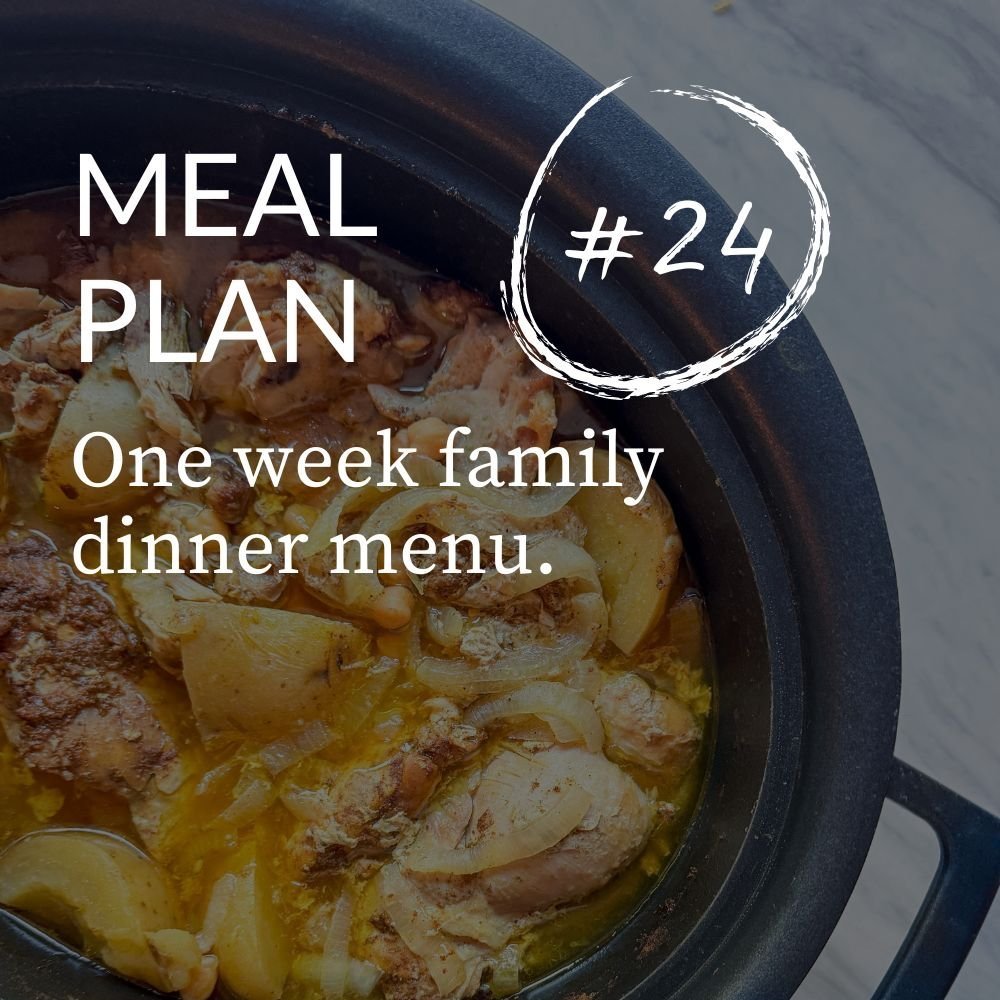
Family Meal Plan #24
Welcome to our family meal plan!

This is a real reflection of what my family actually eats—some weeks I’ve got recipes to share, sometimes there are photos, and other times it’s just me giving you the rundown of what I made. I hope these menus give you some fresh ideas or inspire you as you’re planning your own meals. Feel free to adapt or follow along however it works for you—because meal planning should make life easier, not harder!
From one busy home cook to another, let’s make dinner a little less stressful together.
You can find all of our past meal plans here. And don’t forget to subscribe to my newsletter, Notes from the Kitchen Table, to get the latest weekly meal plan delivered straight to your inbox!

On this week’s menu:
(see below for a few notes about some of the meals)
Sunday: Burgers
Monday: Chicken sausages and zucchini patties
Tuesday: Chicken posole
Wednesday: Leftovers
Thursday: Cabbage roll casserole
Friday: Frozen pizza and bag caesar salad
Saturday: Slow cooker Moroccan chicken
Sunday: Cajun spiced meatballs, roasted tomato sauce, pasta
Extra: banana chocolate chip muffins

A bit more detail about some of the meals:
Sunday: an easy meal of frozen burgers. I had both chicken patties and salmon burgers from Costco, so I just tossed those on the grill and served with the usual burger fixings.
Monday The packs of chicken sausages from Costco, tossed on a baking sheet and roasted until browned and splitting, along with some zucchini fritters and pasta. I make my zucchini fritters very much like the ones in this recipe from Smitten Kitchen, although sometimes I add in another veggies that need to be used, like cabbage or onions or broccoli.
Tuesday Chicken posole. Posole (or pozole) is a Mexican stew, think of it a bit like a tortilla soup, but what makes it posole specifically is the addition of hominy. I have a recipe for a pork posole posted here, but this one was even easier - basically just chicken broth, enchilada sauce, canned hominy, some cabbage and onions. What really makes is great is all the toppings - chips, sour cream, cheese, I like shredded cabbage, green onions.
Wednesday is our usual leftover night.
Thursday I used the leftover sausages from Monday and chopped them up and mixed with rice, cabbage, and some fresh tomato sauce and baked it all together with bread crumbs on top. We can call it a cabbage roll casserole, because the flavor and texture of the cabbage & rice and tomato reminded me of those cabbage rolls my grandma used to make. No real recipe here, and it was just ok, not sure if I’d make it again.
Friday was a frozen pizza night after the end of a very full week.
Saturday was the star of the week. A new recipe that is instantly a new favorite. I made up a Moroccan spiced slow cooker chicken and it was one of the best things I’ve made in a long time and so easy!

Sunday was another new one - Creole spiced meatballs. I don’t have a recipe but really it was too easy. I combined ground beef and turkey in the usual meatball fashion, with some diced onion, eggs, and breadcrumbs. For seasoning I just used a whole bunch of my favorite Creole seasoning, which made it all really easy and very tasty. We had these with an amazing fresh roasted tomato sauce, pasta, and some frozen spinach that I cooked with just a little butter and salt.
Extra meal prep: I made up a batch of banana chocolate chip muffins for school morning breakfasts this week. I’ve adapted this recipe so many times that I felt it was time for a new write up, so there’s a new blog post up with this version of the banana bread recipe.

That’s the week!
Have a Question?
Ask me anything. Do you need lunch packing advice or meal planning suggestions? Or do you have other food or family management related questions? My goal is to be your resource for tips and advice - from a mom who has been there, and done that.
Reply to the newsletter email, post a comment, or hit me up on social media. I’ll do my best to answer, and your question could be featured in my newsletter.
Don’t forget to follow along on Instagram, Facebook, and Threads for daily tips and inspiration, and subscribe to the newsletter to get my weekly updates right in your inbox.
➡️ Follow Me on Instagram | ➡️ Follow Me on Facebook | ➡️ Follow Me on Threads
Wishing you a delicious and stress-free week ahead!
– Lisa

Simple Fresh Roasted Tomato Sauce
A super easy method for turning your fresh garden tomatoes into an amazing sauce.

Wondering what to do with all those tomatoes from your garden?
Make sauce!
Some folks will tell you that you have to use only certain types of tomatoes to make sauce and I’m here to bust that myth. I make sauce out of any and every kind of tomato I grow. I also don’t bother to peel or seed them! If you have a really good blender, then the seeding and peeling becomes unnecessary. I just throw it all in my Vitamix and I’m good to go. This saves so much time.
I often do this with just the fresh raw tomatoes, it makes the most amazing fresh tomato sauce you can imagine. A few garlic cloves, a little salt, some basil leaves if you like - blend it all until smooth and serve. This also freezes really well, and it’s wonderful to have that fresh taste of summer in the middle of a long, cold winter.
But today I’m going to tell you about roasted tomato sauce.
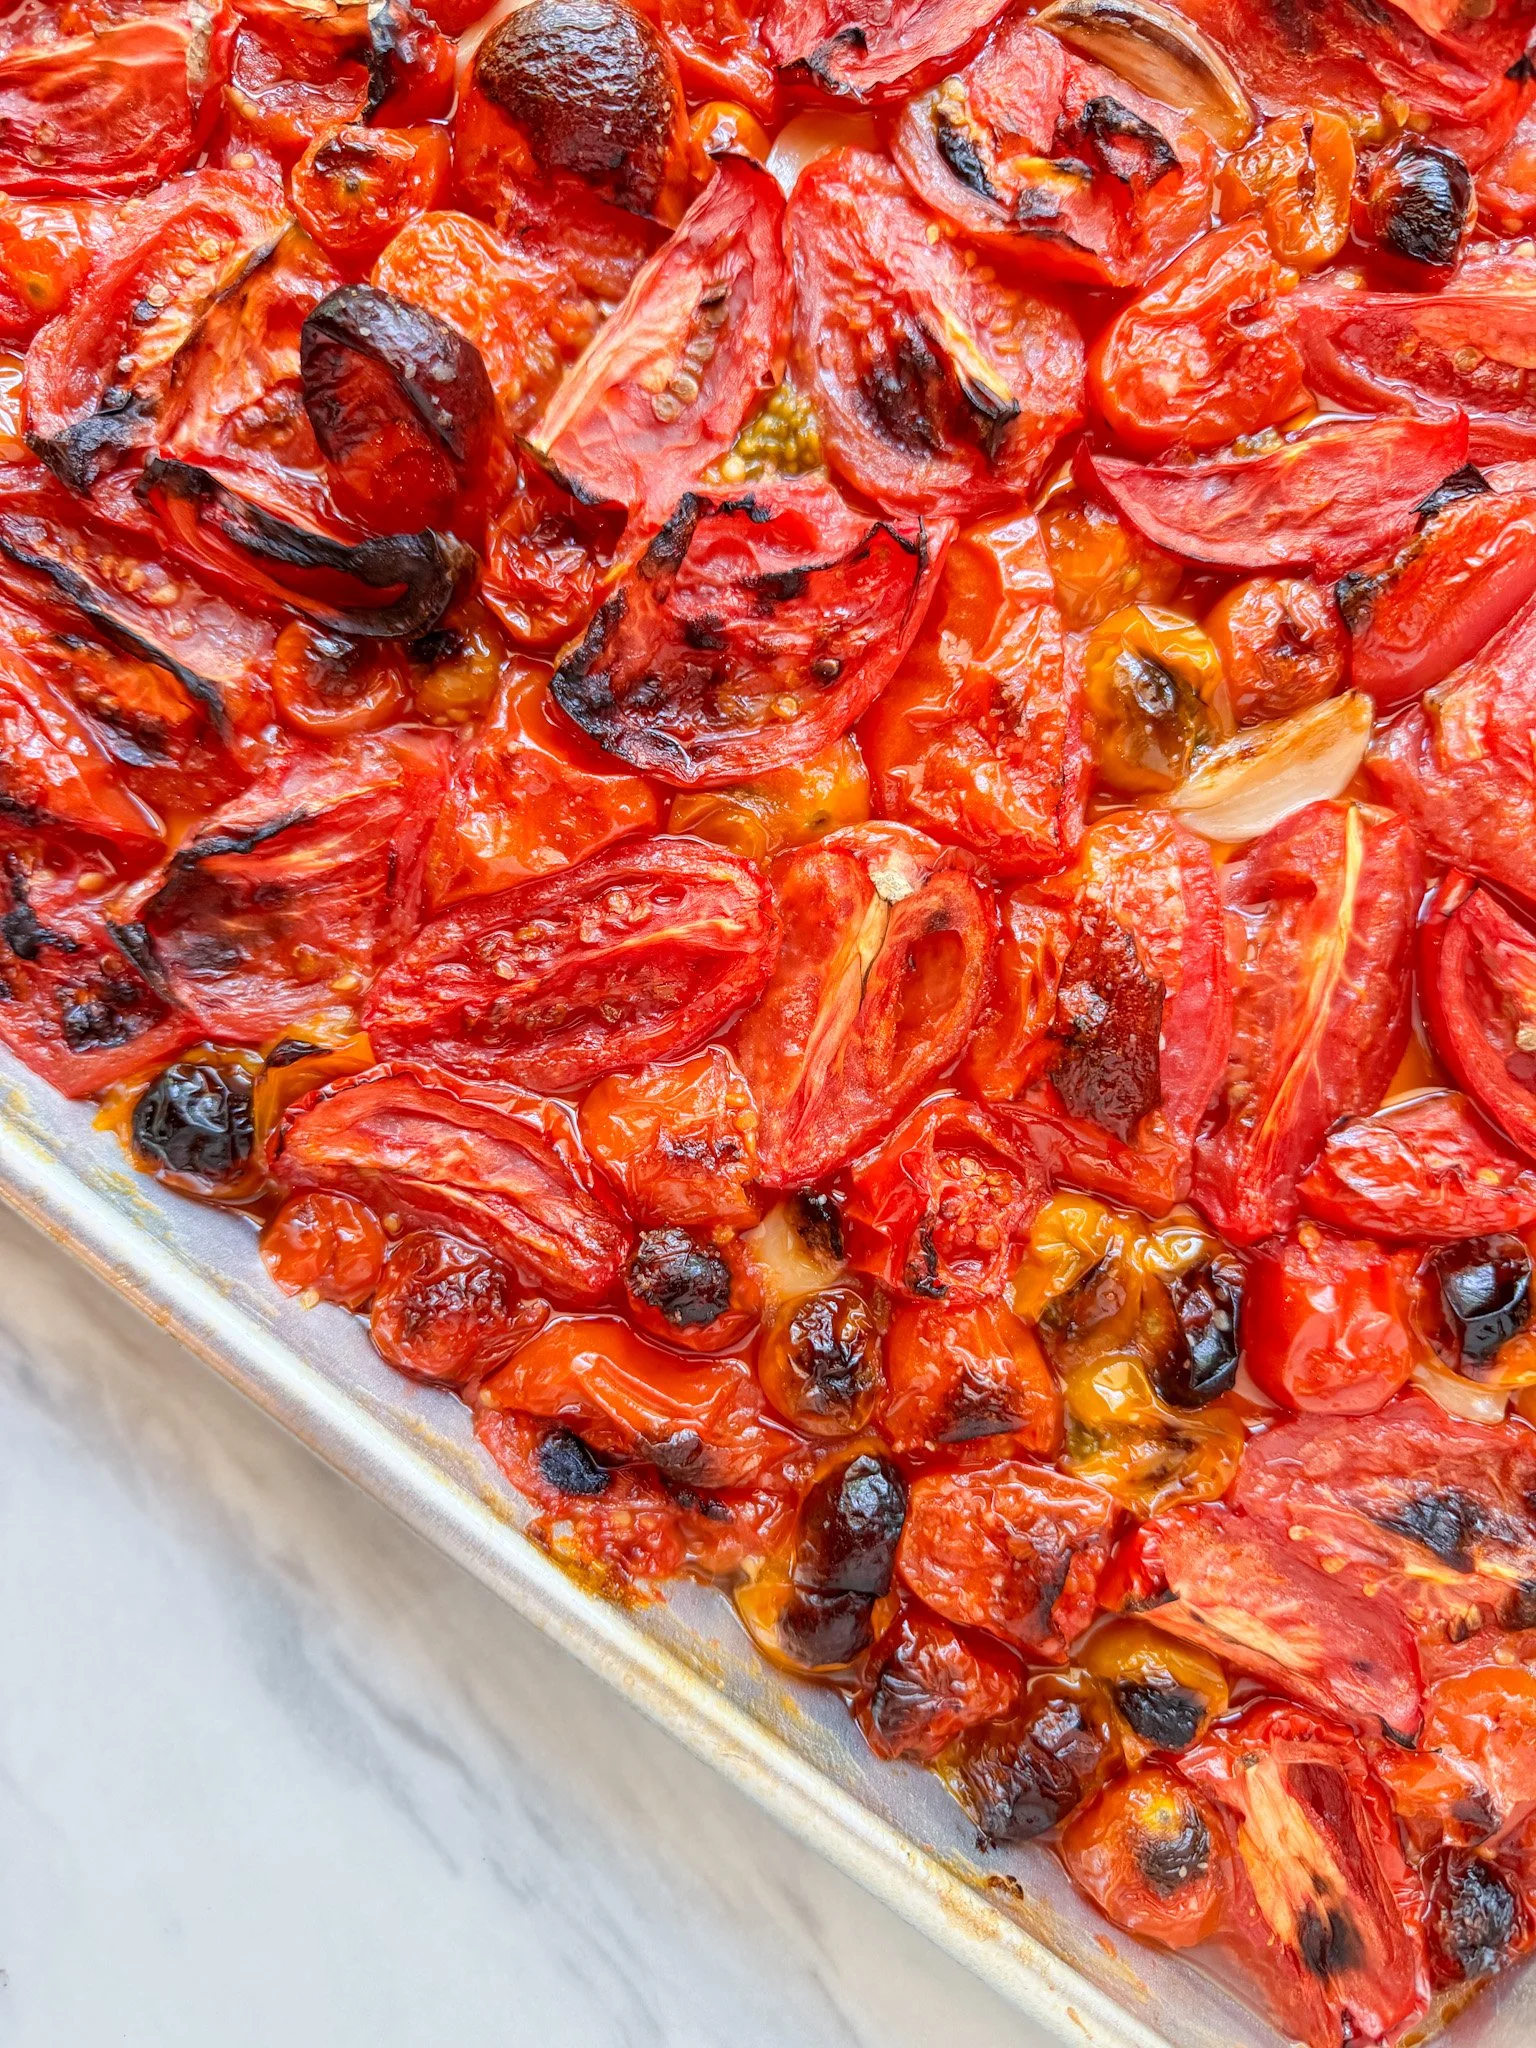
Roasting the tomatoes is an amazing way to bring out flavor, some of these garden tomatoes get so sweet and jammy with roasting that they are practically like candy. I actually have a hard time resisting just snacking on them right off the tray.
This isn’t so much a recipe as it is just some general guidelines. I don’t know what type and size and quantity of tomatoes you have - but it really doesn’t matter.
Here’s how to make simple roasted tomato sauce:
1) Cut your tomatoes into roughly similar size chunks. Cherry or grape tomatoes are usually left whole, smaller Romas I maybe cut in half, bigger tomatoes might need to be cut in several pieces.
2) Drizzle some oil over a sheet pan - I like to do this with a mixture of avocado oil for temperature tolerance and a nice olive oil for flavor.
3) Toss all the tomatoes on the sheet pan and stir them around a bit to get coated with oil, drizzle a bit more over the top if you like.
4) Add a few peeled garlic cloves.
5) Sprinkle salt generously over the top of the whole thing.
6) Stick the pan in the oven - I do mine on about 375 convection, but if you don’t have a convection oven you might want to try 400 degrees.
7) Check the tomatoes after about 15-20 minutes, maybe give them a stir, and keep cooking, checking again in 5-ish minute increments until you think they look ready. You can see the pic below of what mine look like. You want to start getting some browning and caramelization, maybe a few even darker edges but not too much, those cherry tomatoes should burst, some of the juices should start to reduce, the garlic should get a little browned and soft.
8) When you are satisfied with how the tomatoes look, take them out and let them cool for a bit.
9) Dump the whole thing into your high powered blender and puree until smooth. Taste and decide if you want to add more salt, or some fresh garlic, or a little basil or other herbs.
That’s it. Sounds like a lot of steps but it’s really quite easy. If you have a good blender then you shouldn’t have many whole seeds left, and a few little seeds don’t bother me. But if you’re going to be bothered by a few seeds you could put this through a food mill.

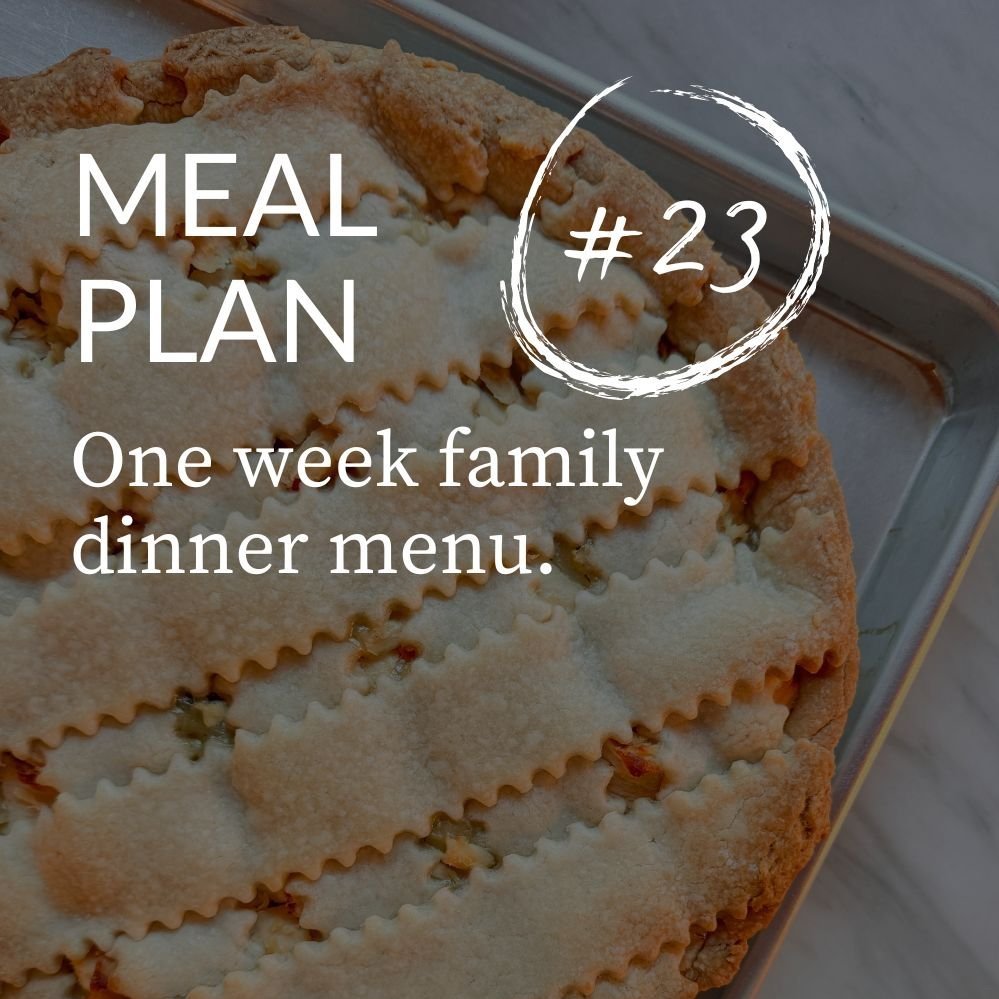
Family Meal Plan #23
Welcome to our family meal plan!

This is a real reflection of what my family actually eats—some weeks I’ve got recipes to share, sometimes there are photos, and other times it’s just me giving you the rundown of what I made. I hope these menus give you some fresh ideas or inspire you as you’re planning your own meals. Feel free to adapt or follow along however it works for you—because meal planning should make life easier, not harder!
From one busy home cook to another, let’s make dinner a little less stressful together.
You can find all of our past meal plans here. And don’t forget to subscribe to my newsletter, Notes from the Kitchen Table, to get the latest weekly meal plan delivered straight to your inbox!

On this week’s menu:
(see below for a few notes about some of the meals)
Sunday: Leftovers
Monday: Baked mac & cheese, lemon dijon chicken breasts, tomato, basil, and avocado salad
Tuesday: Chicken tacos
Wednesday: Leftovers
Thursday: Seared ahi tuna bowls
Friday: Homemade pizza and a big salad with my lemon vinaigrette.
Saturday: Costco chicken pot pie & salad
Sunday: Burgers

A bit more detail about some of the meals:
Sunday we had leftovers. A little unusual for us but I had cooked so much the week before that the fridge was too fun with leftovers to make anything new. Yay for me - I get an extra night off from cooking!
Monday I was actually again using up some leftovers. I don’t always figure the amount of pasta right, so I had a lot of already cooked pasta that needed to be used. So I made a quick baked Mac & cheese with riced broccoli and a bread crumb crust. You can see this one on Instagram for a little more description of how I made it.
To go with the pasta I also cooked some chicken breasts. I like to cook extra chicken because we use it up in all kinds of ways for lunch. I did these similar to my lemon-dijon chicken thighs recipe, but cooked at 350 convection for 30 minutes.
I made a quick salad with some tomatoes and basil from the garden, a couple ripe avocados, a little shallot, and dressed with just balsamic vinegar and a lemon olive oil.
Tuesday was chicken tacos again. This time I took some already cooked chicken, chopped it up a bit, and added it to a pot with enchilada sauce to simmer for a while. Very easy and we had it with all the usual taco fixings.
Wednesday is our usual leftover night.
Thursday I made one of our all time favorite meals: Seared Ahi Tuna bowls. If you can get some nice pieces of ahi tuna, this is a great simple way to prepare it that feels like a high end restaurant meal but is actually super quick for a weeknight dinner. I’ve got the tuna recipe here. I serve this with a spread of options so everyone can make their own bowl. We have rice & mixed salad greens, tomatoes, edamame, scallions, and tofu. Sometimes it’s just cubed plain tofu but this time I made my favorite Crispy Salt and Pepper tofu. I always have to at least double that recipe because my family devours it. I also made a quick cucumber salad and a simple soy ginger dressing, I don’t have exact recipes for the salad and dressing, but loose directions for those are below.
Friday was homemade pizza. I make a sourdough crust. No recipe, sorry, I just make it by feel. I usually make four pizzas - two thick crust pan pizzas and two thin crust pizzas cooked on a baking steel. Everybody is happy.
Saturday we had Costco chicken pot pies and a salad. If you’ve never tried the chicken pot pie at Costco then you definitely must. I make a pretty darn good homemade pot pie, but the Costco ones are equally amazing and already made for you. They are a treat for me to have a night off from cooking. I always buy two because we will eat a whole one for dinner but the family always wants leftover so I have to get a second one so we can have it leftover.
Sunday we had burgers. I had a variety of frozen burgers so I cooked up several of a few different kinds - chicken, salmon, and veggie.
That’s the week!
Here are those loose recipes for the cucumber salad and soy-ginger dressing I mentioned above:
Cucumber salad:
Thin sliced cucumbers
Shallot
Seasoned rice vinegar
Sesame oil
Soy sauce
Optional: Garlic, sesame seeds, Furikake
This is one of my favorites and super easy to make. I usually do 2 big cucumbers and one small shallot, a couple tablespoons of the seasoned rice vinegar (important that you get the seasoned one, otherwise you’ll want to add a little sugar), a couple dashes each of sesame oil and soy sauce. Taste and adjust the dressing to your liking. You can add a little garlic, some sesame seeds, or our favorite is Furikake, which is a Japanese seasoning blend usually served on rice but I think it adds a nice flavor to the cucumbers.
Soy Ginger Dressing:
Soy sauce
Sesame oil
Avocado or other neutral oil
Fresh ginger
Seasoned rice vinegar
Lemon juice
This is another that I usually don’t measure. You can make as much as you like, it’s great on salad or as a dipping sauce for anything Asian. I generally do about equal parts oil to vinegar/lemon/soy. For the oil half you can use all sesame oil if you like that flavor, or use a mixture of sesame plus another neutral oil. For the other half I do about equal parts soy sauce, rice vinegar, and lemon juice. I like the bright tang of lemon juice, but you can play around with this and see what you like. The real star of this is the fresh ginger - grate it very fine, I use a micro grater. Start with maybe a half a teaspoon to about a cup of the oil+vinegar and see if you want more. We like ours rather gingery.
Have a Question?
Ask me anything. Do you need lunch packing advice or meal planning suggestions? Or do you have other food or family management related questions? My goal is to be your resource for tips and advice - from a mom who has been there, and done that.
Reply to the newsletter email, post a comment, or hit me up on social media. I’ll do my best to answer, and your question could be featured in my newsletter.
Don’t forget to follow along on Instagram, Facebook, and Threads for daily tips and inspiration, and subscribe to the newsletter to get my weekly updates right in your inbox.
➡️ Follow Me on Instagram | ➡️ Follow Me on Facebook | ➡️ Follow Me on Threads
Wishing you a delicious and stress-free week ahead!
– Lisa

Moroccan Spiced Slow cooker Chicken
A super easy dump and forget it slow cooker recipe with amazing flavor.

There is a printable recipe card at the end of this post.
Recipe: Moroccan Spiced Slow Cooker Chicken with Chickpeas and Potatoes
Now that we are back in school and our days are getting really busy, I’ve been looking for more slow cooker recipes. There are more and more days when I need to be able to put dinner together earlier in the day because we are running around and on the go right up until dinner time. I don’t want to get home after all the pick-ups and drop-offs and still have to start cooking, so slow cooker meals are perfect for this busy season of life with kids.
This meal I’m sharing with you today started out as an experiment, when I couldn’t find an existing recipe that was really grabbing my attention so I just came up with something on my own that sounded good. And it was a definite success! Every now and then I come up with something that is an instant winner on the first try.
This recipe has everything you want in a slow cooker meal - it’s literally just layering the ingredients in the cooker, with no pre-cooking or browning required, very minimal prep (really just slicing some onion and roughly cutting a few potatoes), hands off cooking time, and amazing flavor. It does require having a couple of specialty ingredients already pre-made if you want this to come together fast, but fortunately they are items that I keep ready in my kitchen almost all the time and I highly recommend that you do too.
So here’s what’s in it:
canned garbanzo beans / chickpeas (with their liquid!)
onions
preserved lemons
moroccan spice blend
salt
yellow potatoes
frozen chicken thighs
When I first made this I debated about adding the potatoes but I’m so glad I did. They absorb so much wonderful flavor and get melt in your mouth soft and delicious.
The preserved lemons and moroccan spice blend are two items that require advance prep, but they are things I absolutely love for adding a huge punch of flavor to so many dishes. I always keep a jar of preserved lemons in my fridge, and when I mix up this moroccan spice blend I always make a lot so I have it ready for quick meals.
Preserved lemons are very easy to make. They are just lemons and salt, but the process that happens as the salt preserves the lemon creates a really one of a kind flavor that’s hard to substitute. It’s such an easy way to add a huge burst of flavor to your dishes that I highly recommend you make some to keep on hand. I have a short little post about them here, and you can find plenty more online. This is one that you don’t have to be super precise about it, you are basically just layering lemons and salt in a jar. When I make these I like to leave them out on the counter for the first few weeks to let them do their magic, and then I store in the refrigerator. Because you are eating the whole lemon rind when you use this, it is nice if you can find organic lemons, but if you can’t then I just recommend that you wash your lemons first. Most recipes tell you to scrape away the pulp of the lemon before using the preserved lemon peel, but I almost never bother doing that. I love the extra flavor that the pulp adds to my dishes.
My Moroccan inspired spice blend is a version I’ve developed after trying several different recipes I found. This version packs a big punch of flavor without making foods spicy hot, which my kids don’t like. I’m always trying new ways of adapting spices for recipes to capture flavor without heat and this one really fits that requirement perfectly. It’s become one of my favorite go-to seasonings. It’s amazing on all kinds of meats as well as roasted vegetables.

How to make this Moroccan Spiced Slow Cooker Chicken with Chickpeas and Potatoes.
First you’ll want to slice your onions and cut your potatoes into big chunks. It’s good to leave the potatoes relatively large so they hold up to the long cooking time that the frozen chicken needs. If the potatoes are on the smaller side you might even leave them whole. I used yellow potatoes here because I like the hint of sweetness they add and I think they hold their shape better with longer cooking, but feel free to use your favorite kind. You could also decide to add the potatoes in a bit later, but I love all the flavor they absorb and how soft they get in the longer cooking time, and I wanted this to be a dump and walk away kind of recipe, not one you have to come back to and add things.
In your slow cooker you are just going to layer all the ingredients. Start with the canned chickpeas and their liquid. This part is important. You need some liquid to get that slow cooking process going, and the liquid from the can of garbanzo beans is full of flavor you don’t want to waste. So don’t drain - just pour the whole can in there. If you accidentally drain that liquid then you will need to add a little water or broth. On top of that place sliced onions, chunks of potato, then several pieces of preserved lemon, and then the spice mix. Then I put the frozen chicken thighs on top of all that and more spices. Cover and cook.
Quantities and cooking time are in the detailed recipe card below. As with all of my recipes though, the quantities don’t have to be exact. Feel free to use more or less of any ingredient and customize to your liking. If your chicken isn’t frozen you’ll want to cook this for less time. You could certainly also do this with bone-in thighs, or with breasts, and I’m sure it would be equally delicious. I also think this would be amazing as a vegetarian dish leaving out the chicken altogether and just using more beans and potatoes and maybe even adding other veggies like cauliflower. The frozen chicken adds a lot of moisture, so if you aren’t using that then you’ll probably want to add a half cup or so of broth or water.
I served this over couscous with a dollop of plain yogurt, but we also ate it leftover both just by itself and over some leftover pasta. It was amazing no matter how it was served, and only got better after it sat in the fridge overnight.
I hope you enjoy and let me know if you try it.

Moroccan Spiced Slow Cooker Chicken Thighs with Garbanzo Beans and Potatoes
Ingredients
Instructions
Notes
Feel free to adapt any of the ingredients to your preference - more or less of any ingredient will work out just fine. If you choose to use fresh instead of frozen chicken you will want to cook this for shorter time, I suggest about 3 hours. See the original post on whatlisacooks.com for more suggestions and notes.

Banana Bread No. 03
An extra healthy banana bread recipe your family will love that comes together quick and easy in just one bowl.

This is a healthier than average banana bread recipe that is very loosely based on Martha’s recipe, which still is one of the best ever. But this version has been tinkered with enough that I think it can be called its own recipe at this point.
There is a printable recipe card at the end of this post.
I have two other quick bread / banana bread recipes posted on this old food blog, this one is a really flexible blender recipe that uses very little sugar, tells you how to adapt it to just about any fruit or vegetable, and comes together without having to soften butter first; and this one here is also similar but specific to banana chocolate chip; so this new one gets the very original name of No. 03.
Those earlier recipes were adapted when my kids were smaller and I was more concerned about refined sugars in their diet. I don’t worry about that quite as much now because they all are mature enough to make relatively smart food choices for themselves, and we believe that a little sweet treat here and there is a fine part of a balanced diet. But I still try to pack in extra nutrients whenever I can, and sometimes the best way to get kids to eat the extra healthy stuff is to hide it in something a little sweet. It’s all about balance.

So let’s talk about this recipe specifically. As I said above, I started many years (decades?) ago making Martha Stewart’s original banana bread recipe. It’s about as perfect as a banana bread recipe can get, and I highly encourage you to try it as originally written. But let’s be honest, part of what makes it so delicious is because it’s practically cake, with the white flour and white sugar. I wanted to try making something that preserved what made that recipe special (it’s so moist!) but see if we could pack enough extra nutrition in that it feels ok to eat as a stand alone quick morning meal, with enough protein and fiber to get them through a school morning.
I also can never get away with making just a single loaf of banana bread, or just a dozen muffins. So when I develop recipes I like to make them bigger than most. If you’ve followed me for any length of time you’ll know that one of my rules to live by is that I always, always, always make extra, so we have enough for leftovers or for the freezer. But if you’re not cooking for 6 people, including four hungry teenagers, feel free to cut this in half.
I like to bake this as muffins for school morning grab and go, I can pack these full of extra goodness by using whole wheat flour, yogurt, eggs, flax and wheat germ, but as long as I also add a few chocolate chips my kids with gobble them up. You can even get away with a little less sugar than this recipe calls for, I’ve cut the sugar by up to half occasionally and they still taste great, especially if you are using really ripe, sweet bananas.
They freeze great, and we love having a stock of muffins in the freezer for easy weekday breakfasts. If I make a couple dozen muffins I will usually leave out enough for a couple of days meals and then put the rest in the freezer.
Here’s what you need to make this banana bread recipe.
But keep reading because I’ll also let you in on a few secrets that most people won’t tell you about baking.
butter (regular salted butter)
sugar (white, brown, or a combination)
eggs
flour (white, wheat, or a combination)
ground flax, wheat germ, oat bran
baking soda
salt
mashed ripe banana
sour cream or plain yogurt
vanilla extract
chocolate chips or nuts
butter or cooking spray for your pans
muffin or loaf pans
Here’s the thing most people won’t tell you about baking - the recipes don’t really need to be quite as precise as many will have you believe. Of course if you are making a very delicate fine cake or a souffle then you probably should follow a recipe exactly, at least the first time you make it.
But this kind of quick bread recipe really is way more flexible than you might think. You can use a variety of types of flour and sugar, you can try it with less sugar, you can add in more or less of the flax or wheat germ, or try oat bran or even a bit of whole oats instead. We like to add chocolate chips, but you could leave those out, or add nuts. In our house we don’t love nuts in this kind of thing, but it is a great way to add extra protein if you like them.

How to make this:
I make this using a one bowl method. A lot of recipes want you to sift all the dry ingredients together separately, but I feel like that’s mostly outdated advice. I mix all the wet ingredients together first, creaming the butter and sugar and then mixing in the rest, and then sprinkle the dry ingredients somewhat evenly over the top, and then combine. It all comes together just fine and you only end up with one bowl to wash.
You can spray your pans with cooking or baking spray, or it’s extra nice if you take the time to smear them with butter. After you fill the pans it’s quite nice if you sprinkle a little extra sugar over the tip, this give the top of nice extra bit of crust, but this is totally optional.
This is a double recipe, so if you make it in loaves it will make two. For muffins it makes about 2 dozen, depending on size of your muffin cups and how much you fill them. Sometimes I make one loaf and some muffins.
I bake this at 350, or 325 convection, for about 1 hour for average sized loaves or about 30 minutes for muffins. You also need to remember that not every oven is the same and not every muffin or loaf pan is the same, so you can’t take the time listed in any recipe as absolute. You need to know your equipment, and if not then you need to be vigilant and check things. When I’m baking a new recipe I tend to set my timer for about 3/4 of the recommend time (so, 45 minutes if the recipe says 1 hour) and check and see how it’s doing. Use a toothpick or a skewer and see if it’s still really wet in the center, check and see how it’s browning or if it’s getting too brown, and decide how much longer you need to go. I’d rather find that something is a little undercooked and needs more time than not check and realize too late that it’s overcooked.
Here’s the full recipe. I hope you enjoy!

Banana Bread No. 03
Ingredients
Instructions
Notes
See the notes in the blog post about this recipe on www.whatlisacooks.com for more instructions and comments.
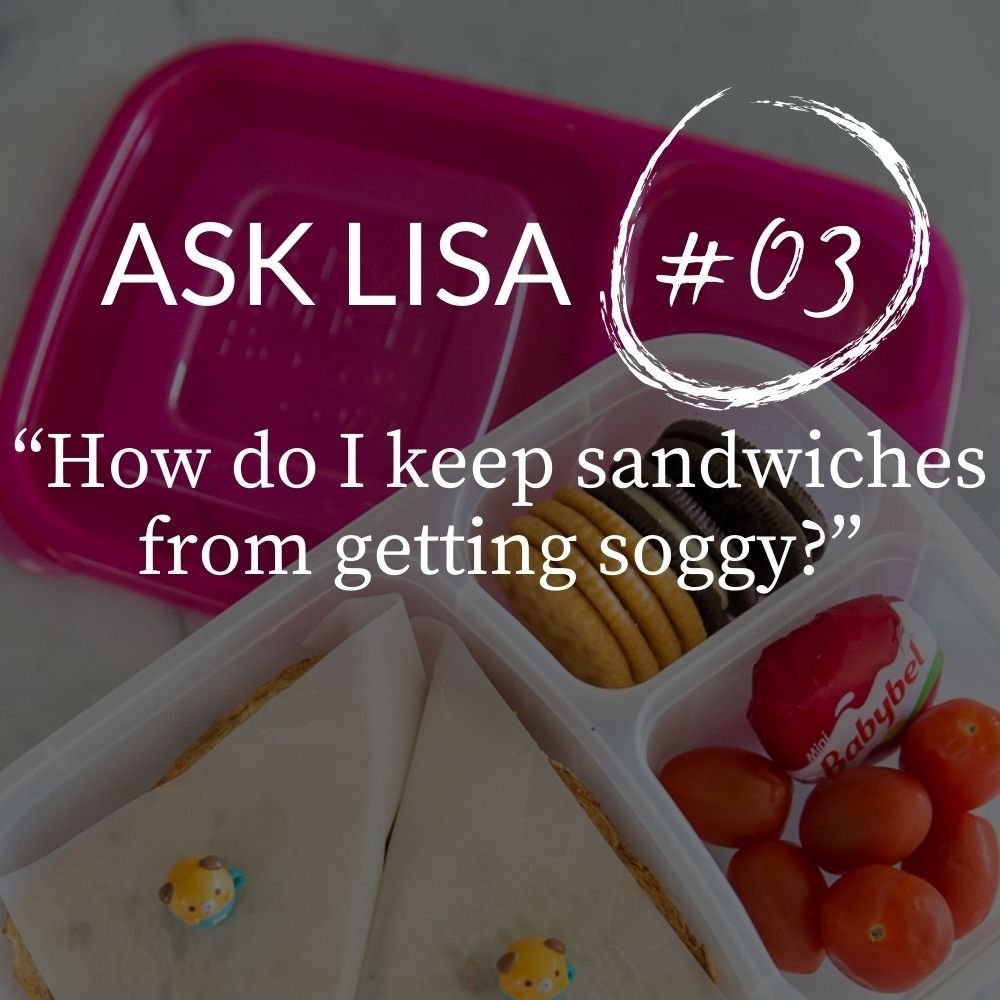
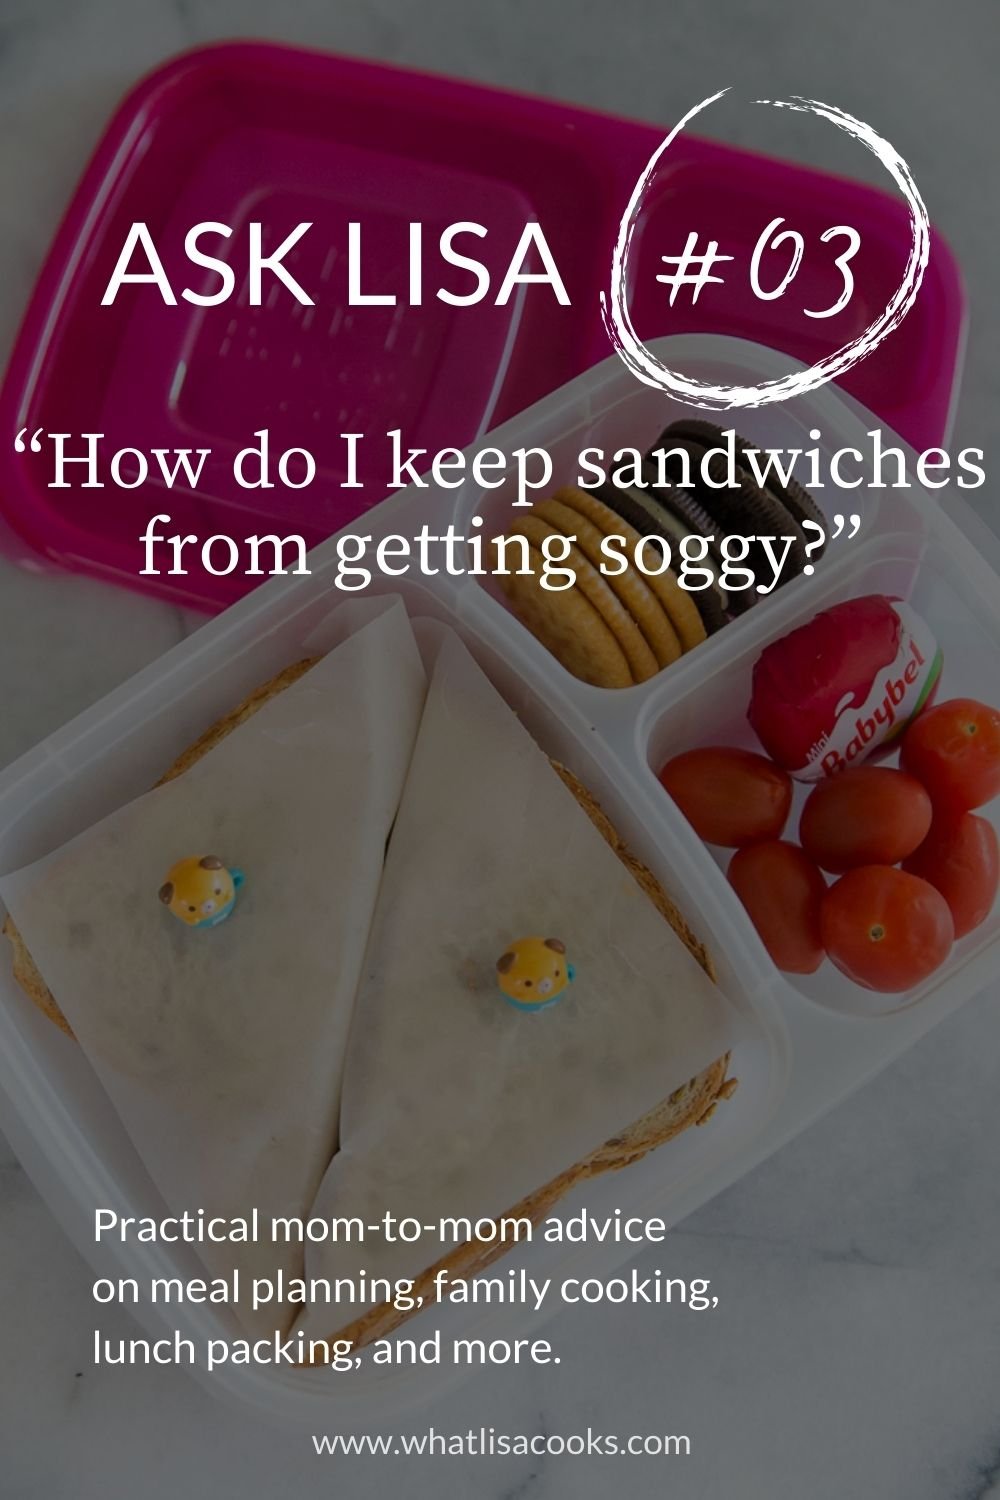
Ask Lisa #03
Answers to a really common question about how to pack sandwiches for lunch and keep them from getting soggy.
Reader Q&A
Here’s where I answer your questions! I get questions all the time from readers about all kinds of things I share - lunch packing, cooking, meal planning, organization, and more. Each week I am sharing my answers to one of your questions. Make sure you’re signed up for my newsletter so you never miss my weekly reader Q&A.
Have a question for me? Comment below or drop me a message on social media.
This week’s question:
Q: How do I keep sandwiches from getting soggy when I pack them ahead of time?
A: This is another one of the questions I get the most when I talk about packing lunches ahead, so I guess it must be a common problem for a lot of you. If you struggle with how to pack lunches ahead of time I am so here for you. This is my thing!
I pack sandwiches days in advance all the time, I definitely have some tricks that can help! They mostly come down to putting just a little more thought into the construction of your sandwich, and what ingredients and methods are causing it to be soggy. I’ve put all my best tips for packing sandwiches ahead of time in a whole new blog post for you. I promise you that you will definitely want to try these tips because packing lunch ahead of time is one of the best things you can do to make school day mornings easier and less stressful. ➡️ Click here to read that post now.
If you want more tips about packing all kinds of lunches ahead of time, you’ll definitely want to hop over and read this post with all of my tips, because packing lunches ahead is such a time saver and a massive school day morning stress reliever that it’s worth figuring out a few little tweaks to your lunch packing to make this work for you. ➡️ Click here to read that post now.
Have a Question?
Ask me anything. Do you need lunch packing advice or meal planning suggestions? Or do you have other food or family management related questions? My goal is to be your resource for tips and advice - from a mom who has been there, and done that.
Reply to this email, post a comment, or hit me up on social media, and your question could be featured in next week’s newsletter.
Don’t forget to follow along on Instagram, Facebook, and Threads for daily tips and inspiration.
➡️ Follow Me on Instagram | ➡️ Follow Me on Facebook | ➡️ Follow Me on Threads
Wishing you an easy week ahead!
– Lisa

Seared Ahi Tuna
Fast and easy restaurant style seared ahi tuna for easy weeknight poke bowls.
Here is a quick recipe for my seared ahi tuna that will make you feel like you are having a special meal without having to spend a fortune at a restaurant.
We are big fans of sushi at our house, but sushi is so expensive that it has really become maybe a once a year treat. I love to find ways to replicate restaurant meal favorites at home, and this seared ahi tuna has become one of my family’s most requested meals. It’s like a great sashimi or poke bowl type of meal, we serve it with a variety of bowl fillings to make your own combination, and everyone loves it.
I’m lucky that one of my favorite local stores almost always has these nice packages of ahi in the freezer section for a reasonable price, so I grab a couple packs whenever I see them. This takes literally 1 minute to cook.
I didn’t do a recipe card with specific quantities for this one because I really don’t think you need it it. This is so simple to make but feels so fancy.

Here’s what you’ll need:
Fresh / frozen ahi tuna steaks or pieces
soy sauce
sesame oil
white pepper
neutral high temp oil for frying
How to make it:
If you’re tuna is frozen you will obviously want to thaw it first. Then I just drizzle a little soy sauce and sesame oil over the pieces of fish and sprinkle a little white pepper. The quantity doesn’t need to be very specific, just enough to get each piece of fish lightly seasoned. I turn the pieces over once or twice to make sure they are well coated.
This cooks so fast that I don’t even start cooking until all the other parts of meal are totally ready to go.
When you are ready, pour a couple of tablespoons of oil into a very hot pan. I like to use mostly a neutral oil, with a few dashes of toasted sesame oil added for extra flavor. You’ll want to be sure to have your exhaust fan on, as this is going to get smokey.
When the oil is just starting to smoke place the pieces of tuna in and watch your timer. After 30 seconds turn them over and cook another 30 seconds on the other side. Remove from the pan and get the next ones in. The goal is to get them nicely browned on either side but still very rare in the middle. Remember that fish continues to cook a little after it’s removed from heat, so you definitely want plenty of pink still visible in order to make sure you get that finished rare middle. I cook these just a few at a time and set them on a plate to rest.
When all the pieces are finished cooking, I like to slice them thin for serving. But you could serve them whole as well.
Serve it with:
steamed rice
spring mix / salad greens
sliced cucumbers, or a marinated cucumber salad
diced tomatoes
edamame
cubes of tofu, or my crispy salt and pepper tofu.
furikake (Japanese rice seasoning)
a simple ginger-soy dressing (whisk together sesame oil, rice vinegar and/or lemon juice, freshly grated ginger, soy sauce)


Crispy Salt and Pepper Tofu
Easy recipe for how to make restaurant quality crispy salt and pepper tofu at home.
My version of a restaurant favorite - crispy salt and pepper tofu.
Scroll to the end for a recipe card.

Crispy salt and pepper tofu is one of my favorite Asian restaurant dishes to order when I can find it. I’m sure someone will jump on and correct me about calling it Asian, but I’m not sure which cuisine it really originated from. I’ve had it at Chinese, Japanese, and Vietnamese restaurants.
We don’t eat out much these days, so when I’m craving a favorite restaurant dish I have to figure out how to make it myself. I’ve been working on this one for years and have finally gotten it to how my family and I absolutely love - it’s crispy and salty on the outside, and still soft and moist on the inside. It’s messy to fry but otherwise very easy to make.
Read on to find out how I make this restaurant favorite dish at home, and scroll to the end of you want a printable recipe card.

What you need to make Crispy Salt and Pepper Tofu:
The recipe below has approximate quantities for making 1 package of tofu, but I usually double or even triple this because we devour it.
Extra firm tofu
Corn starch
Kosher salt (or a somewhat coarse salt of your choice)
Pepper - we like either white pepper or szechuan pepper
Alternatively you can replace the separate salt and pepper with this blend which is my favorite.
Oil for frying - I use a coconut-safflower-avocado blend, with a few dashes of toasted sesame oil for extra flavor.
Fresh garlic (optional)
Green onions (optional)
Extra salt & pepper for garnish
Oyster sauce (optional)
How to make it:
The first thing you need to do is get a bit of the water out of your tofu. I like to slice the block of tofu in half lengthwise and layer it between a few dishtowels with some kind of weight on top, ideally for at least an hour.
While the tofu is pressing you can mix your corn starch, salt, and pepper. The quantities I have given you in the recipe card below are approximate. I recommend you season the corn starch and then dip a finger in and taste it. You should taste the salt and pepper. Remember that tofu doesn’t have much flavor on it’s own, so your seasoning needs to do all the flavor heavy lifting here.
Next you want to cut your tofu into bite sized cubes. These can be any size you like.
Then toss the cubes of tofu in the seasoned corn starch mixture.
Now you are ready for frying. Heat your oil in a deep frying pan, about an inch deep. Test it with a drop of water to make sure it’s hot enough - the water should sizzle instantly when you drop it in. When the oil is hot enough start adding the tofu cubes and fry them. Do this in batches so they stay spread out and don’t crowed each other. You want them to get nice and crispy on all sides.
Remove the fried tofu cubes from the pan and sprinkle a little extra salt and pepper over the top.
When all the tofu is fried I like to make the little extra garnish of fried garlic and onion. A tablespoon or two of diced or sliced fresh garlic and green onion in the hot oil and stir them around and fry until they get golden, and immediately strain them out and sprinkle over the tofu.
We like to serve ours with a little Chinese style oyster sauce for dipping. One of my favorite ways the have this is with a seared ahi tuna bowl - I make this easy seared ahi tuna, and serve it with steamed rice, salad greens, edamame, cucumber salad, tomatoes, and the crispy tofu. Delicious.


Crispy Salt and Pepper Tofu
Ingredients
Instructions
Notes
I almost always at least double this because we love it so much.
As with all of my recipes - I've given you quantities but they are approximate and really flexible. I don't usually measure when I make this. You can, and should, adjust ingredients to suit your tastes.
I usually use a neutral vegetable oil for frying, but sometimes it's nice to add a drizzle of toasted sesame oil to this for extra flavor.
We love these crispy tofu bites plain, but the garlic and onion topping puts them over the top if you have the extra time. We also like to serve some oyster sauce on the side for dipping.
The tofu tastes great left over. It won't retain the crispness, but the flavor is still delicious.


Notes from the kitchen table: no. 07
Thoughts about self care, a birthday, easy lunch ideas, and meal planning.
Welcome to another week of Notes From the Kitchen Table!
I actually missed a week here, things have been busy. We’ve had house guests, theater auditions, scout and school camping trips, volunteer time, a birthday, and plenty more. The time gets filled so easily that sometimes I have to just push the pause button and take a break from anything extra.
The good news is that two of my girls auditioned and got roles in local theater productions this fall. (For a small town, we have an amazing local arts scene.) The bad news is that it’s two separate productions at two different locations with sometimes overlapping and conflicting rehearsal schedules. Sh*t’s about to get real as far as crazy schedules go!
I’ve learned over the years as a busy mom that pushing pause and taking breaks is really the simplest and often the best kind of self care. Especially when schedules get this busy, I have to take little breaks wherever I can find them. I think my kids have all learned this kind of self care skill too, they all really appreciate the value of down time and saying no, especially now that they are in high school and have a lot of demands on their time.
What do you do for self care? I’d love to hear from you.
In other news - we had a birthday this past week!
My oldest set of twins are 17. It’s crazy to think that I’ve been a mom for seventeen years. The time has flown by. I asked them if they wanted to do anything special for their birthday, but we’ve all been so busy lately that everyone agreed that a weekend of doing nothing was exactly what they wanted. So a weekend at home, pizza and pancakes, pool time and movies, and of course plenty of cake, was just what we all needed.
We have a birthday tradition at our house of a birthday pancake stack for breakfast, complete with candle and whipped cream and sprinkles. It’s a fun little way to start the day. I usually make homemade pancakes, but in extra busy years I have used frozen pancakes for this instead and the kids love it just as much.
What birthday traditions do you have at your house?

(I don't share current pics of my kids publicly, but here's a throwback one from a fun birthday many years ago.)
OK, what’s in this week’s issue:
I’m sticking with the birthday theme for some of the updates this week. For school lunch packing I’ve got some really simple lunches to show you for making a school day special occasion just a little more fun, plus my answer to a really common reader question about packing lunches ahead. We’re going to talk a little about birthday cake and birthday dinners, social media and blog post highlights, and of course updates on family meal planning.
Make sure you don’t miss a weekly update - click here to subscribe to my substack and you’ll get these updates in your inbox. The archive of all my weekly updates and past meal plans will always be available on the blog as well.
Let’s dig in!
Tip of the Week:
For this week’s tip I thought I’d talk about birthday cake, and how as busy moms we’ve really got enough going on without pressuring ourselves to feel like we have to make a homemade cake. Hop on over to this tip to read my thoughts about grocery store birthday cakes, and my favorite homemade cake recipe if you really do want to make one from scratch.

This is a grocery store cake!
Ask Lisa - Reader Q&A:
My answers to frequently asked questions from social media, blog posts, and more.
Q: How do I keep sandwiches from getting soggy when I pack them ahead of time?
A: This is another one of the questions I get the most when I talk about packing lunches ahead, so I guess it must be a common problem for a lot of you. If you struggle with how to pack lunches ahead of time I am so here for you. This is my thing!
I pack sandwiches days in advance all the time, I definitely have some tricks that can help! They mostly come down to putting just a little more thought into the construction of your sandwich, and what ingredients and methods are causing it to be soggy. I’ve put all my best tips for packing sandwiches ahead of time in a whole new blog post for you. I promise you that you will definitely want to try these tips because packing lunch ahead of time is one of the best things you can do to make school day mornings easier and less stressful. ➡️ Click here to read that post now.
If you want more tips about packing all kinds of lunches ahead of time, you’ll definitely want to hop over and read this post with all of my tips, because packing lunches ahead is such a time saver and a massive school day morning stress reliever that it’s worth figuring out a few little tweaks to your lunch packing to make this work for you. ➡️ Click here to read that post now.
Lunchbox Inspiration:
Let’s talk about birthday lunches!
When kiddos have to be at school on their birthday, why not make their lunch just a little more special? It’s really easy to add a couple of fun little touches to a lunch to make it feel like a special occasion.
Simple birthday cupcake toppers stuck in a sandwich, maybe a fun cut sandwich, a cute napkin, an extra sweet treat - just a few ideas for how you can really quickly an easily make the birthday school lunch feel just a little more fun and special.
I shared a couple of examples of these ideas on my Instagram this week, so be sure to ➡️ check them out.
I also have a post on the blog with even more of my favorite tips for making lunch packing (and eating) just a little more FUN - great ideas you can use for birthdays, holidays, or any time you need to make school lunch time feel a little more special. ➡️ Check out this post and let me know what you think.
Featured Blog Posts:
Several posts I want to share with you this week!
I’ve already mentioned a few - the one about packing lunch ahead of time, and the new post about how to pack sandwiches ahead of time, AND the new post about how to pack some special fun lunches. (I have been busy!)
I’ve got a few more to share this week too!
I’ve been trying very hard to get better about writing down recipes of things I make regularly, and I’ve actually got a few new recipes posted for you.
My egg bites recipe: one of my secrets for school day breakfast meal prep for high schoolers.
Quick and simple homemade teriyaki sauce that is great on everything from chicken to tofu to veggies.
A delicious Moroccan spiced pork shoulder, with my Moroccan inspired spice rub - one of my favorite meals for impressing dinner guests
Let me know if you try any of these!
Meal Planning Updates:
Last week’s menu is up on the blog. You can click here to go read that post, with links to some pics, a couple recipes, and a bit more detail about a few of the meals.
I never got around to sharing a meal plan for this week, since I skipped the newsletter last week. But I’ve been sharing a lot lately on Instagram and Facebook, so pop on over to either of those to see some pics of what we are having for dinners this week.
For the big birthday I wanted to try combining a couple of family favorites into one meal - so I made Chicken Parm Meatballs. I’m going to have to make this again soon to write down an actual recipe, because they were so good! I made lots extra (as I always do) because we love leftover meatballs! You can see the pic and description here, and hopefully I’ll get a recipe written soon.
Seriously how are we already looking down the barrel at October?
I like to do a rough meal plan for a month at a time. Those big ones often end up evolving over the course of the month, but I think it helps to at least start out with a big picture view of what we have going on during the month and what we want to eat, and then it’s easier to move things around than it is to start from scratch every week. I haven’t done my monthly plan for October yet, that month is kinda sneaking up on me. But hopefully next week I will have more info about monthly meal planning to share.
For now, I’ve got a list of a few things I am planning to cook next week, mostly items that were on my September plan but got kicked down the road due to busy schedules and calendar changes. Check this space next week to see if I figured it all out.
Ideas for next week’s menu:
Some kind of whole chicken. Either Jamie Oliver’s chicken in milk, or maybe Samran Nosrat’s Buttermilk Chicken. I shared a post last week with favorite whole chicken recipes and I’ve been craving several of them ever since.
Sheet pan sausages and veggies. I’m going to Costco this week and my family loves those chicken and apple sausages that they carry, and it’s an easy weeknight meal paired with some veggies and maybe pasta or rice.
Pozole - this is a delicious Mexican inspired stew that we just love. I have a super shortcut recipe here that makes it a quick weeknight dinner and I think it’s just as good as the more time consuming original version. Depending on what chicken recipe I make, I might end up making a chicken pozole with the leftovers.
I saw this chicken saag recipe from Nom Nom Paleo recently and I’ve been dying to try it, maybe just with rice or maybe with paired another vegetable curry.
Our Friday pizza night is probably going to be frozen pizza because schedules are out of hand and I think I’ll be too tired to make homemade, but I’ll try to make a nice big salad with it.
On the weekend, we’re thinking it might be time to start smoking some meat again, I’ve got some tri-tips and a pork butt in the freezer so we might do one of those. I love doing either of those with the Moroccan inspired spice rub recipe that I shared above.
Social Media Highlights:
I’m headed to Costco this week. I don’t go as often as I used to when we lived in the city because Costco is an hour away now, so it’s kind of a special field trip. I like to ask my followers what their favorite Costco finds are, and I always get some great suggestions of fun new things to look for. Take a look at the most recent Thread about that, and let me know if you have any other ideas to add. I would love to know what you buy at Costco. ➡️ Click here to read that thread.
I mentioned above that I shared some fun birthday lunches on Instagram if you want to check those out, and I’ve shared several of our recent dinners. Check out my Instagram feed to see those.
The other big social media news is that I’m back to posting on my Facebook page too! A lot of the content is the same as what I post on Instagram, but there may be some differences, and it’s another option for keeping up with the latest if you aren’t into Instagram.
Coming Next Week:
I realize now that when I pushed the pause button last week I never got around to sharing the things I said I’d share in this section last time. So here’s that list again and hopefully I’ll keep on track this time…
Next week I thought I would share some of my favorite protein packed lunch ideas, maybe school day breakfast suggestions, and some of my favorite household cleaning hacks. And always my quick tips, answers to reader questions, meal plan updates, and more.
Be sure to check back and subscribe so you never miss an update.
Have a Question?
Ask me anything. Do you need lunch packing advice or meal planning suggestions? Or do you have other food or family management related questions? My goal is to be your resource for tips and advice - from a mom who has been there, and done that.
Reply to this email, post a comment, or hit me up on social media, and your question could be featured in next week’s newsletter.
Don’t forget to follow along on Instagram, Facebook, and Threads for daily tips and inspiration.
➡️ Follow Me on Instagram | ➡️ Follow Me on Facebook | ➡️ Follow Me on Threads
Wishing you an easy week ahead!
– Lisa

Tip of the Week #03
This week's tip is all about making birthdays easier for busy parents.
Tip of the Week
Here’s where I tell you some of my best tips, hacks, and shortcuts for making feeding your busy family easier and less stressful. I’ll share tips about cooking, lunch packing, cleaning, and more. Sometimes these are longer and more in-depth, sometimes they are just quick little time saving tips and shortcuts. I hope you enjoy!
Make sure you’re signed up for my newsletter so you never miss my weekly tips.
This week’s tip:
This week I thought I’d talk about birthday cake, and how as busy moms haven’t we got enough going on without pressuring ourselves to feel like we have to make a homemade cake? Not everything has to be homemade perfect.
Just buy the grocery store cake.
I promise you the kids will love it just as much.
I have been a fan of grocery store bakery cakes for years. We’ve been lucky to have a few great grocery stores near where we’ve lived and they always have great bakeries. The secret is to not order the sheet cakes out of the book with the cute kid designs and that awful greasy frosting - but to special order their fancier cakes. You know the ones they have in the case that always look amazing, with whipped cream or fruit fillings, or chocolate ganache frostings. I think most people don’t realize that you can special order and customize these fancy ones and not just the sheet cakes. Ordering a fancier cake from the grocery store gets you a really good freshly made cake for a lot less than a specialty bakery.
One of my all time favorite grocery store bakery birthday cakes. Isn't is gorgeous?

This is our current favorite grocery store cake - our local store calls this Chocolate Decadence and it is a dark chocolate cake with a chocolate mousse filling and a hard chocolate shell. It's amazing.
But what about homemade cake?
If you want to bake a homemade cake, I’ll tell you my favorite recipe, and it’s not from a cookbook or a food blog.
My favorite recipe for the best homemade chocolate cake and icing I’ve ever made is the recipe straight off the Hershey’s Special Dark cocoa powder container. This cake is amazing I am telling you. I follow it pretty closely except I like to substitute a cup of coffee for the water (decaf for kids). Even if you don’t like coffee, just trust me on this one. Coffee amplifies chocolate flavor, but it’s not enough that you will taste coffee at all. I always keep some instant coffee in my pantry for just this reason. Here is a link to my favorite espresso powder, or you can try this one if you need decaf.
Have a Question?
Ask me anything. Do you need lunch packing advice or meal planning suggestions? Or do you have other food or family management related questions? My goal is to be your resource for tips and advice - from a mom who has been there, and done that.
Reply to this email, post a comment, or hit me up on social media, and your question could be featured in next week’s newsletter.
Don’t forget to follow along on Instagram, Facebook, and Threads for daily tips and inspiration.
➡️ Follow Me on Instagram | ➡️ Follow Me on Facebook | ➡️ Follow Me on Threads
Wishing you an easy week ahead!
– Lisa

Egg Bites Recipe
Easy copycat egg bites recipe for weekday breakfast meal prep.
Here is my version of the popular copycat egg bites recipe that everyone loves.

My kids and I love those Starbucks egg bites as much as anyone, but they get expensive fast. There are other brands of egg bites too that you can buy at the store and are great for easy school day breakfasts, but those also get expensive when you are feeding a family of six. Once you figure out how to make them from scratch at home you will never have to be without a quick grab and go school day or work day breakfast again.
The secret to the texture is the cottage cheese all blended in with the eggs. That’s how you get that light, fluffy, creamy texture. I know you think you don’t like cottage cheese, but I can guarantee that you would never know it’s in these if I hadn’t told you.
I make up big batches of these for my teens for school mornings. They are a great protein packed easy breakfast. I usually put half in the fridge and then package up the other half two at at time in little snack bags and freeze, then they can just grab a single serving out the freezer and pop in the microwave for about 45 seconds for a quick weekday breakfast.
My version here is adapted from several different recipes and adjusted to suit our tastes and needs. This one probably makes more than a lot of other recipes you’ll find, because I always like to make lots of things that can be frozen for easy meal. You can use any combination of cheese, meat, and veggies you like. I’ve tried lots of combinations but our favorite is gruyere cheese (like the Starbucks ones), with a little bacon and spinach. So that’s how I’ve written the recipe, but you can easily customize with any combinations you like.

To make this egg bites recipe you will need:
Scroll down for the recipe card with the exact quantities.
eggs
cottage cheese
cheese (gruyere or sharp cheddar or other cheese you like)
bacon
salt & pepper
cooked chopped bacon (optional)
spinach or other veggies (optional)
spray oil
muffin pans, ideally silicone

If you haven’t already cooked the bacon you will want to do that first. Chop it up and cook until crispy. I like to buy big packs of bacon and dice and cook it all at once, then I have bacon to use for this recipe and lots extra for salads and topping in other recipes.
How to make these easy meal prep egg bites:
Preheat your oven to 300 degrees convection (or 325 regular bake). Place your silicone muffin pan in a deep sheet pan, and spray the muffin pan with cooking oil.
Put all of the ingredients except the bacon & spinach in the blender and blend until well combined.
Fill each muffin cup with a little spinach and bacon, or whatever other meat or veggies you are using. Then label the egg mixture into each one, to about 3/4 full.
Put the pan in the oven and fill the sheet pan with hot water to about half way up the muffin pan.
Cook for 25 minutes, and then I dare you to try not to eat several before you can get them put away for breakfast.

Egg Bites
Ingredients
Instructions
Notes
You can do this without the water bath in the pans if you prefer, I just think it gets you a slightly nicer, creamier texture that more closely mimics the Starbucks sous-vide egg bites texture that we all love. And this is especially useful if you don't have a convection oven, for more even cooking.

Homemade Teriyaki Sauce Recipe
A super quick and simple weeknight teriyaki sauce recipe.
(recipe card is below, just scroll down)
This a super simple and fast base recipe for an easy homemade teriyaki sauce that you can use on all kinds of easy weeknight dinners.
I lived in Seattle for 25 years, and my kids were born and grew up there. And it turns out that Seattle is the birthplace of American style teriyaki! Who knew?!? We think of teriyaki as Japanese food, but the version we know of it is actually an American invention, created by Japanese immigrants in Seattle and evolved over the years to suit American tastes.
In Seattle we were surrounded by teriyaki restaurants, it was actually the type of fast food restaurant that there were the most of. We got accustomed to eating a lot of teriyaki, it was the easiest default weeknight thing to pick up after busy days when we didn’t feel like cooking. But when we left Seattle we were a little surprised to realize that not every town had a teriyaki restaurant on every corner! So now it’s become one of my go-to easy weeknight dinners to cook for the family. It’s really just as simple as slapping some teriyaki sauce on pieces of chicken or slices of tofu, and sticking it in a hot oven for 15 - 30 minutes, just long enough to cook some rice and maybe microwave a bag of frozen broccoli.
It really had never occurred to me to make my own teriyaki sauce until one day I had promised teriyaki chicken to a kid for dinner, and realized I didn’t have any teriyaki sauce in my pantry. So I looked up some recipes for how to make it and it turns out that it’s very simple and fast. Seriously this can come together in like five minutes. If you do any amount of Asian cooking you likely already have all the ingredients you need. I do still buy bottled sauce occasionally because it is very nice to have around (this brand is my all time favorite), but more often these days I just whip up my own because it’s so fast and easy.
What you need for this easy homemade teriyaki sauce recipe:
The recipe card is below.
pineapple juice
soy sauce
brown sugar
honey
ginger (ground or fresh)
garlic (ground or fresh)
sesame oil (optional)
corn starch
sesame seeds (optional)
hoisin sauce (optional)
The recipe card is below with the specific measurements, but really they are all approximate and very flexible. My favorite combination of flavors is meant to imitate a combination of two of the flavors of that bottled sauce brand that I love (the island version with pineapple juice and sesame, and the hoisin garlic version)
Once you have everything together, you basically just chuck it all in a saucepan and whisk a bit as it heats up. Once the mixture gets up to a simmering temperature the corn starch will thicken up and then you’re done. It takes really like five minutes. Unlike flour, when you thicken a sauce with corn starch it’s done as soon as it starts to thicken, so it’s a very fast method.
Once you realize how easy it is to make your own teriyaki sauce you might never buy it from a store again.
This is not a traditional Japanese recipe. More traditional Japanese teriyaki sauces are not thickened or flavored as much as this, they really are much more of a simple light marinade. This version is adapted to our American tastes and is meant to be closer to what you’ll find in a neighborhood street corner teriyaki joint in Seattle. We like a more sweet and thick sauce to coat our teriyaki chicken.
A lot of the ingredients are listed as optional, because the great thing about this recipe is that it's really flexible. I’ve given you the basic way that I do it most of the time, and you can customize yours from there. So you can add more or less sweetness with the honey and sugar, more or less garlic or ginger, swap out the juice, leave out the sesame, etc. There’s no wrong way as long as you like how it tastes.
A few other notes about this recipe:
Most recipes have water instead of juice, and more sugar added. But I like the extra splash of flavor from the pineapple juice, and that it adds sweetness without as much processed sugar. But if you don't like pineapple you can just swap that out for water, and then you'll probably want to add a bit more sugar or honey. You could also use all brown sugar or all honey instead of a mix of both. I like the depth of flavor that the two different sweeteners add, but it’s not mandatory.
The corn start is for thickening, so feel free to adjust that amount if you like your sauce more or less thick. If you’ve not cooked with corn starch much, you need to know that it does need to be dissolved in cold liquid before adding to a hot sauce, otherwise you will get lumps. So if you decide you want your sauce thicker after it's simmering you will need to make a slurry with a couple tablespoons of liquid (water, juice, soy sauce, etc.) and then pour that into the simmering sauce while whisking to avoid lumps.
The optional hoisin adds a bit of extra depth of flavor and is intended to imitate the flavor in my personal favorite bottled sauce, but again, optional. You could try adding a little Chinese oyster sauce instead, I love that flavor too, and it’s especially great if you want to make a teriyaki salmon or other fish.
The sesame seeds don't add much flavor but they give a nice bit of texture. Feel free to leave them out if you don’t have them.
If you use fresh ginger you will need to let this simmer long enough to cook and break that down a bit, otherwise the enzymes in the fresh ginger will affect the texture of your meat.
Easy Pineapple Teriyaki Sauce
Ingredients
Instructions
Notes
The great thing about this recipe is that it's really flexible, so you can add more or less sweetness with the honey and sugar, more or less garlic or ginger, swap out the juice, etc.
- The corn start is for thickening, so feel free to adjust that amount if you like your sauce more or less thick. It does need to be dissolved in cold liquid before adding to a hot sauce though, so if you decide you want your sauce thicker after it's simmering you will need to make a slurry with some water (or juice, soy sauce, etc.) and then pour that into the simmering sauce while whisking to avoid lumps
- The optional hoisin adds a bit of extra depth of flavor and is intended to imitate the flavor in my personal favorite bottled sauce.
- If you don't like pineapple you can just swap that out for water, and then you'll probably want to add a bit more sugar or honey.
- The sesame seeds don't add much flavor but they give a nice bit of texture. Feel free to leave them out.
- If you use fresh ginger you will need to let this simmer long enough to cook and break that down a bit, otherwise the enzymes in the fresh ginger will affect the texture of your meat.
Moroccan Spiced Slow Roasted Pork Shoulder
A super easy recipe for a slow roasted pork with amazing Moroccan flavors, that will wow your guests.
A big pork shoulder (or pork butt) is one of my favorite things for feeding a crowd. It’s a great way to cook up a large pile of food for a reasonable price, and even though they are very easy to cook it always seems impressive and gets rave reviews. I usually get them at Costco, although occasionally my local store has them on sale for a great price.
One of my favorite ways to cook a pork shoulder for a crowd is with a Moroccan inspired spice rub. It takes just a few minutes of work to season the pork and then it’s entirely hands off for many hours. Throw in some roughly diced veggies for the last hour or two of cooking, I think it’s great with more firm veggies that hold up to roasting like potatoes, sweet potatoes, winter squashes, califlower. Throwing some onions and garlic cloves in there can also add an extra flavor boost. Serve the roasted meat and veggies with couscous, flat bread, and maybe some sauces like tzatziki.
It’s a great complete meal to feed a crowd, with amazing flavors, that doesn’t have you in the kitchen for hours.
One of these days I will actually take a picture of this meal before we devour it. But this is real family cooking I’m sharing here, I’m not cooking food just to stage photos of it. Having a house full of hungry people isn’t always conducive to photography, so you’ll just have to use your imagination.
What you need to make Moroccan Spiced Slow Roasted Pork Shoulder:
One large pork shoulder roast, or sometimes called pork butt, usually 6-8 pounds
Several cups of chopped veggies (sweet potatoes, squash, cauliflower, onions, garlic, etc.)
How to make it:
Put the pork roast in a large and deep oven safe baking dish and season on all sides with the Moroccan seasoning mix. You want to get it really well coated. It’s best if you do this the day before and let it sit in the fridge overnight. Cover with foil and put in a 300 degree oven for at least 6 hours. The cooking time is going to vary depending on the size of your roast, but I’ve found that at least 6 hours is needed for that really falling apart melt-in-your-mouth to your meat. If your roast is on the bigger side you might want closer to 7 or 8 hours. Plan to put it in the oven by 11:00 in the morning to have it ready by dinner time.
Meanwhile, chop up all your veggies and toss with a little olive oil, more of the Moroccan seasoning, and a little salt.
If you are roasting veggies with the meat you can do this two ways: The first way is to put all your chopped veggies in the pan around the meat for the last hour or more of cooking. The time is going to depend on what veggies you are cooking and what size pieces you like. Firmer vegetables like sweet potatoes or winter squashes will take a little longer than an hour at 300 degrees. The second option is to take the meat out of the pan when it is cooked to your liking, put it in a separate dish covered with foil to keep warm, and then put your veggies in dish the meat was cooked in, with all the meat juices and spices, and turn your oven up to 375 or 400 to roast the veggies a little faster. Then when the veggies are mostly cooked you can add the meat back in to heat back up and brown a bit. You can of course also roast the vegetables separately, but there’s nothing like cooking veggies in a pan full of pork fat for amazing flavor.
Moroccan Spiced Slow Roasted Pork Shoulder
Ingredients
Instructions
Moroccan Spice Blend
Here is my recipe for an easy Moroccan inspired spice mix that you can use in so many ways. I love to use this on all kinds of meat and roasted veggies, but one of my favorites is this Slow Roasted Moroccan Spiced Pork Shoulder. It adds an amazing amount of flavor to any dish.
Moroccan Seasoning Recipe
A printable recipe card is below.
I’ve written out a recipe for my Moroccan spice rub that makes a lot. I love this spice mix to generously season a large piece of meat, plus veggies for roasting, and still have extra for another time. It’s so good on pork, beef, and chicken, and on roasted veggies. These are all ground spices, and the quantities don’t have to be exact. If you like more or less of any of these, feel free to adjust.
This recipe is made of a mix of ground spices, most of which you probably already have in your kitchen. Here are the ground spices you will need. A recipe card is below with the exact quantities.
black pepper
ginger
cinnamon
turmeric
cumin
paprika
cloves
nutmeg
kosher salt
Measure out all the spices into a jar and combine. I like to do it in a pint jar with a shaker lid.
Use this spice rub to season just about any kind of meat. If you have a jar of it already mixed up it can be a really quick and simple way to make a delicious weeknight meal with some chicken thighs or pork chops. Or use it on larger pieces of meat for smoking or slow roasting.
Moroccan Inspired Seasoning Rub
Ingredients
Instructions

Family Meal Plan #22
Welcome to our family meal plan!

This is a real reflection of what my family actually eats—some weeks I’ve got recipes to share, sometimes there are photos, and other times it’s just me giving you the rundown of what I made. I hope these menus give you some fresh ideas or inspire you as you’re planning your own meals. Feel free to adapt or follow along however it works for you—because meal planning should make life easier, not harder!
From one busy home cook to another, let’s make dinner a little less stressful together.
And don’t forget to subscribe to my newsletter, Notes from the Kitchen Table, to get the latest weekly meal plan delivered straight to your inbox!

On the menu this week:
(see below for a notes about some of the meals)
Sunday: Big meatballs, pasta, spinach
Monday: Teriyaki chicken and broccoli, teriyaki tofu, brown rice
Tuesday: Chicken tacos
Wednesday: Leftovers
Thursday: Thai inspired lemongrass soup with steamed rice
Friday: Homemade pizza and a big salad with my lemon vinaigrette.
Saturday: Chicken shawarma, flatbread, lettuce, tomato, cucumber, tahini dressing, tzatziki, carrot hummus (so good! see below)
Sunday: Moroccan spiced pork shoulder, roasted veggies, couscous, kale salad with tahini dressing
Lunch: Moroccan spiced roasted veggie soup with the leftover veggies

A bit more detail about some of the meals:
Big Meatballs were just a combination of ground beef, pork, and chicken, seasoned with garlic salt and held together with egg and almond flour. I cooked them on a sheet pan in a 350 degree oven for a half hour, then I poured tomato sauce over them and cooked for another half hour. They were quite simple and really delicious.
Teriyaki is one of our favorite meals and one of the easiest to make. I seasoned thin sliced chicken breasts with a little garlic salt and let them sit for a couple hours, then cooked them in the oven at 375 for about 15 minutes, then put teriyaki sauce over the top, added broccoli to the sheet pan, and cooked for another 15 minutes. The tofu is literally just sliced extra firm tofu with teriyaki sauce and cooked in a hot oven until it’s bubbly and a little browned, it’s the easiest thing in the world and one of our favorites. I used a homemade teriyaki sauce for this but only because I was out of my favorite bottled sauce so I whipped on up to imitate it. It was pretty good.
Chicken Tacos: Monday night when I cooked the chicken for teriyaki I cooked a bunch extra that was just seasoned with garlic salt. For tacos I chopped up that chicken and seasoned it with a little cumin and chili powder and just warmed that up in the microwave. Super easy, and served with the usual taco fixings.
“Thai inspired” soup was really one I just made up as I went along. I was thinking of the tangy coconut lemongrass soup you can get in a Thai restaurant, but wanted it to be a whole meal. No recipe here, just a little of this and a little of that until I liked how it tasted. I seasoned chicken broth with fish sauce, soy sauce, white pepper, ginger, garlic, coconut milk, and lime juice, and I added pork, lots of mushrooms, frozen spinach, and some riced cauliflower.
Chicken Shawarma: The schawarma recipe from The Mediterranean Dish is one of the few that I come back to regularly. It’s easy and delicious. I usually try to make a lot extra, but I leave out the cayenne to make it not spicy. The tahini dressing is from Love and Lemons and I follow it pretty closely but this time I used some coconut aminos instead of maple syrup because I wanted the hint of sweet without the sugar.
I make a tzatziki inspired cucumber yogurt sauce that is not so traditional but I love it - grated cucumber, plain yogurt, a bit of cumin, salt, and some finely diced preserved lemon with a little of the brine from the jar. The preserved lemon gives it a really unique flavor. Sometimes I make this with a dairy free plain cashew yogurt and honestly my family can’t tell the difference between the dairy version and the non dairy version.
Carrot Hummus was the new superstar here. I had seen a mention of it somewhere and wanted to try it, I looked at several recipes but didn’t really find one I liked so I just made it up. Basically you make it like any favorite hummus recipe (with tahini, salt, lots of lemon juice and fresh garlic) but instead of chickpeas I used roasted carrots and garlic. I tossed the carrots and whole garlic cloves with olive oil and a bit of salt and roasted them until golden and soft, and the pureed everything together in the food processor like I would with any other hummus. I will make this again and try to write out a recipe because it was amazing.
Moroccan Pork Shoulder: We had guests for dinner so I wanted to make something that felt special without a lot of work. A big roasted pork shoulder is often my go-to in these situations. This time I did it Moroccan flavored, using this recipe that I have made many times and adapted over the years. These are the kinds of meals that I love to make for a crowd, because it tastes amazing and is always really impressive, but is super simple and mostly hands off. The star of the show is this Moroccan inspired spice rub that I’ve adapted from a few other recipes and put my own spin on. I’ve made this many times over the years and it never disappoints. For veggies this time I did sweet potatoes and cauliflower, with some onions and garlic. I served all this with more of all the sauces that I made extra of the night before.
Moroccan Spiced Roasted Veggie Soup: I took all the leftover roasted sweet potatoes, cauliflower, onions, and garlic and put that in a pot with chicken broth and more of the moroccan seasoning and let it simmer for a bit and then pureed. We had this for lunch two days in a row and it was amazing. I think I’ll be roasting more veggies with that seasoning soon so I can make soup again.
Have a Question?
Ask me anything. Do you need lunch packing advice or meal planning suggestions? Or do you have other food or family management related questions? My goal is to be your resource for tips and advice - from a mom who has been there, and done that.
Reply to the newsletter email, post a comment, or hit me up on social media. I’ll do my best to answer, and your question could be featured in my newsletter.
Don’t forget to follow along on Instagram, Facebook, and Threads for daily tips and inspiration, and subscribe to the newsletter to get my weekly updates right in your inbox.
➡️ Follow Me on Instagram | ➡️ Follow Me on Facebook | ➡️ Follow Me on Threads
Wishing you a delicious and stress-free week ahead!
– Lisa
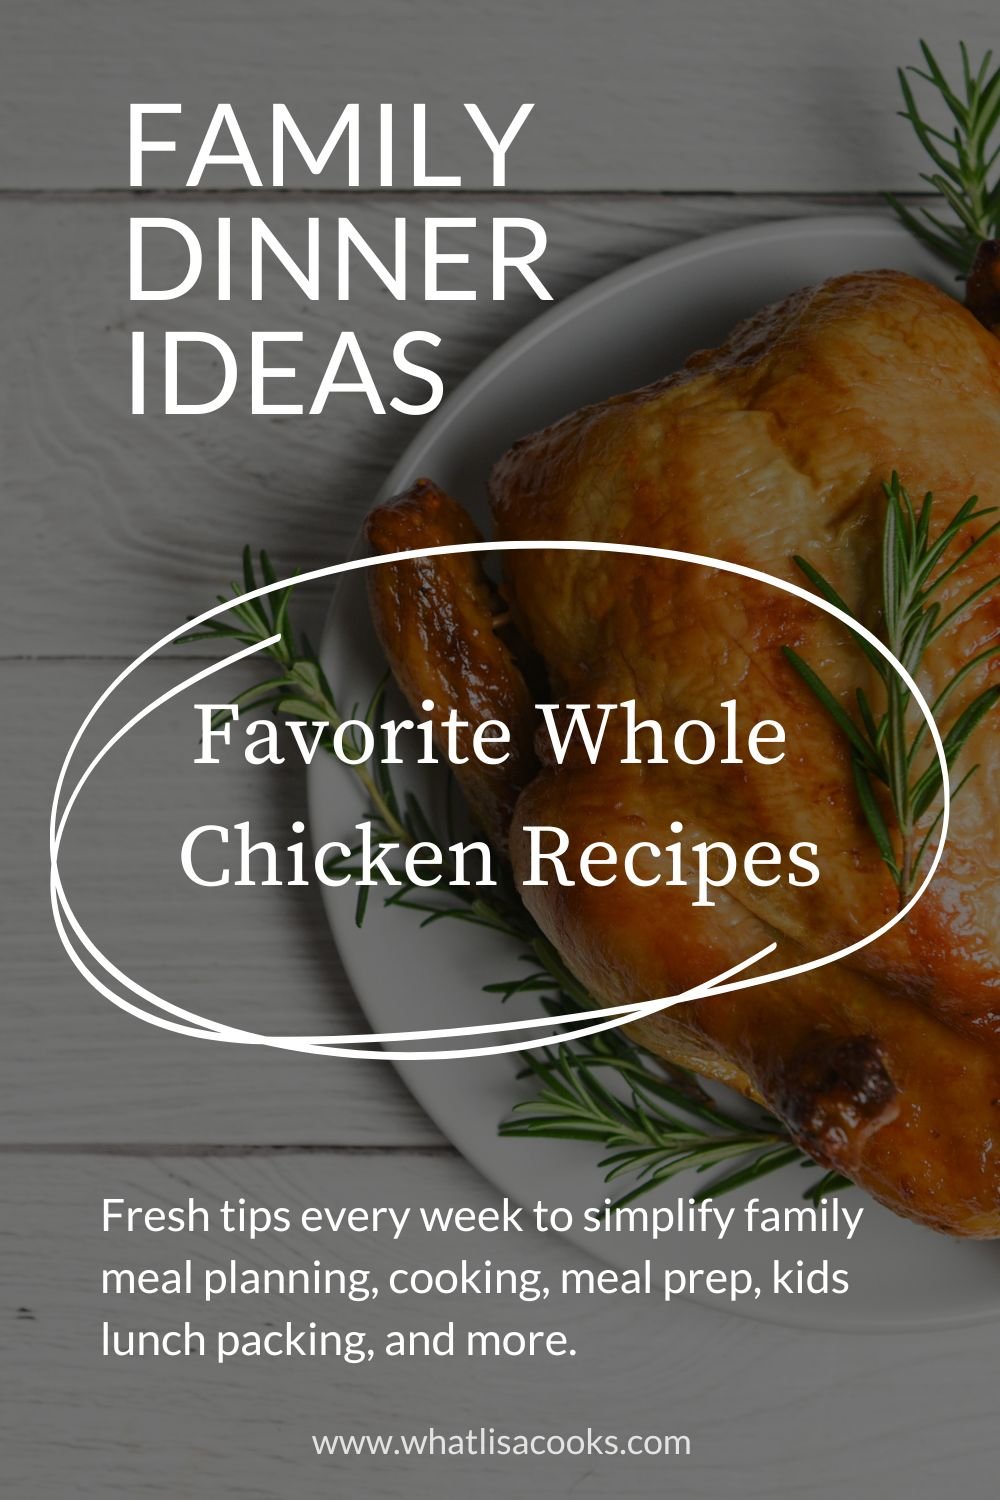
Favorite Whole Chicken Recipes
A great list of reader favorite budget friendly whole chicken recipes.

As I talked about in my last post about the cost of meat - and I shared a great list of budget friendly ground beef recipes - it’s just getting more and more expensive to feed a family. So we have to come up with ways to get more for our money. I think that the whole chicken is one of the absolute best budget friendly cooking tips there is. Chicken is by far the least expensive meat right now, and buying whole chickens are the lest expensive way to buy chicken.
I love the whole Costco roast chicken as much as the next person, but sometimes it’s nice to skip the store bought convenience and cook your own from scratch.
So once again I reached out to my followers to ask for new ideas. I asked everyone for their favorite ways to cook a whole chicken. And once again my friends did not disappoint with all of their amazing ideas and suggestions for healthy and easy whole chicken recipes.

This isn’t a food editor’s list, this is real people commenting on the recipes they actually make and use to feed their families. I definitely got some new ideas to try from these suggestions, and you can expect to see some these in my meal plans in the future. I hope you find this list helpful too.
Reader favorite whole chicken recipes:
Marcella Hazan’s Roast Chicken With Lemons - if you’ve ever cooked any of Marcella Hazan’s recipes, you’ll know that they are always sure winners.
Whole Soy Sauce Chicken from Tiffy Cooks - an Instant Pot recipe for a delicious Asian flavor spin on the whole chicken.
Buttermilk Marinated Roast Chicken - from Samran Nosrat (of Salt, Fat, Acid, Heat). This is probably the simplest recipe you will ever make. It has literally 3 ingredients - chicken, buttermilk, and salt - and yet makes for some of the most delicious chicken you will ever eat.
Chicken in Coconut Milk with Lemongrass - from the kitchn - this is my personal favorite on this list. Moist and juicy chicken with a unique blend of flavors that you might not initially think would be good but they make the chicken and resulting broth taste amazing.
Jaime Oliver’s Chicken in Milk This one is the original inspiration for the coconut milk recipe above. And again from a well loved cook whose recipes never disappoint.
Zuni Cafe’s Roasted Chicken + Bread Salad - recipe from Smitten Kitchen - Deb at Smitten Kitchen is known for her adaptations of other famous recipes, and this is her version of a well loved restaurant dish.
Do you have other favorites?
I would love to know if you have tried any of these, or if you have any other favorite whole chicken recipes that you love. Let me know in the comments here, or jump on over to that Threads post and add to the conversation.

Family Meal Plan #20
Easy one week family dinner menu.

My weekly family meal plans are the actual menus I have used for our family dinners. I hope you find them helpful. Feel free to borrow our menu or use these ideas as inspiration for your own meal planning.
I’ve included links to pictures and recipes where I have them, but a lot of my cooking is just figuring it out as I go, based on many years of cooking experience. If you ever have a question about anything you see here, please reach out (lots of ways to contact me below).
The menu for the week:
I don’t usually make totally separate dinners for adults and kids, but were planning for guests and the timing was going to be challenging so I needed to be flexible.
Monday: Gumbo
Tuesday: Ground beef tacos (are we calling these white people tacos now??)
Wednesday: Leftovers
Thursday: chicken & tofu stir fry
Friday: frozen pizza for kids, Costco street taco kit for adults
Saturday: Costco chicken pot pie for kids, dinner out for adults
Sunday: Salmon, rice, green salad with berries & lemon vinaigrette.
Monday: Chicken thighs with basil & garlic, zucchini patties, sliced tomatoes, white pasta.
Have a Question?
Ask me anything. Do you need lunch packing advice or meal planning suggestions? Or do you have other food or family management related questions? My goal is to be your resource for tips and advice - from a mom who has been there, and done that.
Reply to the newsletter email, post a comment, or hit me up on social media. I’ll do my best to answer, and your question could be featured in my newsletter.
Don’t forget to follow along on Instagram, Facebook, and Threads for daily tips and inspiration, and subscribe to the newsletter to get my weekly updates right in your inbox.
➡️ Follow Me on Instagram | ➡️ Follow Me on Facebook | ➡️ Follow Me on Threads
Wishing you a delicious and stress-free week ahead!
– Lisa
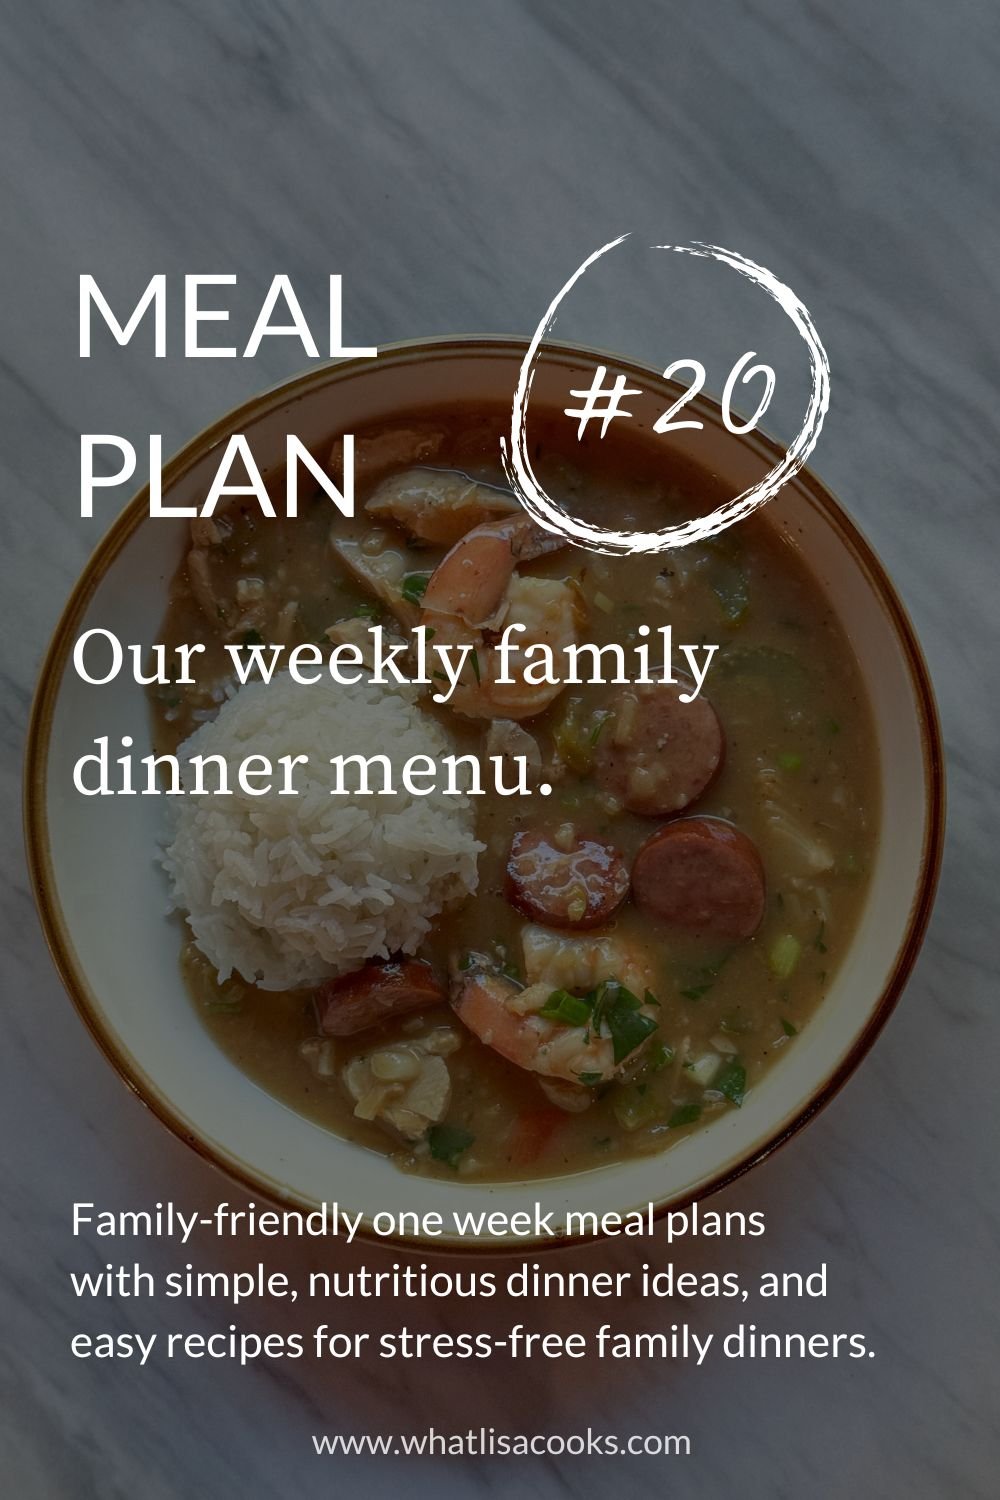
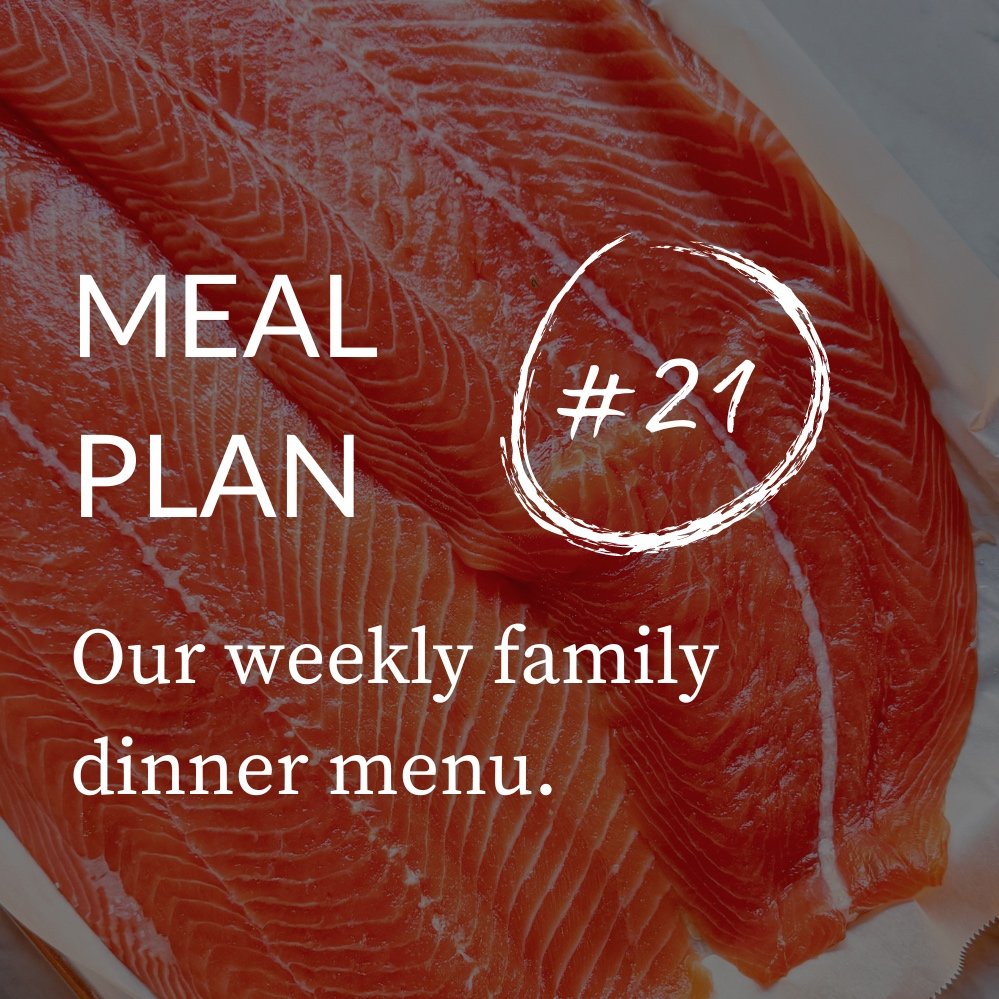
Family Meal Plan #21

I’m doing Whole30 this month, which means I’m not having any grain or dairy or sugar or alcohol, and a few other things. But I still have a family to feed so I just have to get a little extra creative with my meal planning.
If you’ve planned ahead it’s pretty easy to adapt your meals to work. My biggest meal planning tip for when one member of the family is trying to eat a little different from the family is the same as my first tip in my latest Ask Lisa post about how to meal plan for a picky eater - it’s deconstructed meals. Click over to read that post for a little more explanation of how I approach this type of meal planning.
I’m planning meals for this month that are easy to take apart into components. So the family can still have spaghetti and meatballs, and I am very content with my bowl of spinach and meatballs.
I’ve included links to pictures and recipes where I have them.
Here is the menu:
Sunday: Salmon, pasta, green salad with berries & lemon vinaigrette.
Monday: Chicken with basil and garlic, zucchini patties, sliced tomatoes
Tuesday: Fish tacos (fish sticks for kids, leftover salmon for adults, I had mine as a salad)
Wednesday: Leftovers
Thursday: Baked pasta with cheese sauce, chicken, tomatoes & basil; Cobb salad
Friday: A frozen pizza for the boy, a salad for me (the others were camping)
Saturday: Leftovers for the boy, a salad for me

Have a Question?
Ask me anything. Do you need lunch packing advice or meal planning suggestions? Or do you have other food or family management related questions? My goal is to be your resource for tips and advice - from a mom who has been there, and done that.
Reply to the newsletter email, post a comment, or hit me up on social media, and your question could be featured in next week’s newsletter.
Don’t forget to follow along on Instagram, Facebook, and Threads for daily tips and inspiration.
➡️ Follow Me on Instagram | ➡️ Follow Me on Facebook | ➡️ Follow Me on Threads
Wishing you a delicious and stress-free week ahead!
– Lisa
Family Meal Plan #19
Quick one week meal plan.

On the menu this week:
Sunday: oven roasted salmon and veggie fried rice
Monday: pasta with bolognese sauce, garlic bread
Tuesday: enchiladas - chicken, and black bean (two separate kinds, not combined)
Wednesday: leftovers
Thursday: lasagna, made with the bolognese and a béchamel and roasted eggplant and squash
Friday: frozen pizza and bagged caesar salad
Saturday: leftovers again because we are swimming in them and we don’t waste food here